Star Swirl *** 1st build
-
cmiller0034
- Top Producer
- Posts: 221
- Joined: Tue Oct 15, 2013 1:44 pm
- Location: Louisville, Ky
Re: Star Swirl *** 1st build
I dont want a heavy cast iron plate falling anywhere near my feet. Thanks for the words or warning!
"If the women don't find you handsome, they should at least find you handy."- a wise man
-
cmiller0034
- Top Producer
- Posts: 221
- Joined: Tue Oct 15, 2013 1:44 pm
- Location: Louisville, Ky
Re: Star Swirl *** 1st build
How to Keep those Pesky Ninjas from Stealing your tools

I got the idea for these bars from years of watching Japanese Chambara films and feudal Japanese Architecture. They will also allow light to continue to brighten the garage instead of blocking it up with a particle board sheet. I will put a couple of horizontal boards across it as well.
Of course this is just quick and dirty solution, hopefully this will discourage further break-ins to my "shop" and I can get back to finishing my guitar.
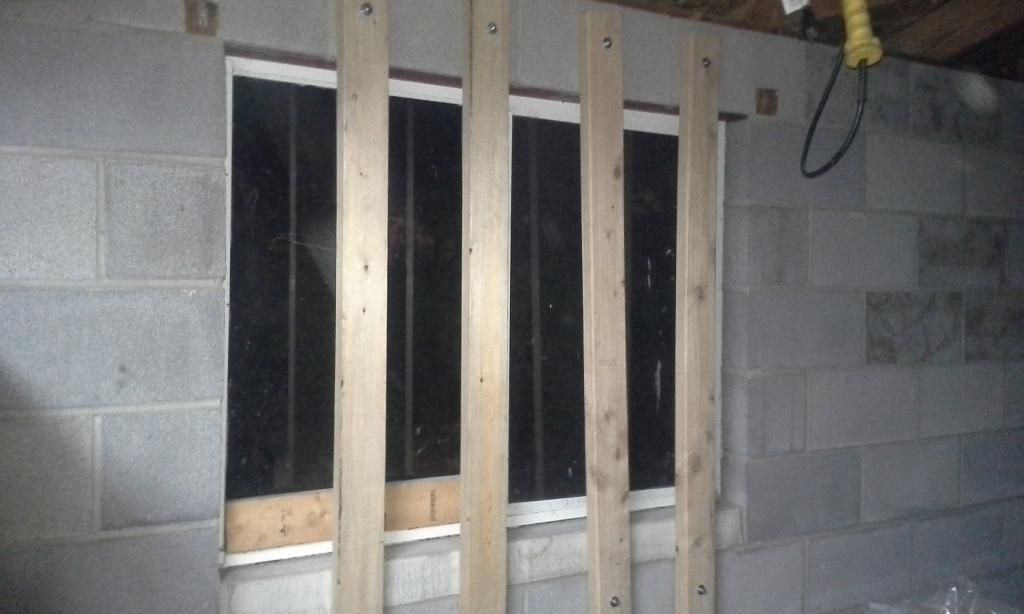
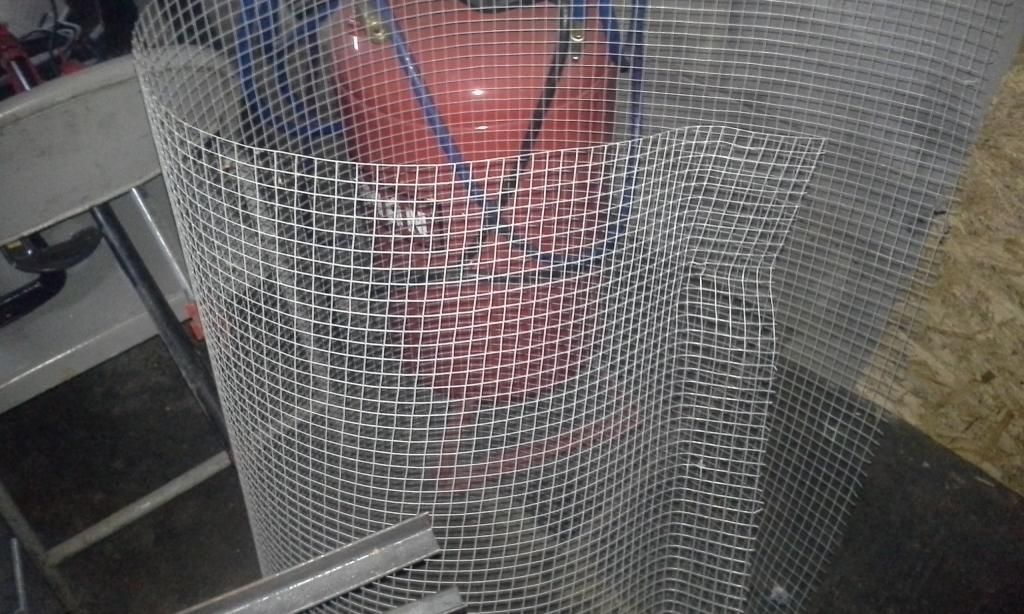
My father had this Chicken wire up to the window to keep kids from breaking it with stones. The thieves pry ed that off pretty easily. I'm putting it back up but once they see my wood bars on the other side of the wire maybe it will discourage them.
Now all I need are a couple of Ronin to guard the outside and I'll be set.


I got the idea for these bars from years of watching Japanese Chambara films and feudal Japanese Architecture. They will also allow light to continue to brighten the garage instead of blocking it up with a particle board sheet. I will put a couple of horizontal boards across it as well.
Of course this is just quick and dirty solution, hopefully this will discourage further break-ins to my "shop" and I can get back to finishing my guitar.


My father had this Chicken wire up to the window to keep kids from breaking it with stones. The thieves pry ed that off pretty easily. I'm putting it back up but once they see my wood bars on the other side of the wire maybe it will discourage them.

Now all I need are a couple of Ronin to guard the outside and I'll be set.

"If the women don't find you handsome, they should at least find you handy."- a wise man
-
Bob Shade
- Master Contributor
- Posts: 1364
- Joined: Wed Jan 21, 2009 11:53 am
- Location: Md
- Contact:
Re: Star Swirl *** 1st build
I see you are very determined, as well you should be!
Question, which zero fret did you end up using and how did it work out for you?
Question, which zero fret did you end up using and how did it work out for you?
-
cmiller0034
- Top Producer
- Posts: 221
- Joined: Tue Oct 15, 2013 1:44 pm
- Location: Louisville, Ky
Re: Star Swirl *** 1st build
Bob Shade wrote:I see you are very determined, as well you should be!
Question, which zero fret did you end up using and how did it work out for you?
I ended up using the method you suggested, and kept the Zero fret the same height as the other frets. The lower end is fine, but it seems that the angle at the heel is not steep enough for good low action on the heel end of the neck. I could park a bus under there with such a high action!
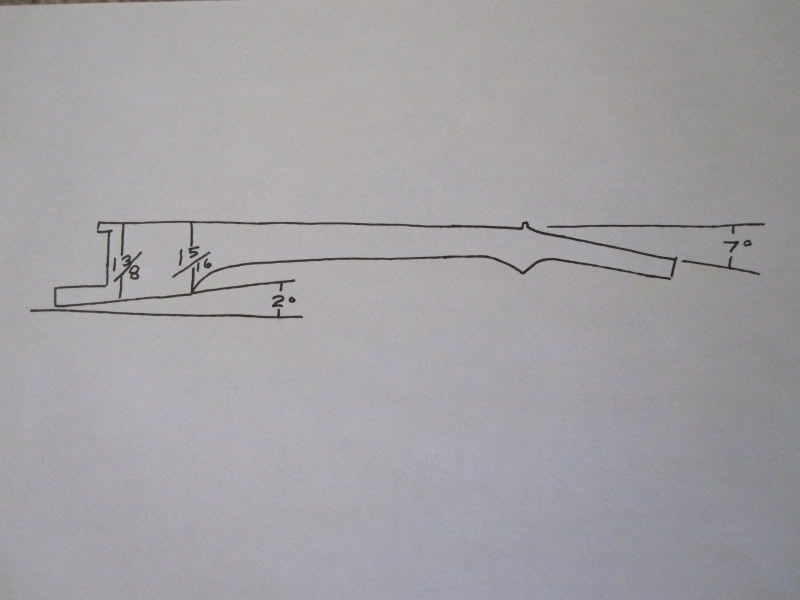
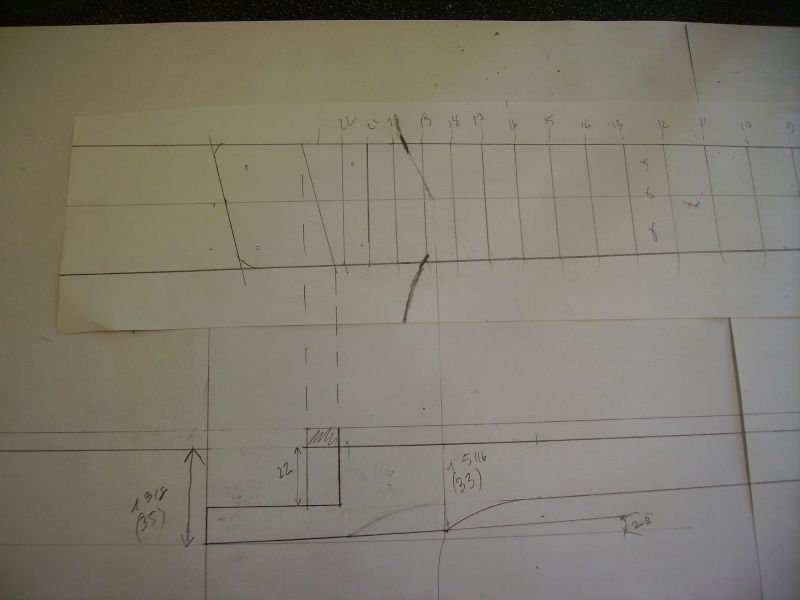
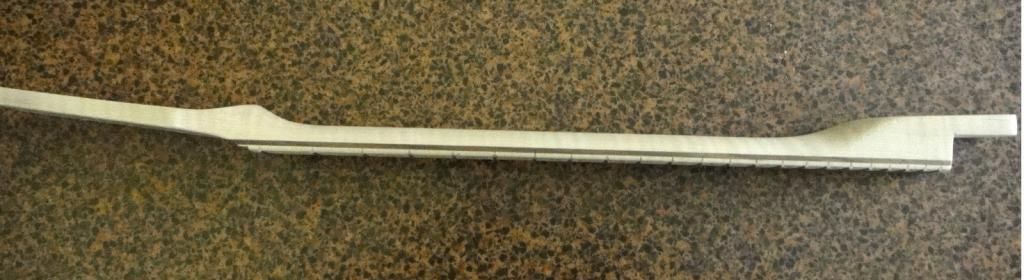
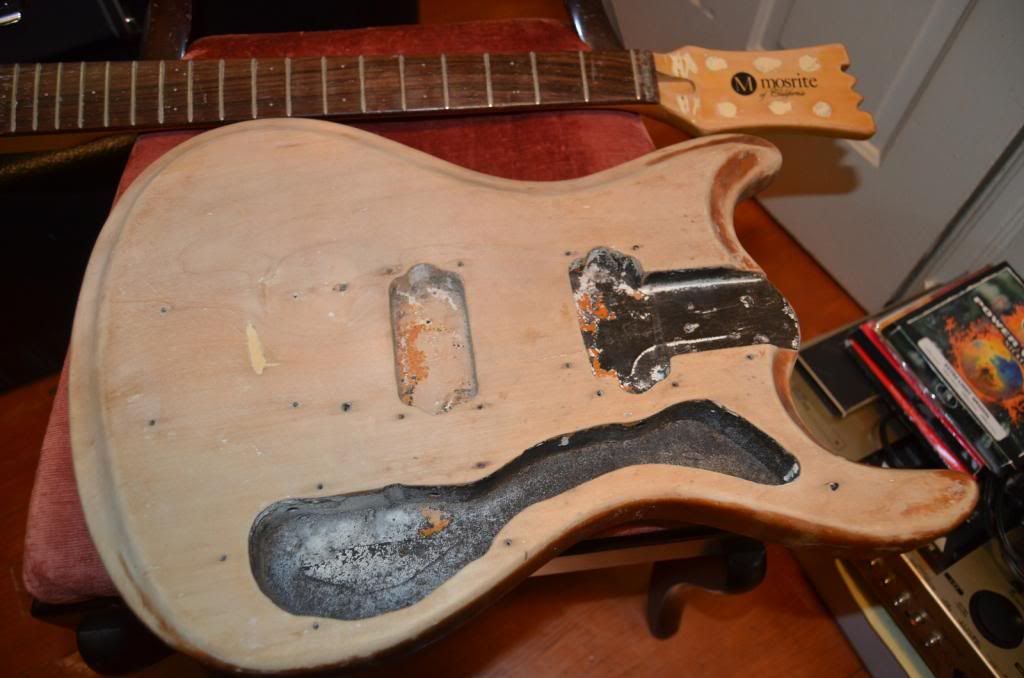
Most of the references on this site claim that a 2 degree angle at the neck are what is called for. But from where I'm looking and various reference pictures of Mosrite and Your own brand, 2 degrees in relation to the fretboard is way too shallow I think. I'm pretty sure I measured the angle right.
EXAMPLES


Also the Fretboard is far too high from the top of the body making it difficult to get my fingers around the higher frets. I have looked at both
"If the women don't find you handsome, they should at least find you handy."- a wise man
-
cmiller0034
- Top Producer
- Posts: 221
- Joined: Tue Oct 15, 2013 1:44 pm
- Location: Louisville, Ky
Re: Star Swirl *** 1st build
1 Answer and 10 questions for Bob Shade
The last post would not let me edit or delete it after a while please disregard it as half finished.
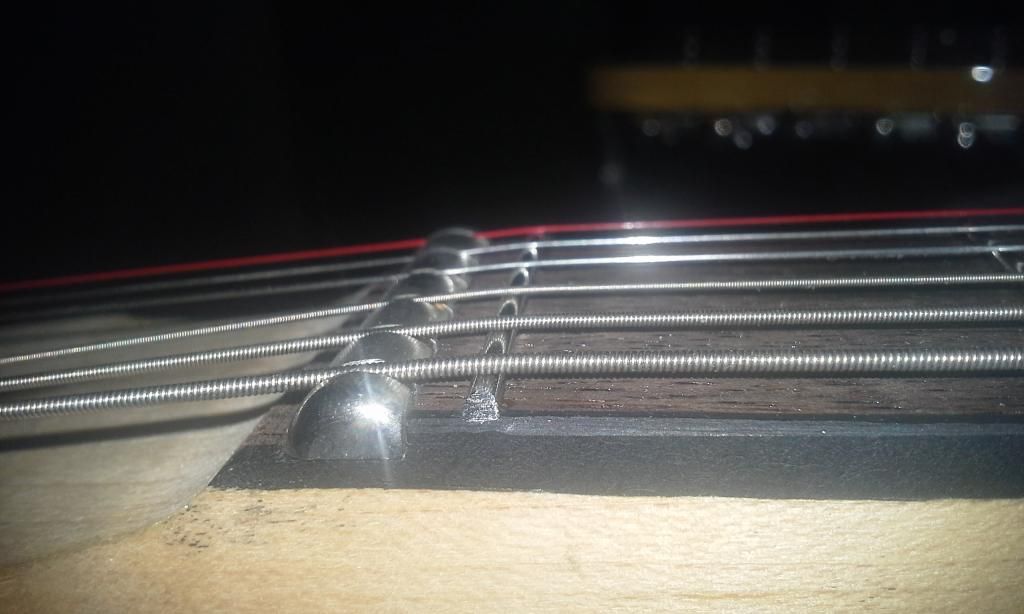
I ended up using the method you suggested, and kept the Zero fret the same height as the other frets. The lower end is fine, but it seems that the angle at the heel is not steep enough for good low action on the heel end of the neck. I could park a bus under there with such a high action! Also, the fact that the frets have not been leveled and crowned must be taken into consideration.
Most of the references on this site claim that a 2 degree angle at the neck are what is called for. But from where I'm looking and various reference pictures of Mosrite and Your own brand, 2 degrees in relation to the fretboard is way too shallow I think. I'm pretty sure I measured the angle right. At 2 degrees I can hardly tell that the neck is angled downward on my guitar. The Low E also likes to pop out of the roller as well, a problem I believe would be remedied by a steeper heel angle.
(from the forums)
EXAMPLES of Mosrite Heels
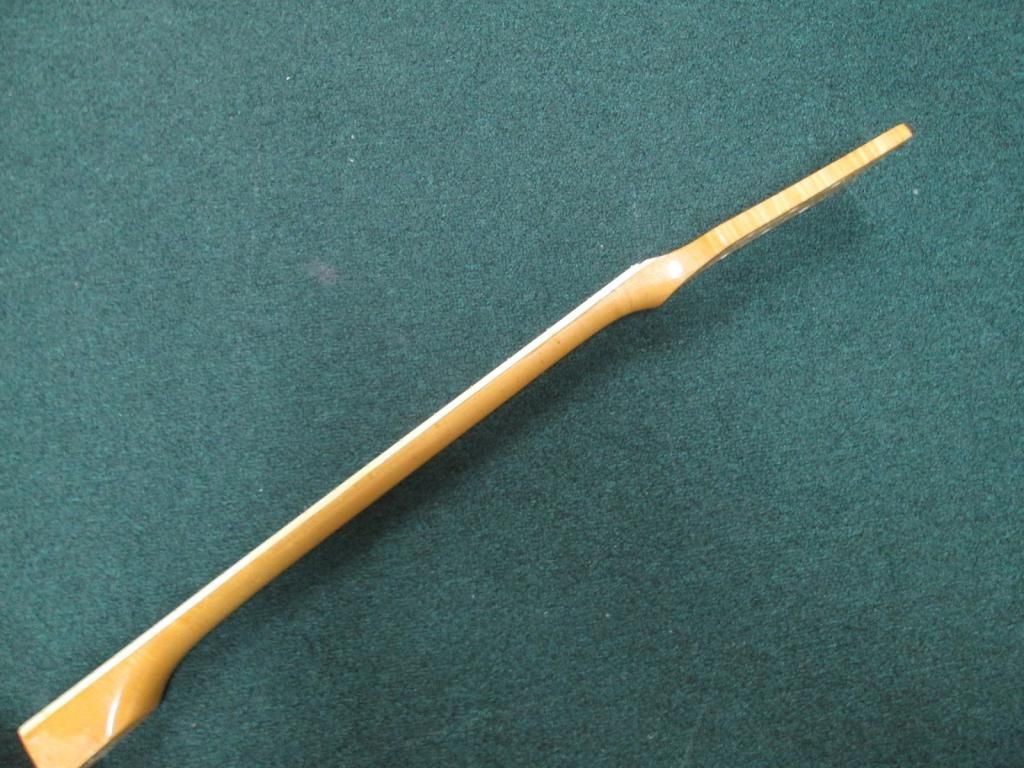
Not a Ventures model, but still.

MY Neck angle at 2 degrees... Negligible.
So Mr. Bob Shade any help would be appreciated.
Is 2 degrees on the angle of the heel correct? Or is it a bit more like I suspect it is?
ANY Help from a knowledgeable party is appreciated actually.
Also the Fretboard is far too high from the top of the body making it difficult to get my fingers around the higher frets. A steeper angle might help but, something Is definatly off just by eyeballing it.
Top of the Fretboard is look WAY closer to the body on SOME Genuine Mosrites and Hallmarks Than others. Makes me wonder what Black Arts you use to put the angle on your heels Bob. Some kind of Jig to do multiple necks at once, or do you CNC and clean up by hand? I have NO idea how big your operation is. Kinda curious.
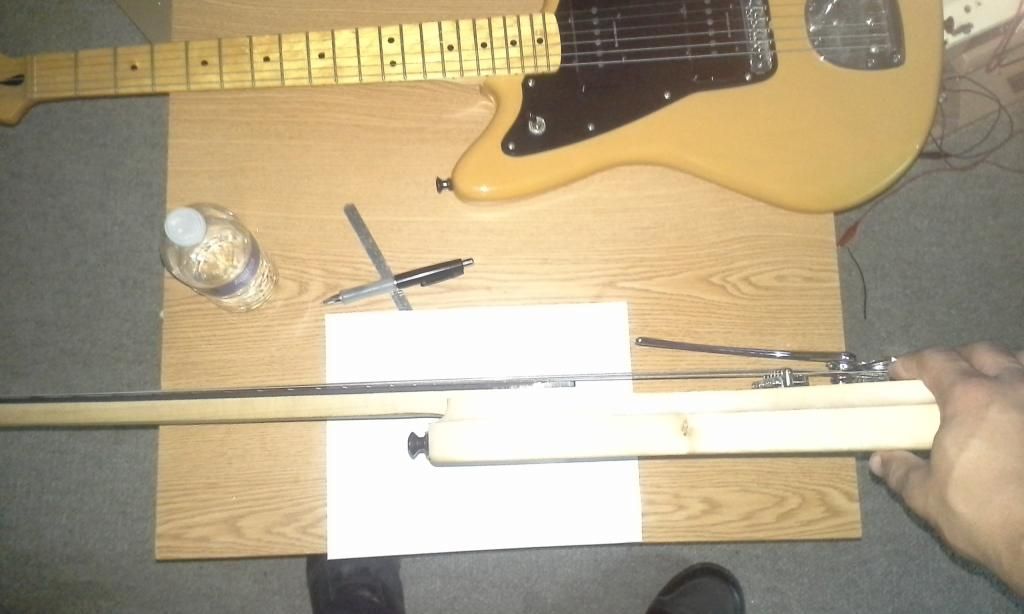
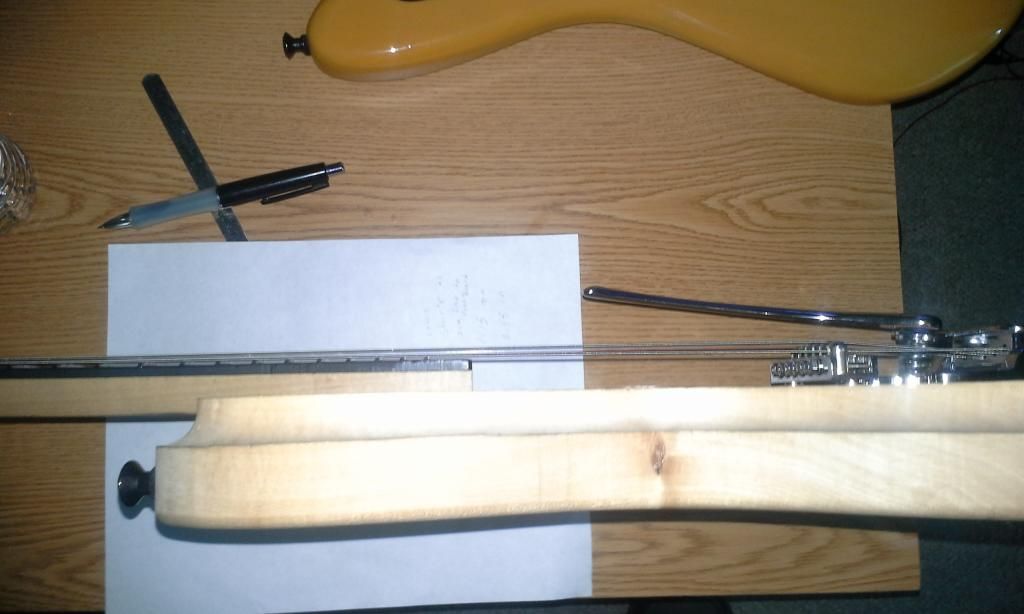
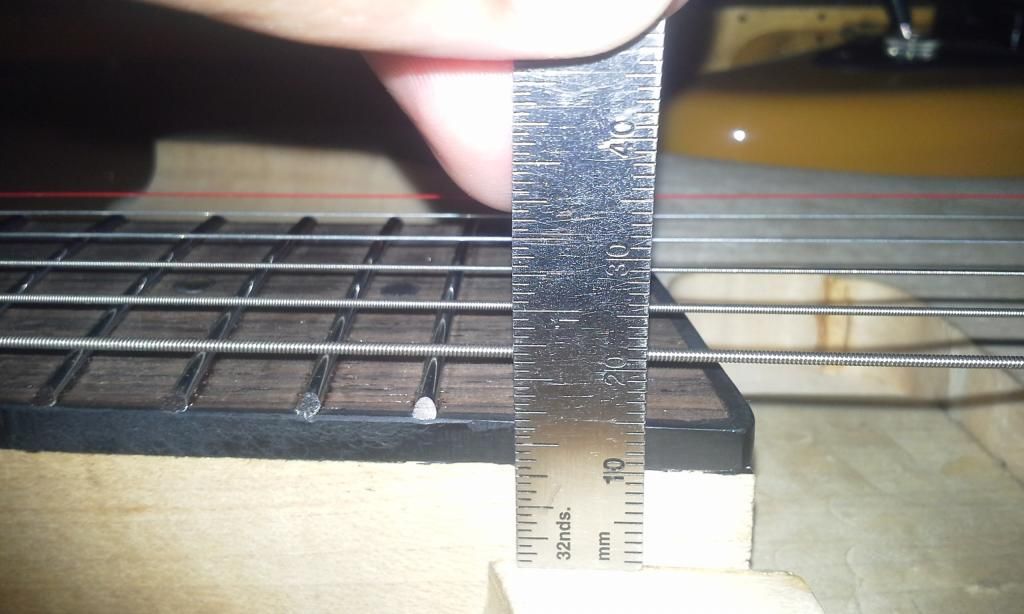
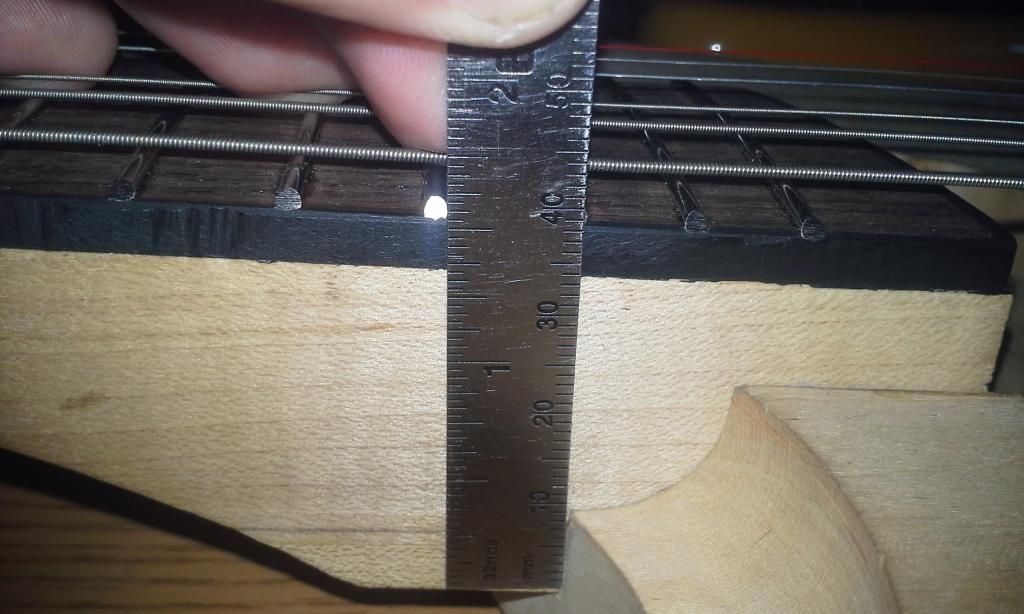
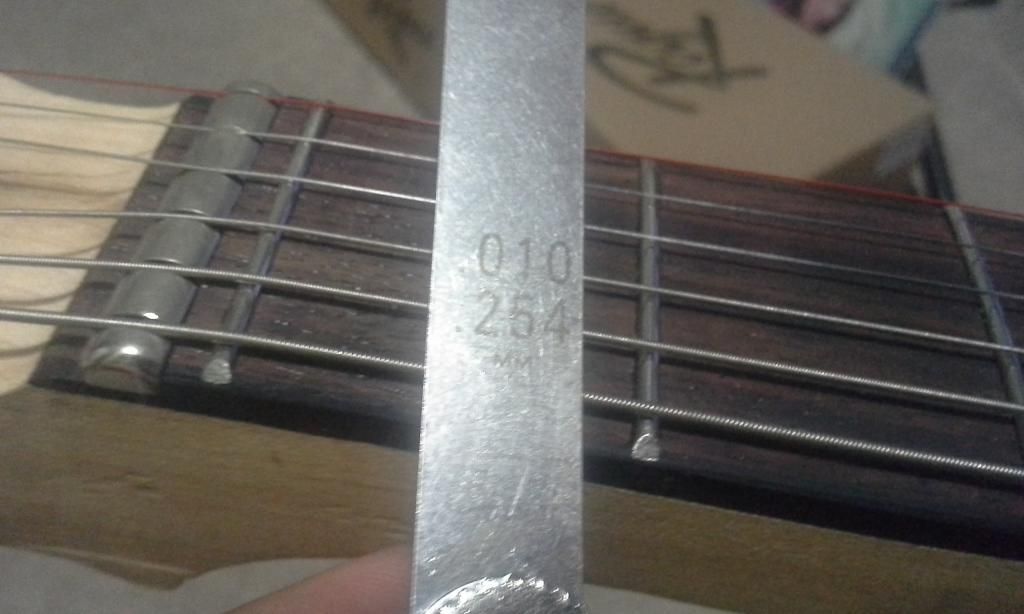
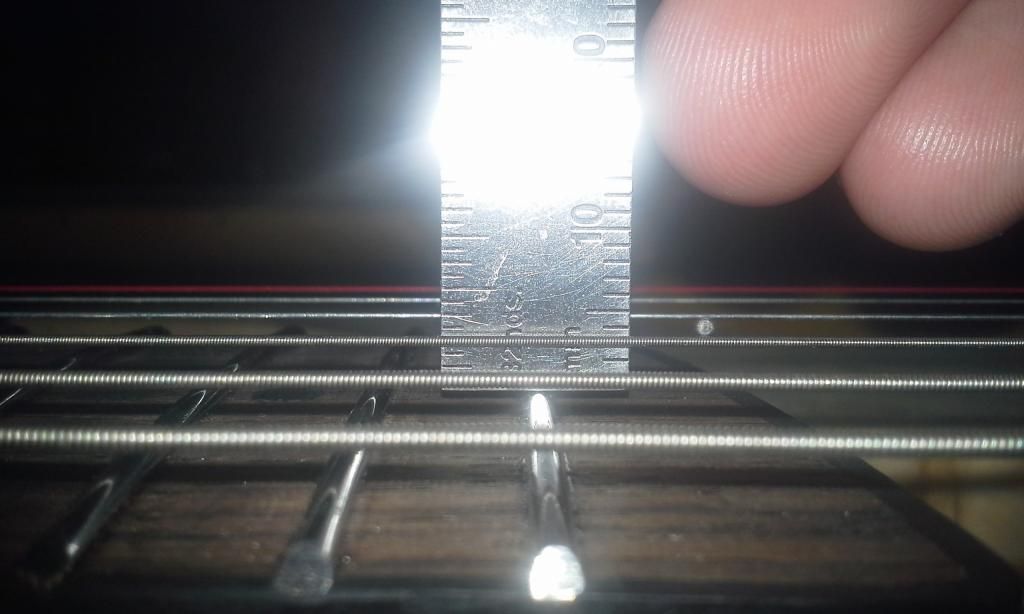
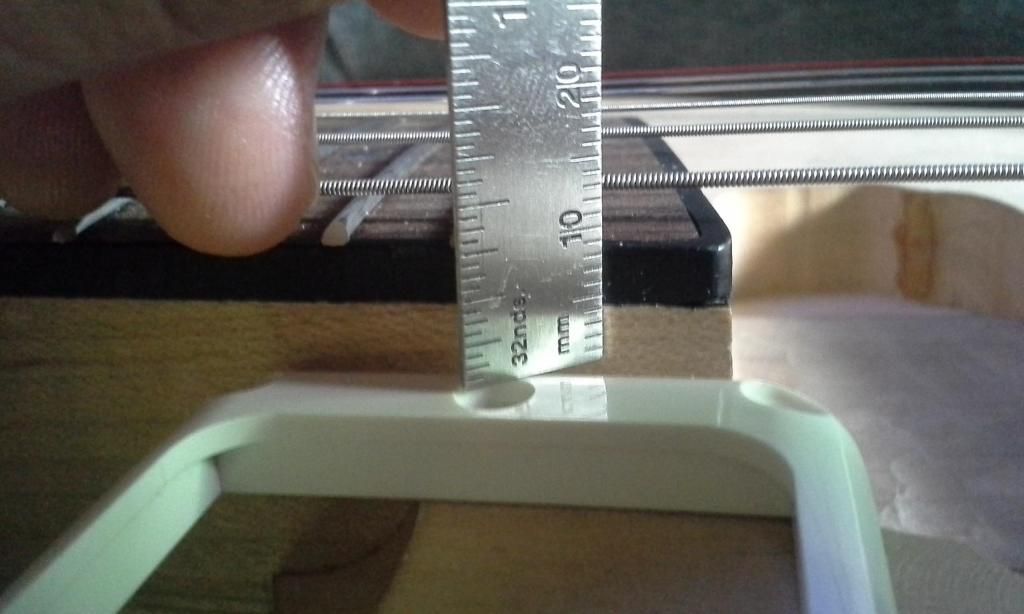
I also took a few Under string and ruler measurements Comparing my Modified Jazzmaster which I consider having perfect Action to where I am on this Project.
JM 1st fret .019 in" feeler gauge
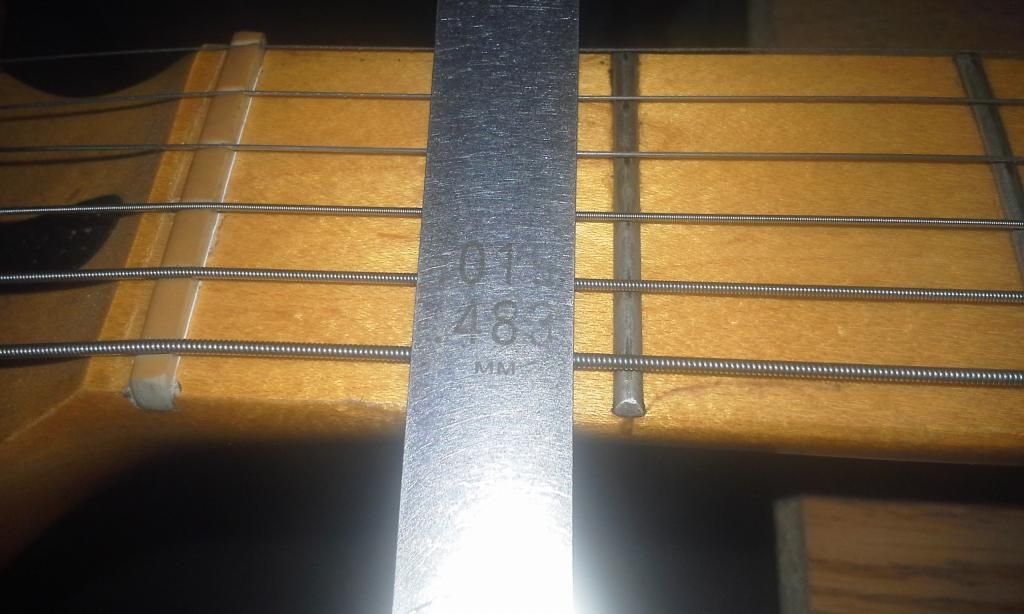
Star swirl 1st .010 in" feeler gauge a bit lower than JM
JM 12th with a ruler
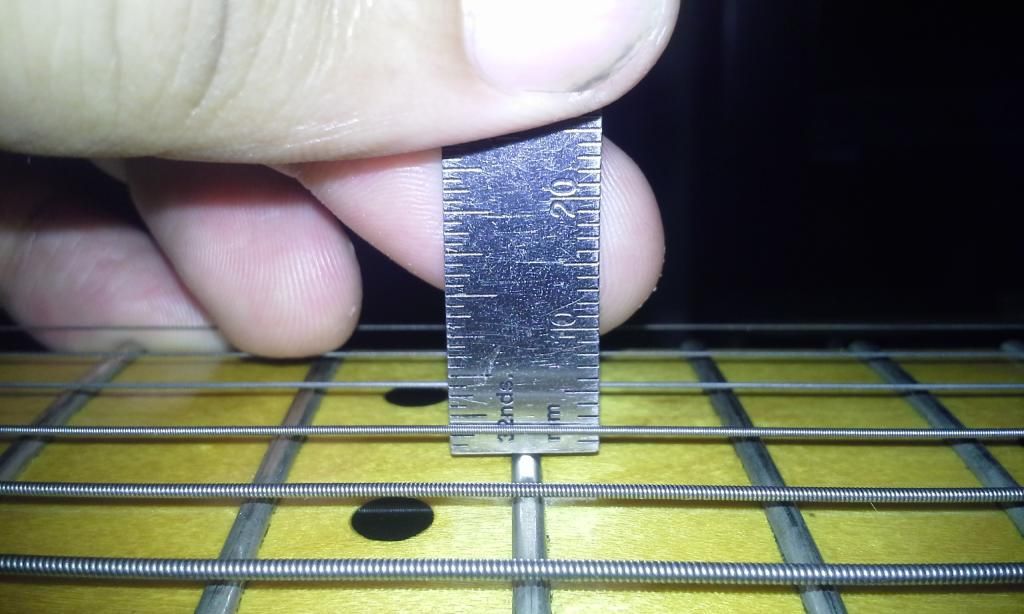
SS 12th with a ruler
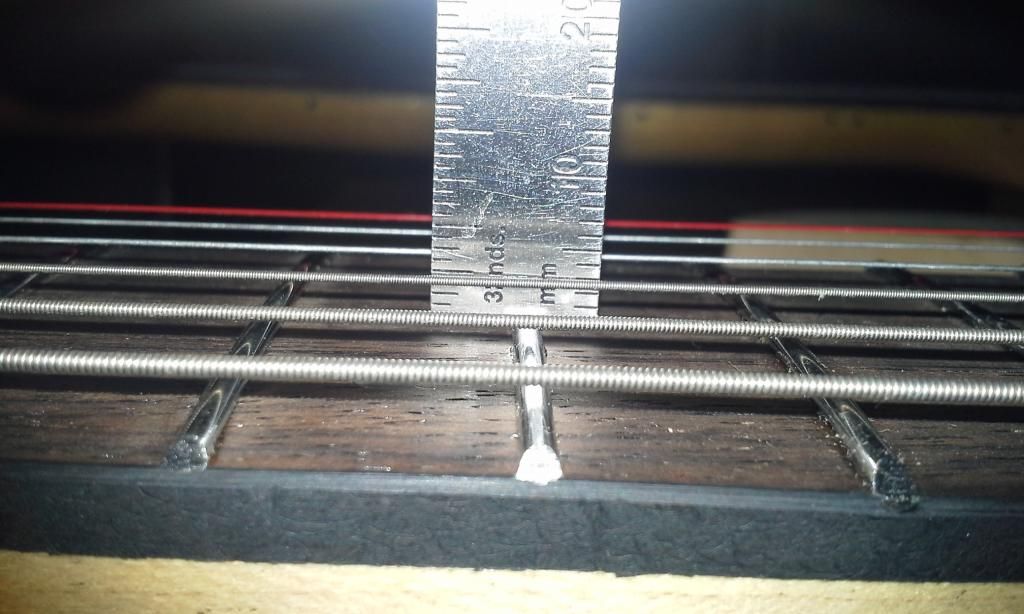
JM Last fret
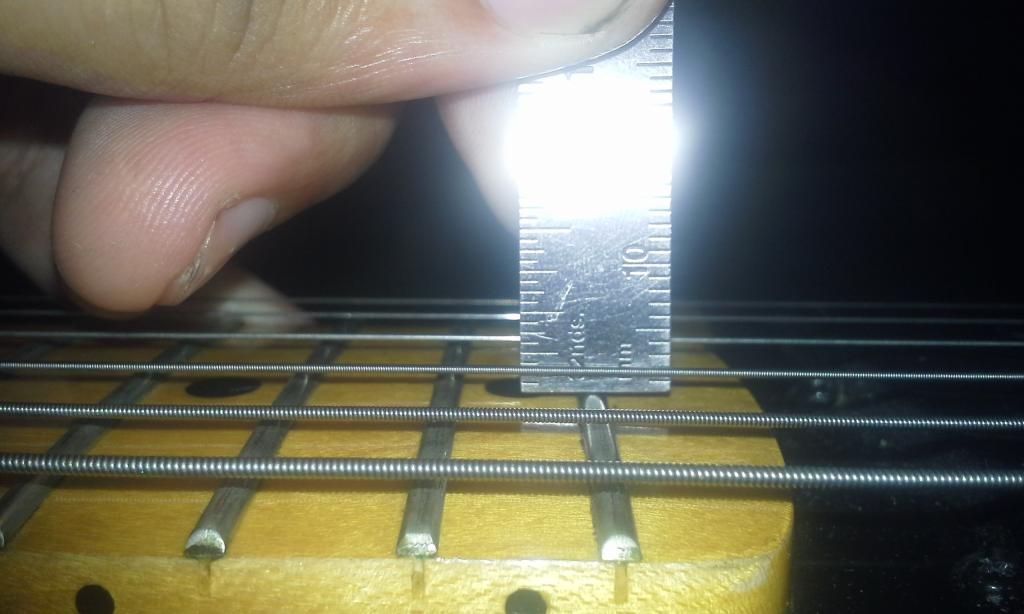
SS Last fret I'm not playing Slide on this thing! 1-2 mm lower would be preferable.
Also as long as I'm asking questions about building. I was wondering how to handle Painting Bolt-on Necks in relation to the Neck pocket. The neck is Very tight in the pocket I made to If I paint it the neck probably wont fit in the pocket anymore. How do you take this in consideration when painting bolt-on necks? Do you make the pockets wider to compensate for the extra milometers of paint? Also, how do you go about masking off the pocket? Set necks just get glued and painted over I Imagine. (custom 60's )
)
I don't want this!
Also do you recommend Poly Satin for a non slippery and fast neck finish, or something like Tru-oil?
So I guess I just wanted to know what Angle on the heel you use. And how thick the heel is usually at the last fret for my own reference if you got that kind of info handy. And the Paint thing. I await you answer sir.
Thanks for checking in Bob.
The last post would not let me edit or delete it after a while please disregard it as half finished.
Bob Shade wrote:I see you are very determined, as well you should be!
Question, which zero fret did you end up using and how did it work out for you?

I ended up using the method you suggested, and kept the Zero fret the same height as the other frets. The lower end is fine, but it seems that the angle at the heel is not steep enough for good low action on the heel end of the neck. I could park a bus under there with such a high action! Also, the fact that the frets have not been leveled and crowned must be taken into consideration.
Most of the references on this site claim that a 2 degree angle at the neck are what is called for. But from where I'm looking and various reference pictures of Mosrite and Your own brand, 2 degrees in relation to the fretboard is way too shallow I think. I'm pretty sure I measured the angle right.
(from the forums)


EXAMPLES of Mosrite Heels

Not a Ventures model, but still.

MY Neck angle at 2 degrees... Negligible.


So Mr. Bob Shade any help would be appreciated.
Is 2 degrees on the angle of the heel correct? Or is it a bit more like I suspect it is?
ANY Help from a knowledgeable party is appreciated actually.
Also the Fretboard is far too high from the top of the body making it difficult to get my fingers around the higher frets. A steeper angle might help but, something Is definatly off just by eyeballing it.


Top of the Fretboard is look WAY closer to the body on SOME Genuine Mosrites and Hallmarks Than others. Makes me wonder what Black Arts you use to put the angle on your heels Bob. Some kind of Jig to do multiple necks at once, or do you CNC and clean up by hand? I have NO idea how big your operation is. Kinda curious.


I also took a few Under string and ruler measurements Comparing my Modified Jazzmaster which I consider having perfect Action to where I am on this Project.
JM 1st fret .019 in" feeler gauge

Star swirl 1st .010 in" feeler gauge a bit lower than JM

JM 12th with a ruler

SS 12th with a ruler

JM Last fret

SS Last fret I'm not playing Slide on this thing! 1-2 mm lower would be preferable.

Also as long as I'm asking questions about building. I was wondering how to handle Painting Bolt-on Necks in relation to the Neck pocket. The neck is Very tight in the pocket I made to If I paint it the neck probably wont fit in the pocket anymore. How do you take this in consideration when painting bolt-on necks? Do you make the pockets wider to compensate for the extra milometers of paint? Also, how do you go about masking off the pocket? Set necks just get glued and painted over I Imagine. (custom 60's

I don't want this!

Also do you recommend Poly Satin for a non slippery and fast neck finish, or something like Tru-oil?
So I guess I just wanted to know what Angle on the heel you use. And how thick the heel is usually at the last fret for my own reference if you got that kind of info handy. And the Paint thing. I await you answer sir.
Thanks for checking in Bob.
"If the women don't find you handsome, they should at least find you handy."- a wise man
-
panther

- Top Producer
- Posts: 817
- Joined: Tue May 03, 2011 8:31 pm
- Location: Anza, California
Re: Star Swirl *** 1st build
CM;
I found pretty much the same issue with my first build. I thought I had made amajor mistake somewhere. The neck angle on mine is about 7 degrees. I still have issues with the pickups being way high., and the strings at the rollers are an issue also.
I've pretty much left it as is, and hung it on the wall. I'll get back to it, MAYBE this winter when it cools down.
Plus now I can go to school on yours. When I get the action where I want it, everything on the body seems wrong.
Dan
"The More People I Meet, The More I Miss My Dog"
-
Bob Shade
- Master Contributor
- Posts: 1364
- Joined: Wed Jan 21, 2009 11:53 am
- Location: Md
- Contact:
Re: Star Swirl *** 1st build
First, let me say it is difficult to give you exact spec's without having the guitar in front of me, but I will give you my best advice.
1. High action at the heel: yes it looks as though you either need a deeper pocket or a slimmer neck heel. I would take one or the other down a bit. Then you can shave a bit off of the neck to get the exact angle you desire, for better action down at the heel and also to help put more tension on the bridge.
2. Yes leave a tiny bit of additional room in the neck pocket to accept the neck once it and the body are finished. Try not to overload the neck pocket with finish but you will need to put finish in there to seal the wood. I hesitate to give you an exact measurement as I have no idea how much finish you will be applying. I would make the pocket so the neck is just a little loose and once you apply the finish it should be a perfect fit. If not you can always sand a little off of the sides of the pocket.
3. I would not use oil. If you ever decide to re finish it it would never let paint stick to it, even when sanded. A good urethane or poly is best these days. The nitro is not as good as it used to be. All of the dangerous elements have been taken out of it and that was what made the finish what it was. Now it really does not give you nearly as good of results as the new modern finishes. Urethane got a bad rap at the beginning but has come a very long way and you don't need nearly as many coats, so you can get a good crystal clear thin finish that drys and cures fast.
Hope this helps,
Bob
-
cmiller0034
- Top Producer
- Posts: 221
- Joined: Tue Oct 15, 2013 1:44 pm
- Location: Louisville, Ky
Re: Star Swirl *** 1st build
What about Bob ?

Thankyou for taking the time to look over and answer these questions Bob
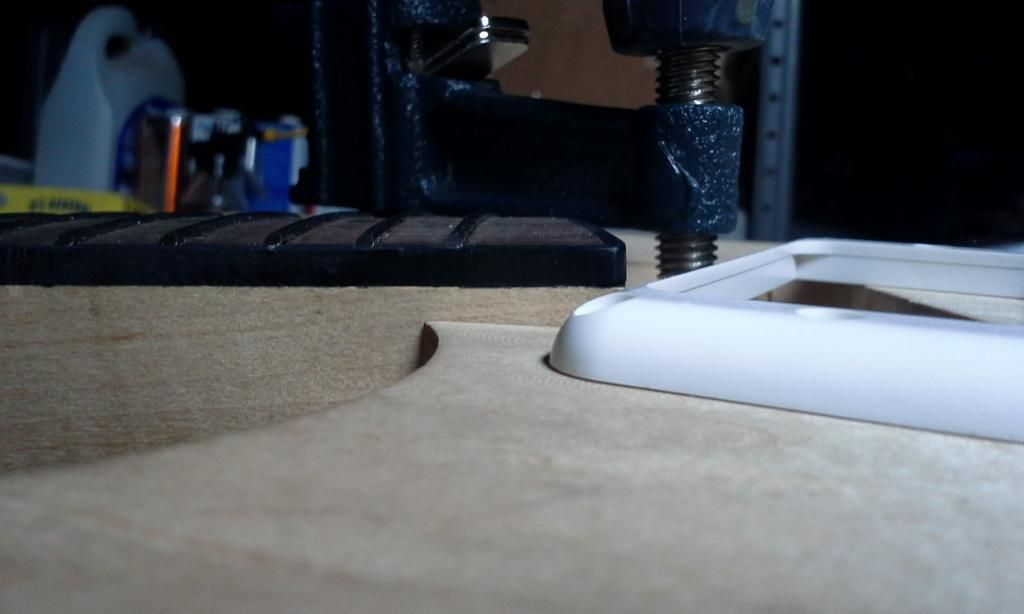
As far as the heel height is concerned, I am leaning toward taking material off the neck rather than out of the body. Looking at the photos it looks like the bottom of the binding always lines up with the top of the pickup ring as a rule of thumb. On this guitar I will have to take it down 3 1/2 mm for those two points to line up.
I dont want to take the 3 1/2 mm off all at once so I dont mess this thing up.
True, just lopping off 3 mm will lower the neck to the correct height. But, the angle must be addressed as well. Putting a greater angle removes material and will decrease the height even further. That has to be taken into consideration. Also, dropping the Fretboard height jacks the String height way up, the opposite of what I want. But increasing the Angle will bring the String height back down some, decreasing the distance between the strings and frets again. Quite a Balancing Act!
I am debating whether putting a steeper angle on the heel AFTER I have lowered it the full 3 mm will take more material than I want. Making the action TOO LOW and cause buzzing.

Do you think I should Babystep this process? Taking it down a millimeter then shaving off a slight angle and checking my work progressively? I would have to keep un-stringing and re-stringing to check my work. Seems a little excessive. There is probably some Mathomatic equation for this sort of thing. But, since I'm not that great at mathematics sneaking up on the desired height/angle would be my best option.
Taking it down the full height needed and then creeping up on the neck angle be faster, but would it be the SMARTER way to work? (these are questions are reflective, but if Bob or anyone else would like to chime in I always appreciate it).
The first method seems Safer but time consuming. (more self-reflection)
Am I Over thinking this thing? Probably.
Again Babysteps

How would this be done after the pocket has already been made? Do I have to make a slightly bigger neck pocket jig and re-cut the pocket? Trying to take material off by hand with sandpaper seems really difficult to do without mangling the shape.
Will that give me the satin smooth finish I'm looking for? Hmm. I HATE the finish on my VM squire stratocaster and Jazzmaster I'm not sure what finish they use exactly, probably a gloss polyurethane . When my hands get sweaty they feel sticky on those necks. The Takamine Acoustic I have has a more satin finish that I like. Not sure what finish is on that neck though. I see wipe on or aerosol poly in the home stores, is that the stuff you mean?
Is it possible to have a Glossy black headstock and a satin smooth finish on the back of the neck?
Maybe I should explain what I want to do with to paint.
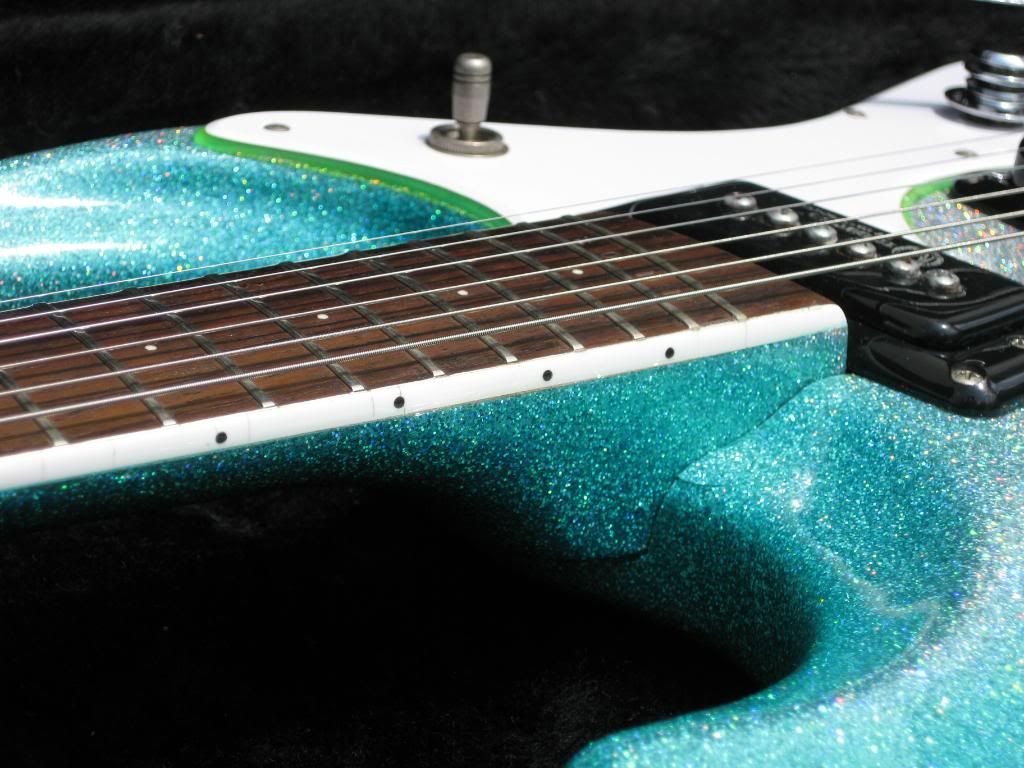
The name of the guitar is StarSwirl because I want to have a black guitar with holographic Flakes in the paint. Kinda like star clusters. The front of the headstock would match the body. The flakes are layered in the clear coat of course, but I dont want the back of the neck to be glossy for the reasons mentioned above.
I was going to swirl the guitar as well and have "star clusters" within each Nebulae of paint.
Basically a combination of these two things
But I'm not going to do that now. That's way too much work. Putting Flakes in the clear is difficult enough. Maybe on future builds.
Yes I realize this is quite ambitious for a fist build, but I want what I want!
If anyone has suggestions on how to achieve this, I'm all ears.
In the meantime I will chip away at the neck heel today. And thank you again for the tips Bob Shade!


Thankyou for taking the time to look over and answer these questions Bob
1. High action at the heel: yes it looks as though you either need a deeper pocket or a slimmer neck heel. I would take one or the other down a bit. Then you can shave a bit off of the neck to get the exact angle you desire, for better action down at the heel and also to help put more tension on the bridge.
As far as the heel height is concerned, I am leaning toward taking material off the neck rather than out of the body. Looking at the photos it looks like the bottom of the binding always lines up with the top of the pickup ring as a rule of thumb. On this guitar I will have to take it down 3 1/2 mm for those two points to line up.

I dont want to take the 3 1/2 mm off all at once so I dont mess this thing up.
True, just lopping off 3 mm will lower the neck to the correct height. But, the angle must be addressed as well. Putting a greater angle removes material and will decrease the height even further. That has to be taken into consideration. Also, dropping the Fretboard height jacks the String height way up, the opposite of what I want. But increasing the Angle will bring the String height back down some, decreasing the distance between the strings and frets again. Quite a Balancing Act!
I am debating whether putting a steeper angle on the heel AFTER I have lowered it the full 3 mm will take more material than I want. Making the action TOO LOW and cause buzzing.

Do you think I should Babystep this process? Taking it down a millimeter then shaving off a slight angle and checking my work progressively? I would have to keep un-stringing and re-stringing to check my work.
Taking it down the full height needed and then creeping up on the neck angle be faster, but would it be the SMARTER way to work? (these are questions are reflective, but if Bob or anyone else would like to chime in I always appreciate it).
The first method seems Safer but time consuming. (more self-reflection)
Am I Over thinking this thing? Probably.
Again Babysteps

I would make the pocket so the neck is just a little loose and once you apply the finish it should be a perfect fit. If not you can always sand a little off of the sides of the pocket.
How would this be done after the pocket has already been made? Do I have to make a slightly bigger neck pocket jig and re-cut the pocket? Trying to take material off by hand with sandpaper seems really difficult to do without mangling the shape.
A good urethane or poly is best these days.
Will that give me the satin smooth finish I'm looking for? Hmm. I HATE the finish on my VM squire stratocaster and Jazzmaster I'm not sure what finish they use exactly, probably a gloss polyurethane
Is it possible to have a Glossy black headstock and a satin smooth finish on the back of the neck?
Maybe I should explain what I want to do with to paint.
The name of the guitar is StarSwirl because I want to have a black guitar with holographic Flakes in the paint. Kinda like star clusters. The front of the headstock would match the body. The flakes are layered in the clear coat of course, but I dont want the back of the neck to be glossy for the reasons mentioned above.
I was going to swirl the guitar as well and have "star clusters" within each Nebulae of paint.
Basically a combination of these two things


But I'm not going to do that now. That's way too much work. Putting Flakes in the clear is difficult enough. Maybe on future builds.
Yes I realize this is quite ambitious for a fist build, but I want what I want!
If anyone has suggestions on how to achieve this, I'm all ears.
In the meantime I will chip away at the neck heel today. And thank you again for the tips Bob Shade!

"If the women don't find you handsome, they should at least find you handy."- a wise man
-
cmiller0034
- Top Producer
- Posts: 221
- Joined: Tue Oct 15, 2013 1:44 pm
- Location: Louisville, Ky
Re: Star Swirl *** 1st build
A little off the top please
A little moment I captured that encapsulates how I feel. And yes that's me hollering at the end.
Now that we're in the right frame of mind.
Updates:
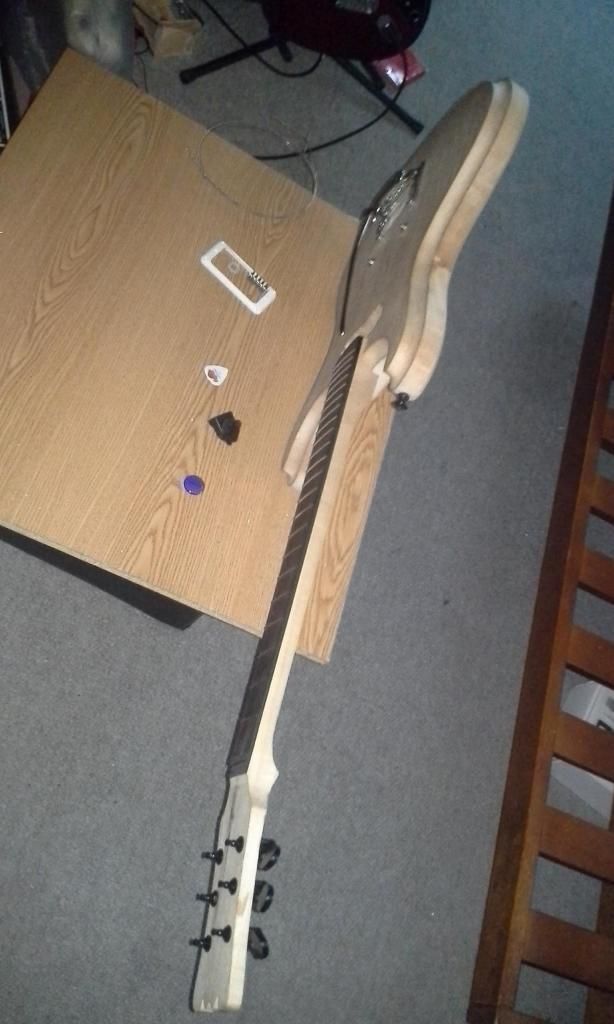
The target was to drop the heel by 3 1/2 mm and line it up with the top of the pickup ring.
I decided to shave off 2 mm with the first router pass and then begin increasing the angle. I took two more passes checking the fitment between each pass.
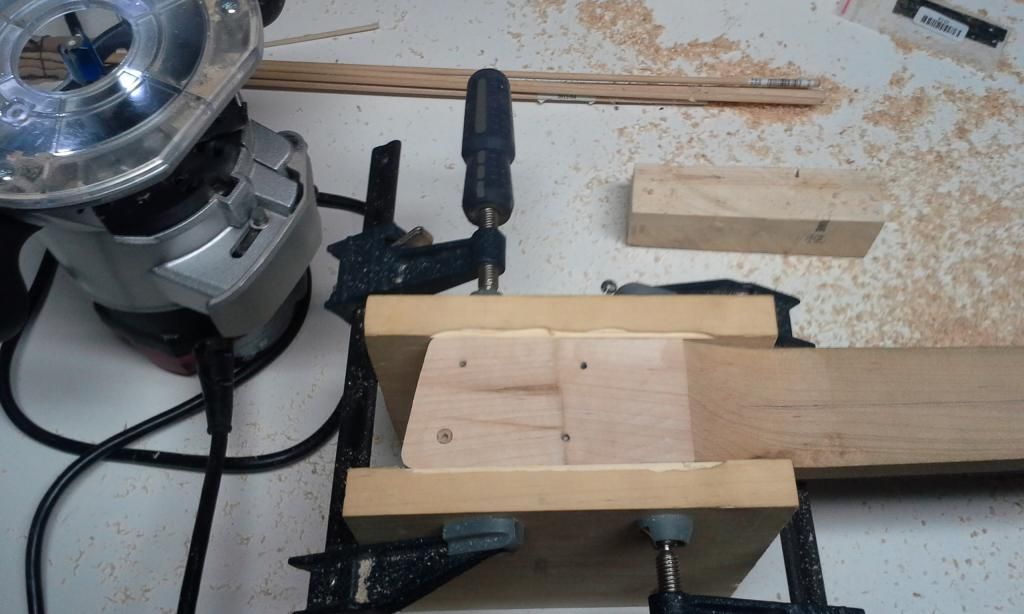
In retrospect I took off two much with the 2 mm drop and maybe should have only taken about 1 1/2 mm. The bottom of the heel is not high enough to give me the sort of action I was looking for and the bridge has bottomed out so I cant lower it to compensate. That being said, its still a pretty good height 2 mm away from the last fret without buzzing. About the same as my Stratocaster with factory setup. Not as low as my custom Jazzmaster setup, but still good.
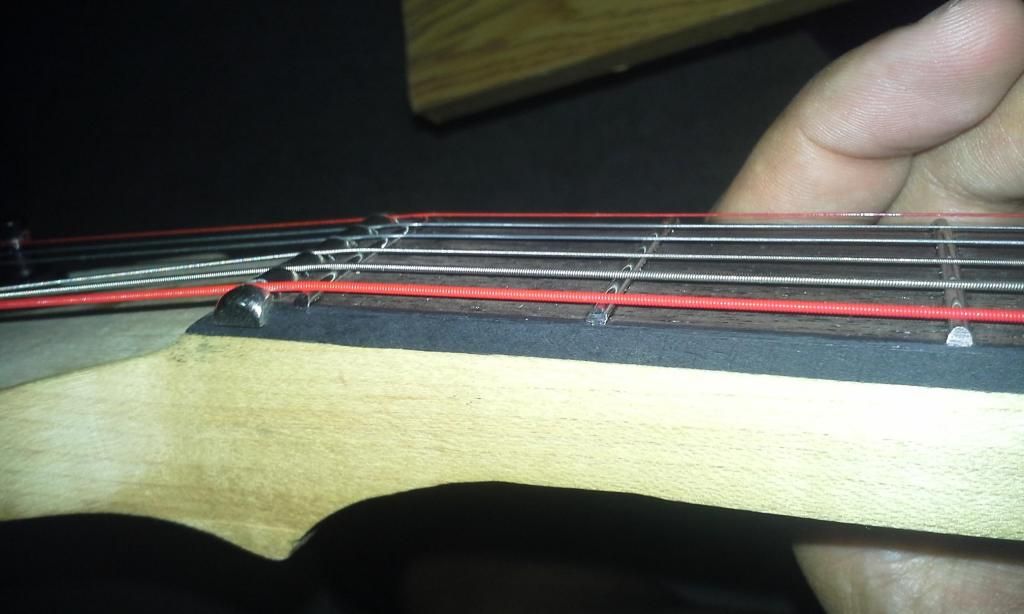
On the other hand, the action at the nut is exactly where I want it! (1st fret .011 in) Another learning experience. I'll do better next time.
Before Shave
After Shave
Can you see the difference? I can certainly feel the difference.

Before
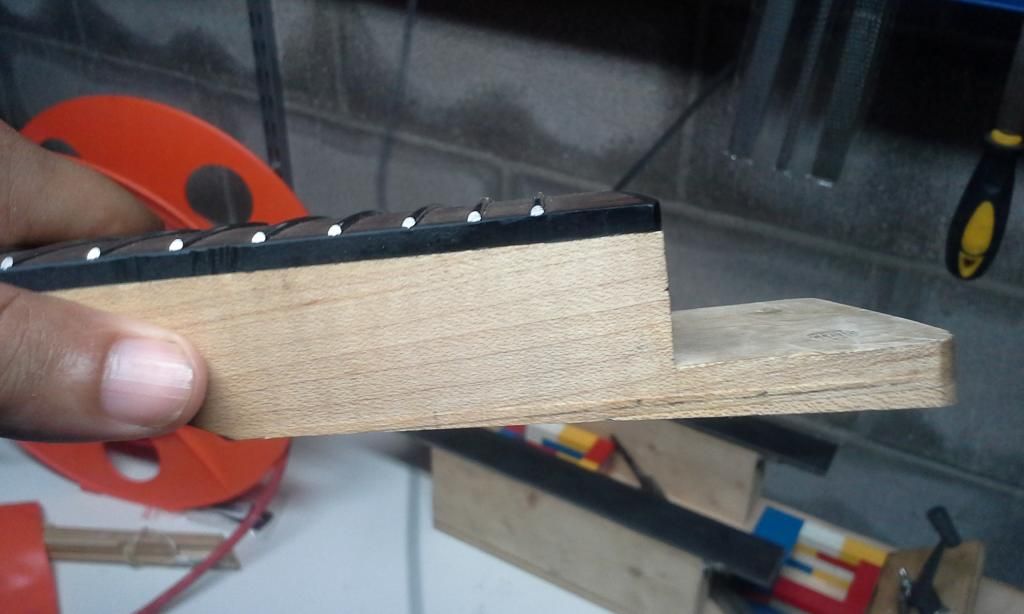
After

Look at that sexy angle. Work it Swirl! On a side note. The guitar has become more balanced. It can sit up on it's side now. Probably a good thing. Look at you standing up all by yourself.
Note to Self:
Do Not Drill Neck Screw holes until final fittitng. The angle will change and the holes will have to be filled and re drilled.
Dont want to do that again.
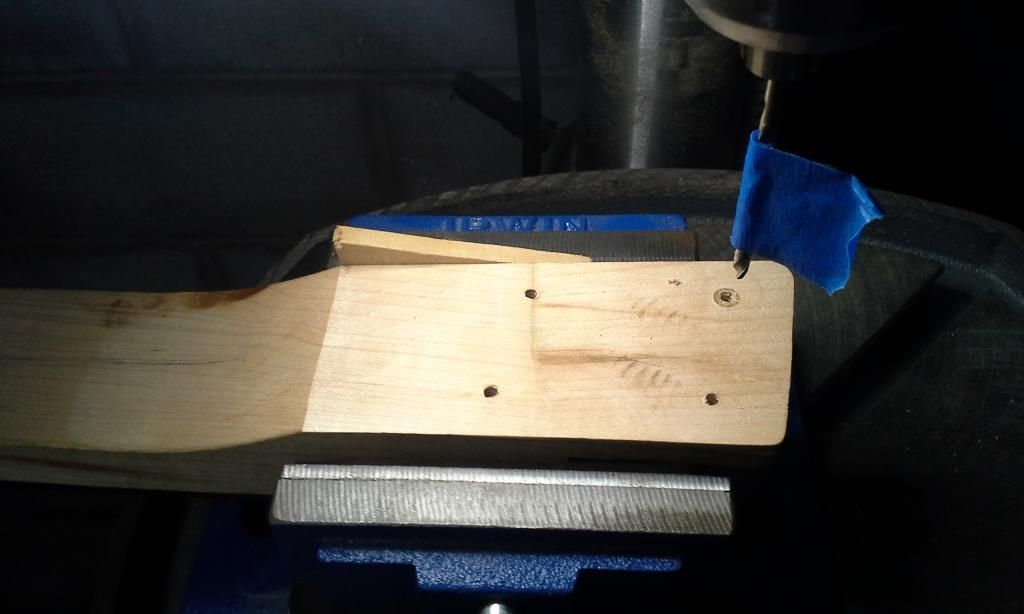
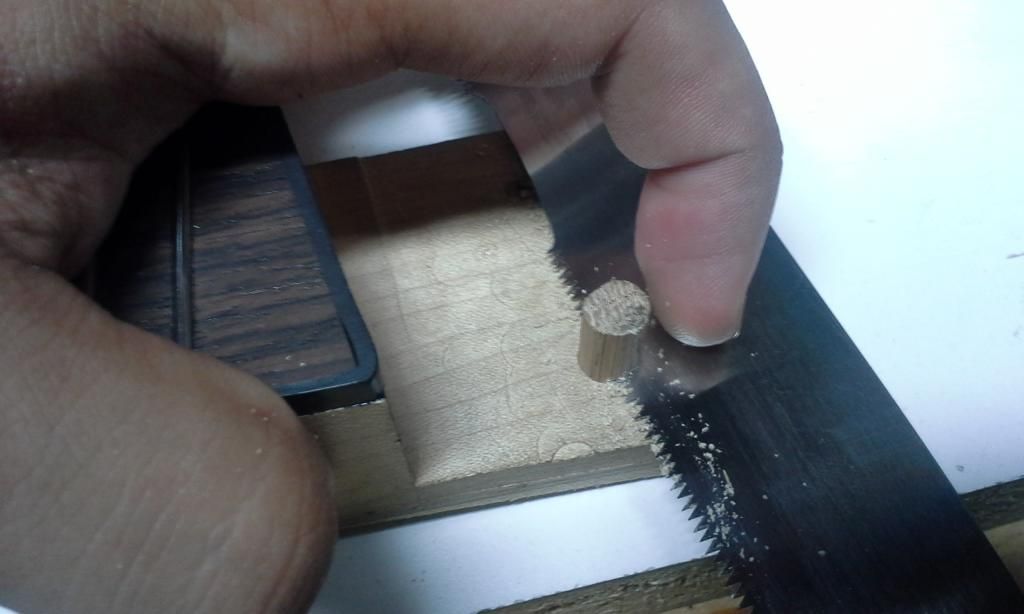
While I was on a roll I decided to take care of those wobbly strap pegs. Why not make this thing as solid as possible?
Without a stable base to rest upon, these come loose after a while
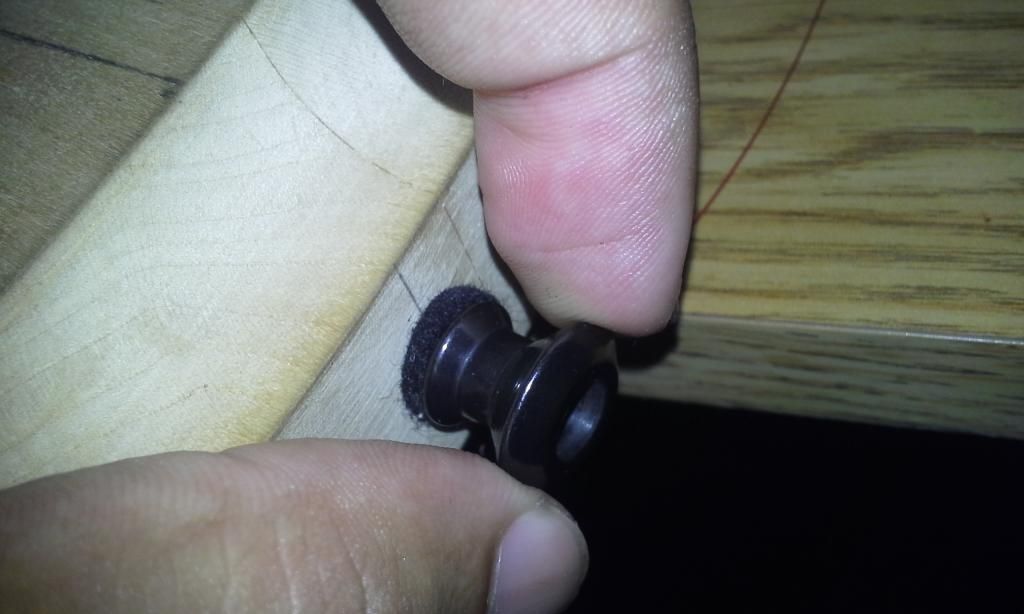
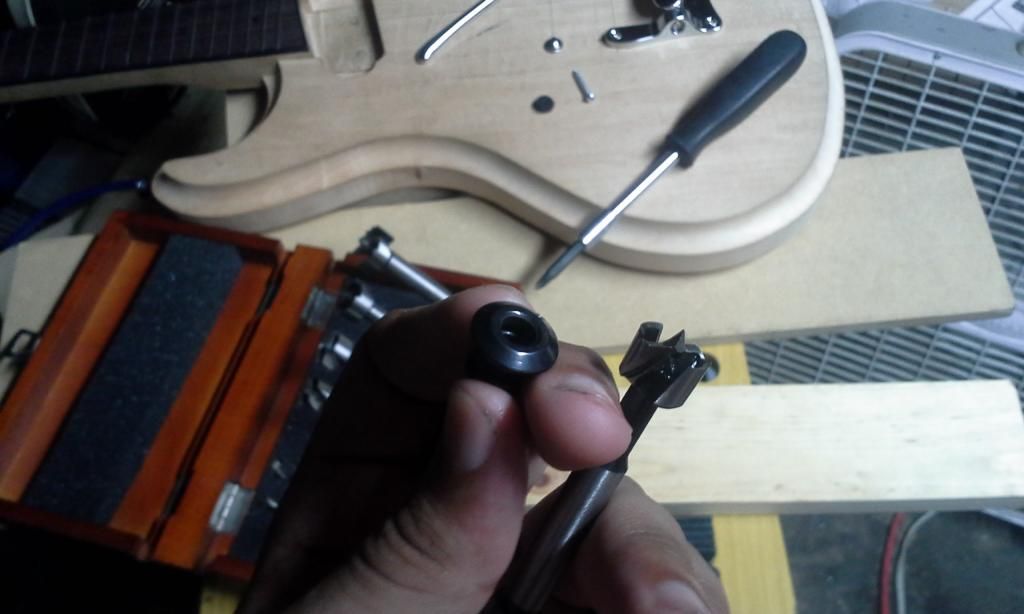
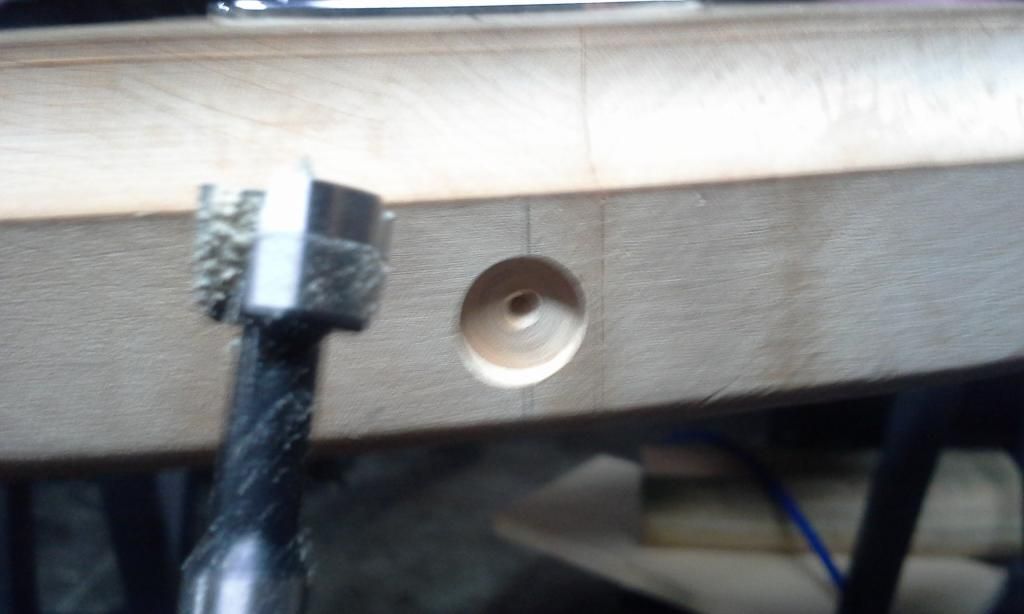
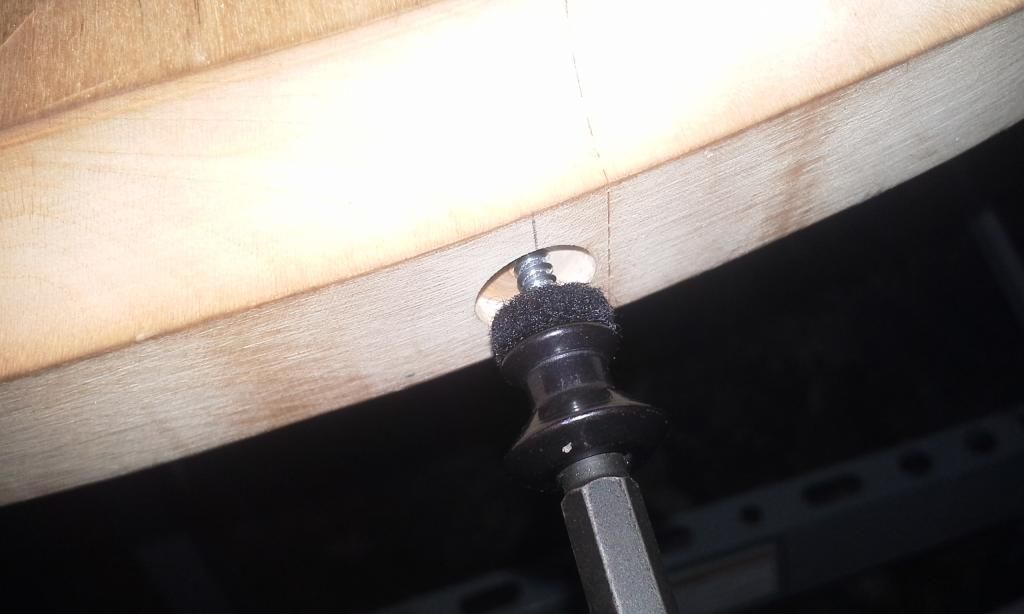
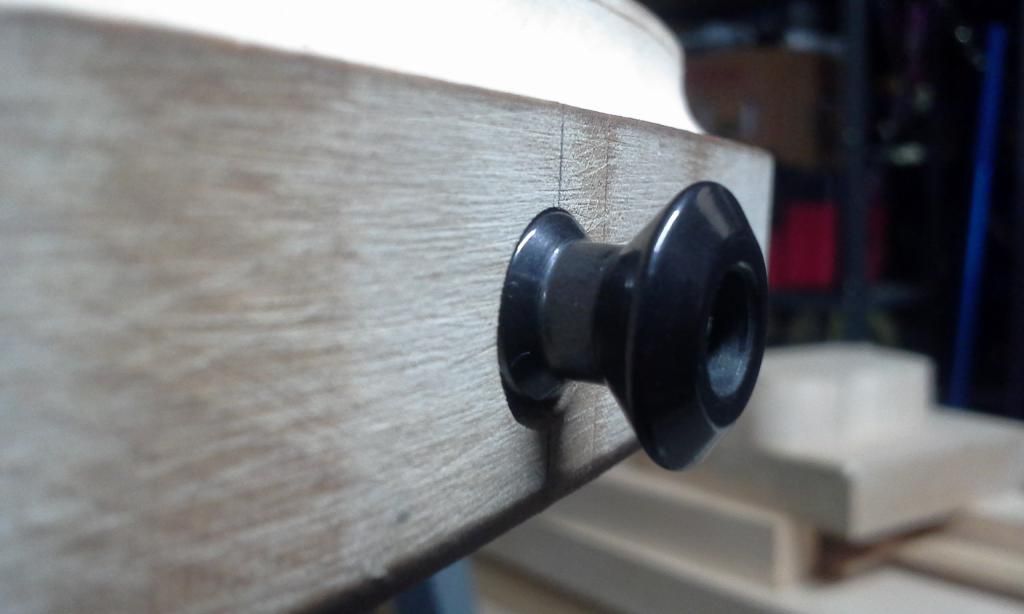
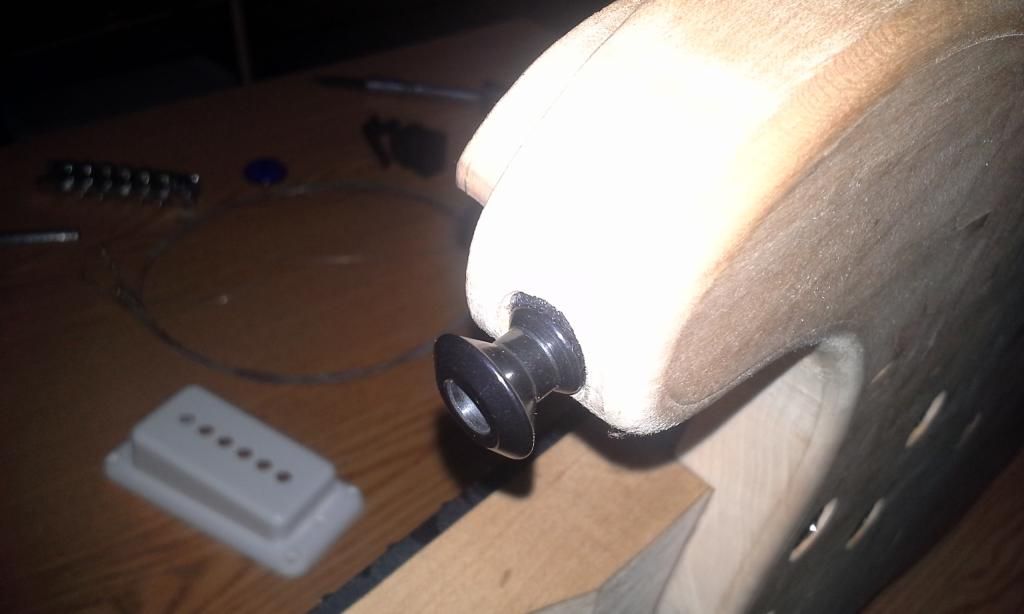
Nice and clean looking. Also quite stable. Its the little things like this, I think that make a decent guitar into a good one.
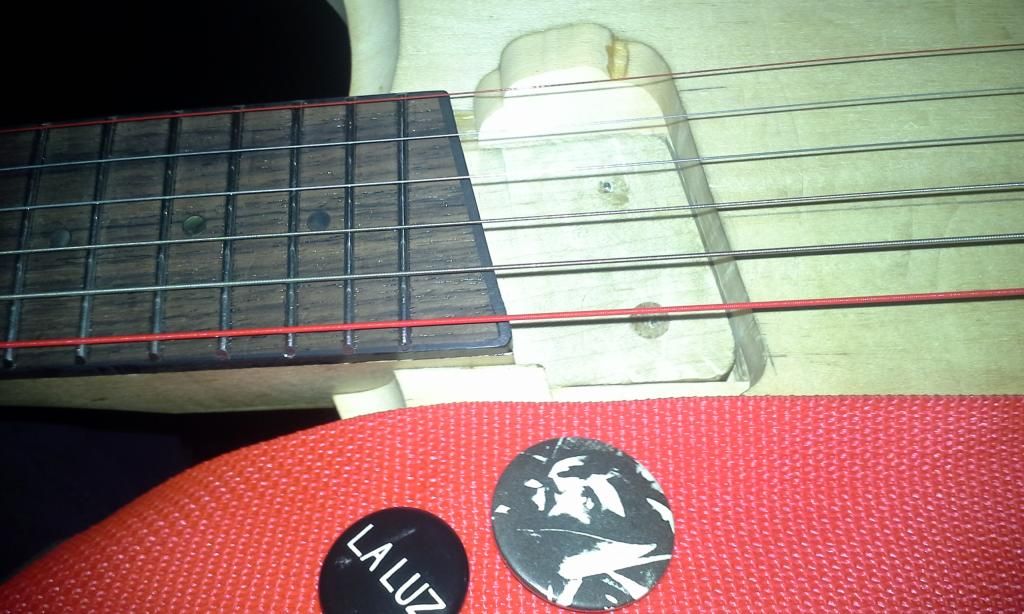
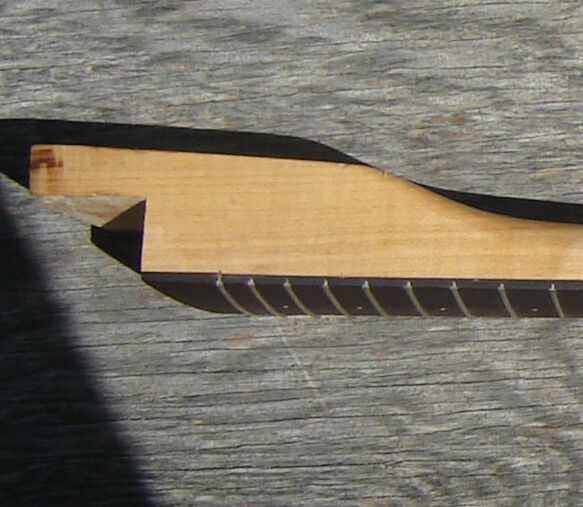
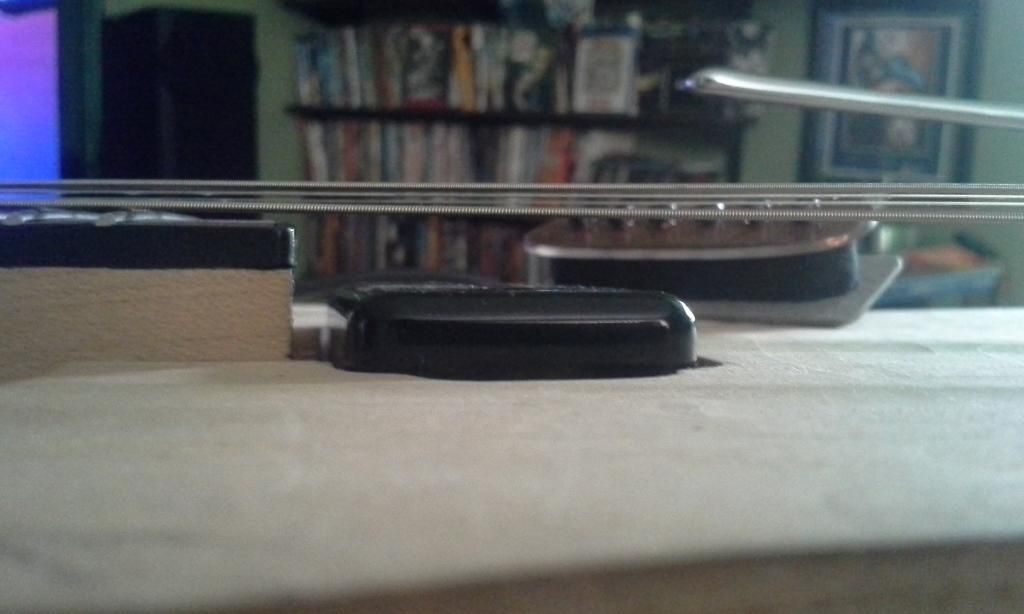
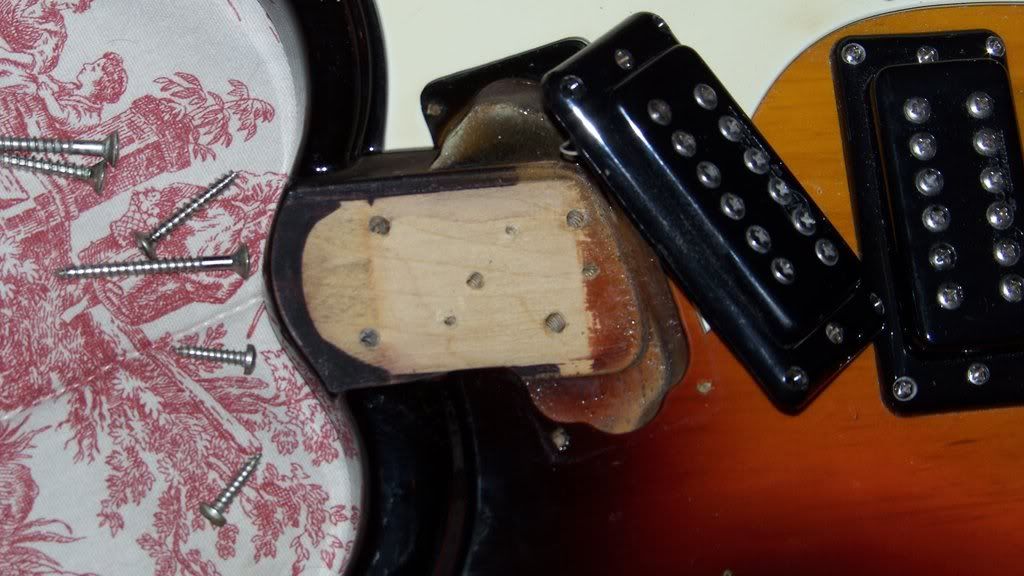
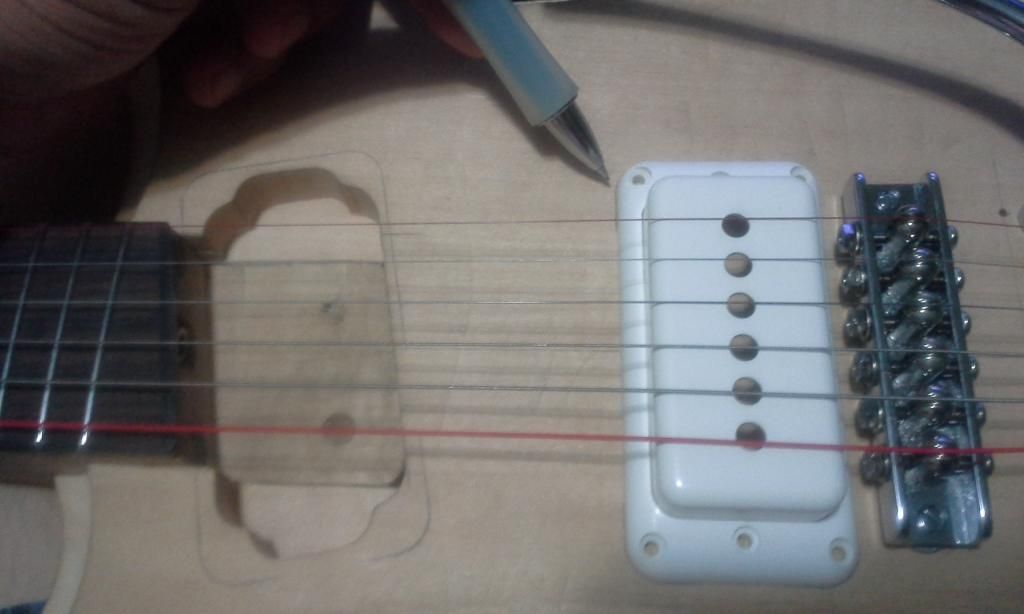
I marked out where to put the second Pickup pocket. I will be making a new slimmer template for the hole. The first one is unnecessarily wide in my opinion and needs to be redesigned. What was Mosely thinking?
Things left to do:
1. Layout control positions (I'm having difficulty deciding the best place for the pup switch)
2. Route the control cavity. (I'm doing a rear cavity and side jack)
3. Level and dress the frets
4. Profile the back of the neck (This is what I'm MOST apprehensive about)
5. Body curves
6. Final Sanding
7. Paint
Summer's a wastin'


A little moment I captured that encapsulates how I feel. And yes that's me hollering at the end.
Now that we're in the right frame of mind.
Updates:
The target was to drop the heel by 3 1/2 mm and line it up with the top of the pickup ring.
I decided to shave off 2 mm with the first router pass and then begin increasing the angle. I took two more passes checking the fitment between each pass.

In retrospect I took off two much with the 2 mm drop and maybe should have only taken about 1 1/2 mm. The bottom of the heel is not high enough to give me the sort of action I was looking for and the bridge has bottomed out so I cant lower it to compensate. That being said, its still a pretty good height 2 mm away from the last fret without buzzing. About the same as my Stratocaster with factory setup. Not as low as my custom Jazzmaster setup, but still good.
On the other hand, the action at the nut is exactly where I want it! (1st fret .011 in)


Before Shave
After Shave

Can you see the difference? I can certainly feel the difference.

Before
After

Look at that sexy angle. Work it Swirl! On a side note. The guitar has become more balanced. It can sit up on it's side now. Probably a good thing. Look at you standing up all by yourself.


Note to Self:
Do Not Drill Neck Screw holes until final fittitng. The angle will change and the holes will have to be filled and re drilled.
Dont want to do that again.


While I was on a roll I decided to take care of those wobbly strap pegs. Why not make this thing as solid as possible?
Without a stable base to rest upon, these come loose after a while


Nice and clean looking. Also quite stable. Its the little things like this, I think that make a decent guitar into a good one.

I marked out where to put the second Pickup pocket. I will be making a new slimmer template for the hole. The first one is unnecessarily wide in my opinion and needs to be redesigned. What was Mosely thinking?

Things left to do:
1. Layout control positions (I'm having difficulty deciding the best place for the pup switch)
2. Route the control cavity. (I'm doing a rear cavity and side jack)
3. Level and dress the frets
4. Profile the back of the neck
5. Body curves
6. Final Sanding
7. Paint
Summer's a wastin'

"If the women don't find you handsome, they should at least find you handy."- a wise man
-
cmiller0034
- Top Producer
- Posts: 221
- Joined: Tue Oct 15, 2013 1:44 pm
- Location: Louisville, Ky
Re: Star Swirl *** 1st build
Field Work
In order to understand the true nature of the Beast it must be studied in it's natural habitat.


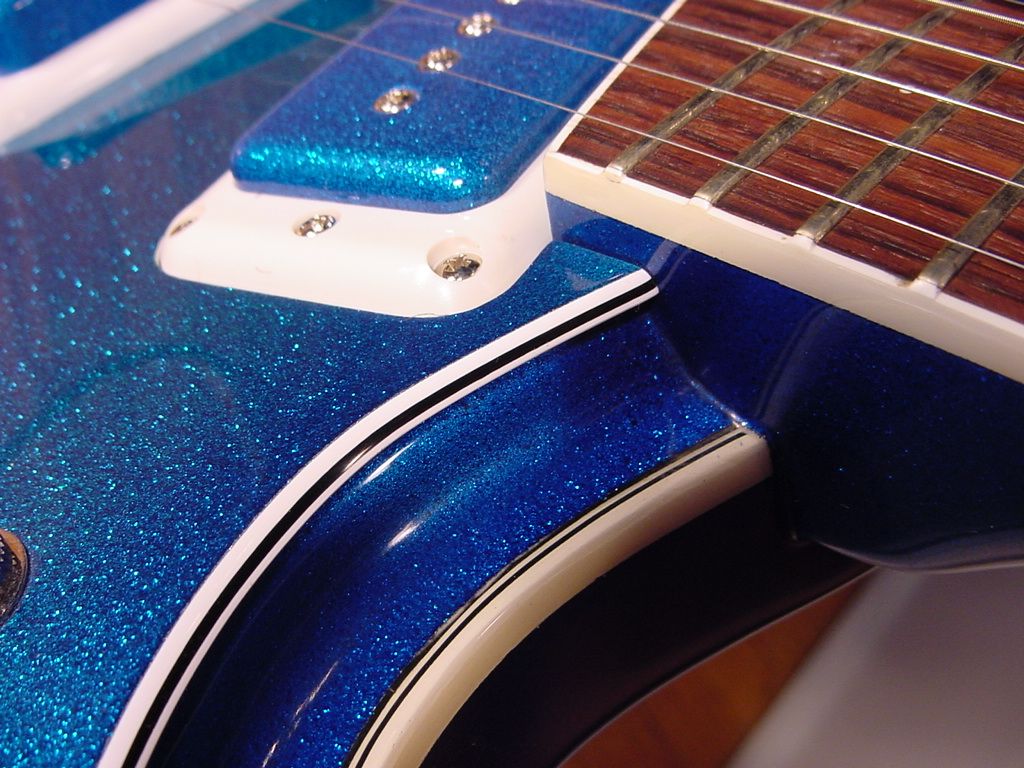
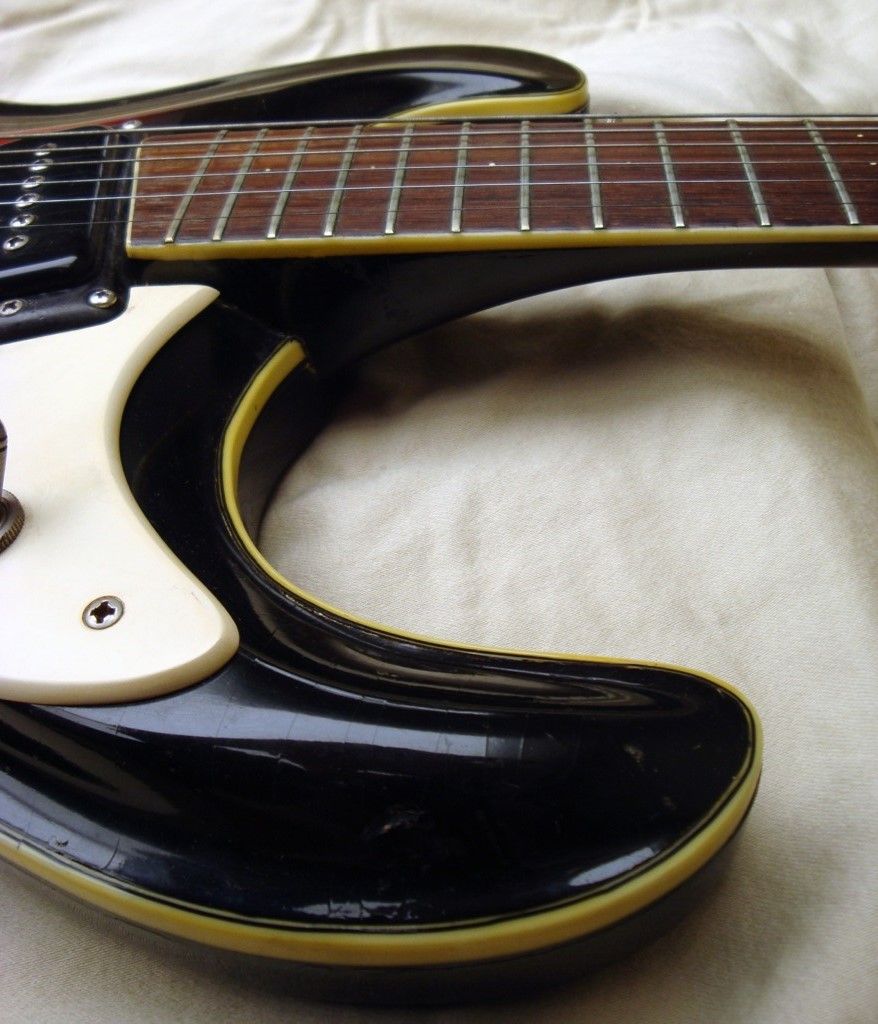
This Thursday I traveled to the backwater City of Indianapolis to observe the Halmark Custom in the wild. A beautiful and mysterious creature indeed. See how the Majestic Swept Wing lives in perfect symbiosis with the custom creature.


On the prowl

A ferocious Theremin Battle for supremacy.


I met StarCrunch himself and talked his ear off about this Project. And how much help I've gotten from the good people of the forums. The guy is a class act and quite gracious. Dick Dale, The Madeira, The Volcanos, Daikaiju, and now Man or Astroman! What a busy two months I've had. Great summer for surf music, I've seen all my favorite bands in such a short amount of time, I'm sort of dizzy from it all.
Brian Causey aka Star Crunch and I

One thing I did confirm. My Guitar is alot shorter scale than a standard Halmark guitar, that's for sure. I already knew this but it looks gigantic compared to mine.
Well that concludes my Field research. Time to get back to the Laboratory and get some word done!
In order to understand the true nature of the Beast it must be studied in it's natural habitat.


This Thursday I traveled to the backwater City of Indianapolis to observe the Halmark Custom in the wild. A beautiful and mysterious creature indeed. See how the Majestic Swept Wing lives in perfect symbiosis with the custom creature.


On the prowl

A ferocious Theremin Battle for supremacy.


I met StarCrunch himself and talked his ear off about this Project. And how much help I've gotten from the good people of the forums. The guy is a class act and quite gracious. Dick Dale, The Madeira, The Volcanos, Daikaiju, and now Man or Astroman! What a busy two months I've had. Great summer for surf music, I've seen all my favorite bands in such a short amount of time, I'm sort of dizzy from it all.
Brian Causey aka Star Crunch and I

One thing I did confirm. My Guitar is alot shorter scale than a standard Halmark guitar, that's for sure. I already knew this but it looks gigantic compared to mine.
Well that concludes my Field research. Time to get back to the Laboratory and get some word done!
"If the women don't find you handsome, they should at least find you handy."- a wise man
Return to “Mosrite & Clone, Projects, Parts & Accessories Q&A”
Who is online
Users browsing this forum: No registered users and 308 guests