Mosrite 'Knock Off' Project #6 double neck
-
MWaldorf

- Site Admin
- Posts: 3264
- Joined: Sat May 24, 2008 1:21 pm
- Location: Alameda, California
- Contact:
Re: Mosrite 'Knock Off' Project #6 double neck
Holy cow! It's great to see this coming along!
Oy vey - it's MESHUGGA BEACH PARTY - The world's premier Jewish Surf Music Band!

What? Couldn't tell the logo is a link? So click here, what's the hold up? http://www.meshuggabeachparty.com
What? Couldn't tell the logo is a link? So click here, what's the hold up? http://www.meshuggabeachparty.com
-
Veenture

- Master Contributor
- Posts: 4127
- Joined: Sat Jan 03, 2009 12:07 pm
- Location: The Netherlands
Re: Mosrite 'Knock Off' Project #6 double neck
yeah, + 1
Two questions concerning the neck attachment Danny:
a. Will you be using a synthetic type of glue when you attach the necks? I imagine it will have to be a type having really strong adhesive properties...
b. will you be using screws too (from the inside?) for extra support/strength?
Maybe I'm jumping the gun...
-
dubtrub
- Administrator
- Posts: 3852
- Joined: Sun May 04, 2008 10:12 am
Re: Mosrite 'Knock Off' Project #6 double neck
Paul,
There will not be any screws. The necks will be attached using an Aliphatic Resin carpenters glue.
There will not be any screws. The necks will be attached using an Aliphatic Resin carpenters glue.
Danny Ellison
-
Veenture
- Master Contributor
- Posts: 4127
- Joined: Sat Jan 03, 2009 12:07 pm
- Location: The Netherlands
Re: Mosrite 'Knock Off' Project #6 double neck
Thanks, look forward to the next instalment! 
-
KRamone27

- Master Contributor
- Posts: 1325
- Joined: Mon May 05, 2008 1:38 pm
- Location: Carterville, IL
- Contact:
-
TerryTNM

- Top Producer
- Posts: 353
- Joined: Thu Jan 22, 2009 2:34 pm
- Location: Nashville, TN
- Contact:
Re: Mosrite 'Knock Off' Project #6 double neck
Danny,
Man you are a glutton for elbow grease. Hand carving aluminum block is about as labor intensive as it gets.
The project is looking great. A tip of the hat to you sir.
-Terry
Man you are a glutton for elbow grease. Hand carving aluminum block is about as labor intensive as it gets.
The project is looking great. A tip of the hat to you sir.
-Terry
-
thunderhead
- Top Producer
- Posts: 377
- Joined: Fri Jun 26, 2009 9:05 pm
- Location: Gray, Tennessee
Re: Mosrite 'Knock Off' Project #6 double neck
Danny, Lookin' great, can't wait to see more!!! 
Click on logo to visit website

-
dubtrub
- Administrator
- Posts: 3852
- Joined: Sun May 04, 2008 10:12 am
Re: Mosrite 'Knock Off' Project #6 double neck
I've been working on the construction of all the metal parts which is completed. They are extremely time consuming but it is still coming right along. I will probably rout the inlet for the vibrato into the body tomorrow and drill holes for the inserts in the octave bridge. Mel and Adam are coming by the next day so I will put it on hold for a day. Next I will make a jig to rout the pickup covers, then start final assembly.
I build a little differently than other guitar builders. I will completely build the guitar and string it up and play it while in the 'white'. I make any necessary adjustments, correct them, them take it all apart for final sanding then painting. I have approached this build as if I were building a scale model radio controlled airplane (which BTW I used to do). It has been very rewarding as I go through the process as in my mind it is like being back in 1959 building a Mosrite.
I build a little differently than other guitar builders. I will completely build the guitar and string it up and play it while in the 'white'. I make any necessary adjustments, correct them, them take it all apart for final sanding then painting. I have approached this build as if I were building a scale model radio controlled airplane (which BTW I used to do). It has been very rewarding as I go through the process as in my mind it is like being back in 1959 building a Mosrite.
Danny Ellison
-
LoveyX

- Top Producer
- Posts: 322
- Joined: Thu Jul 16, 2009 6:46 pm
- Location: Webster, New York
Re: Mosrite 'Knock Off' Project #6 double neck
Danny,
How do you measure your fretboards for the slots? Is it the same as on Semie's original version or do you use a fret calculator or template? Just for my curiousity how did Semie measure them 'back in the day'?
Thanks again to you and all who have shared these incredibly interesting photos & stories.
BTW looks to be the makings of a super cool guitar, would like to see more of it.
Did you say you're going to wind the pickups yourself?
Marty
-
dubtrub
- Administrator
- Posts: 3852
- Joined: Sun May 04, 2008 10:12 am
Re: Mosrite 'Knock Off' Project #6 double neck
LoveyX,
I used calipers and the calculating scale offered on Stewart MacDonald website. I also used the standard Mosrite scale length on this particular project. However the octave neck I made a little longer scale at 15 inches. I will be winding my own pickups later as I am now just getting set up for making pickups, but for now it will house some gutted out Hallmark Custom 60s p'ups with changed to proper fillister slot head machine screws correct for the era under walnut covers. For scale length, I don't know what Semie would have used originally, but from talking with Doug Brewer, it would be my guess that he simply laid a finished neck along side the blank fretboard and mark off the position, since I have seen some of the scales all over the spectrum. It sounds like they were probably an intonation nightmare.
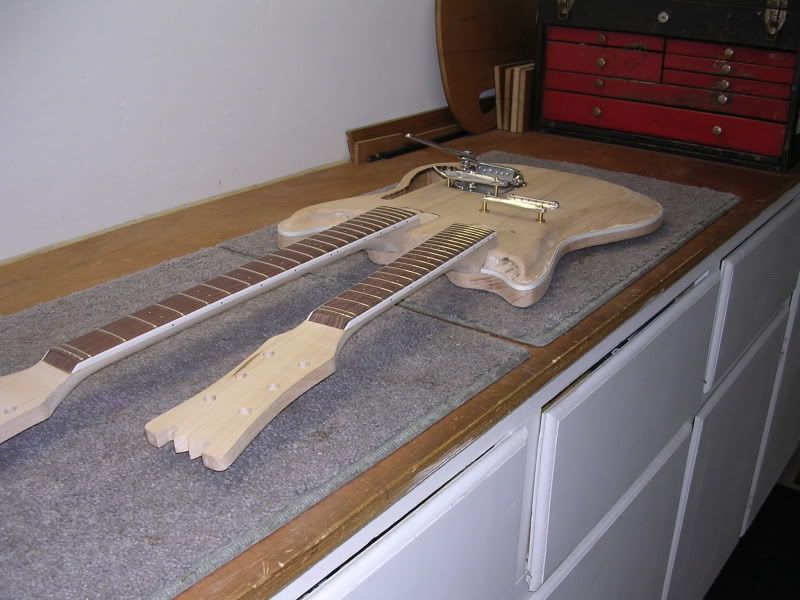
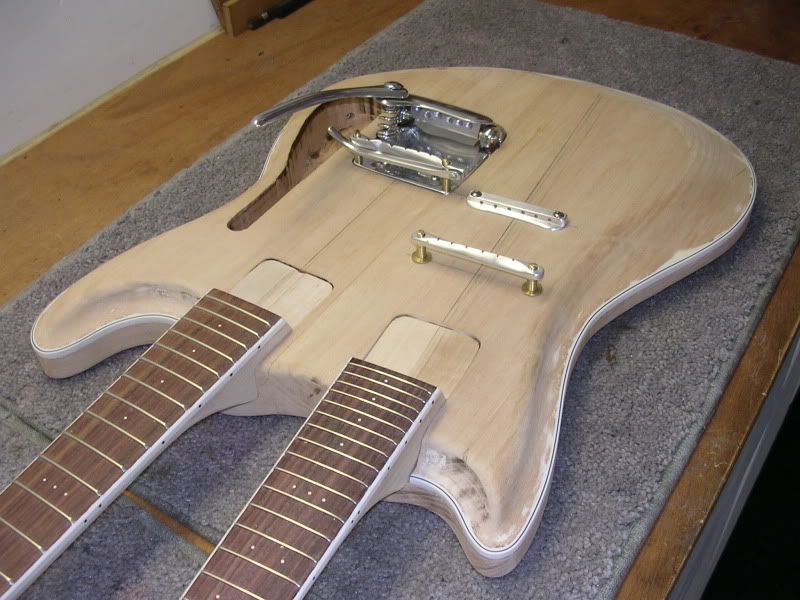
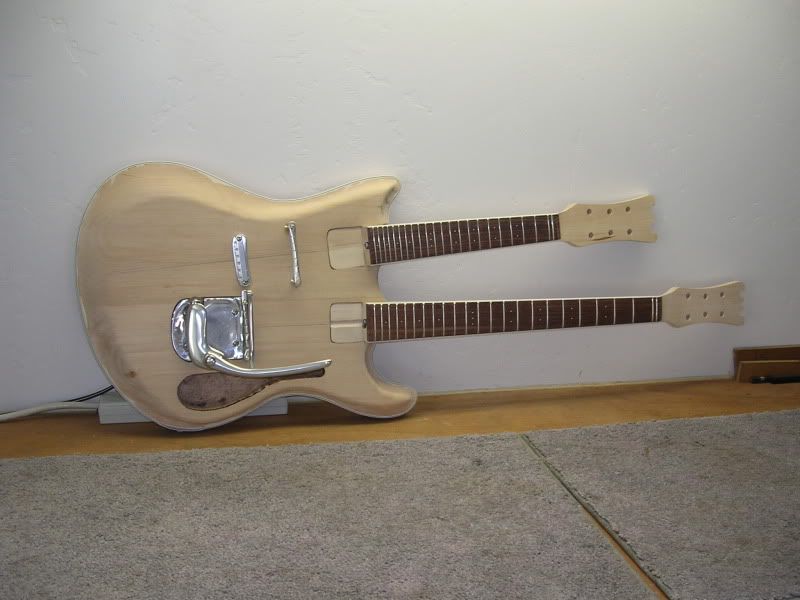
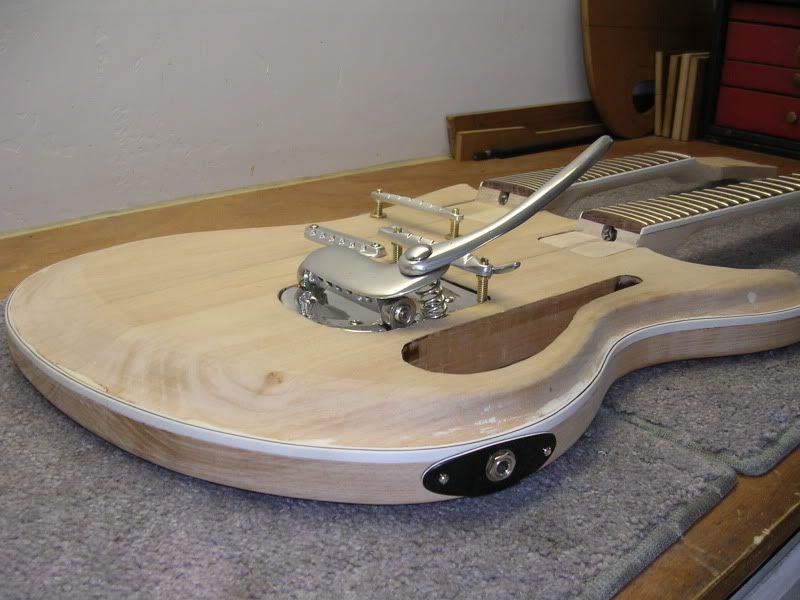
Here are a few shots of the current status. Vibrato is counter sunk into the body, binding is on, still have to polish out the metal for the octave neck. The necks are not glued in yet. I used minute amount of wood filler around the top edge of the binding where a dull router bit wasn't too kind. Fortunately it will be bidden during painting. I will probably finish sanding it one day next week and then glue in the necks. Once I get the p'up covers made I will install the electronics and string it up for a spin around the block. Once all final fitting is done it will be disassemble and painted three tone sunburst. But that is still a few weeks away. I don't recall if I mentioned it, all the metal parts are hand made and I turned the bridge adjusting post and the octave neck bridge post inserts out of brass on my crappy Chinese import lathe.
I used calipers and the calculating scale offered on Stewart MacDonald website. I also used the standard Mosrite scale length on this particular project. However the octave neck I made a little longer scale at 15 inches. I will be winding my own pickups later as I am now just getting set up for making pickups, but for now it will house some gutted out Hallmark Custom 60s p'ups with changed to proper fillister slot head machine screws correct for the era under walnut covers. For scale length, I don't know what Semie would have used originally, but from talking with Doug Brewer, it would be my guess that he simply laid a finished neck along side the blank fretboard and mark off the position, since I have seen some of the scales all over the spectrum. It sounds like they were probably an intonation nightmare.
Here are a few shots of the current status. Vibrato is counter sunk into the body, binding is on, still have to polish out the metal for the octave neck. The necks are not glued in yet. I used minute amount of wood filler around the top edge of the binding where a dull router bit wasn't too kind. Fortunately it will be bidden during painting. I will probably finish sanding it one day next week and then glue in the necks. Once I get the p'up covers made I will install the electronics and string it up for a spin around the block. Once all final fitting is done it will be disassemble and painted three tone sunburst. But that is still a few weeks away. I don't recall if I mentioned it, all the metal parts are hand made and I turned the bridge adjusting post and the octave neck bridge post inserts out of brass on my crappy Chinese import lathe.
Danny Ellison
Return to “Mosrite & Clone, Projects, Parts & Accessories Q&A”
Who is online
Users browsing this forum: No registered users and 280 guests