Hello there fellow Mosrite fans!
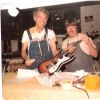
Well, I've built Original Mosrites with my ol' friend and mentor Semie Moseley,
and custom Mosrite style clones in my own shop for many years
and I've never done any step-by-step photos of any of my projects,
infact dozens of my guitars have gotten away without a single photo,
so you're going to see it here first, on the Mosrite Forum,
Step-by-step photos of the hand-building process of four of my E.F.Elliott
Custom Mosrite style guitars.
I have a customer in Spain that has placed and order for a '59 Joe Maphis
Custom and a '63 Ventures style side-jack, and my good friend and exclucive E.F.Elliott
dealer in Japan placed the very same order. So I'm going to be building
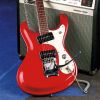
2 '59 Joe Maphis customs and 2 '63 Ventures style custom guitars. I belive these four
custom guitars will be the closest thing on the planet to the originals
built by my two ol' friends and mentors Semie Moseley and Bill Gruggett in
that little tin shed outside of Bakersfield on Panama Lane all those years ago.
I'm going to link all the photos together,so, you'll have to keep checking back to
see my progress, let me know what you think.
Eddy
Ed Elliott, Step-by-Step Building of 4 Mosrite Custom Clones
-
EFElliott
- Top Producer
- Posts: 502
- Joined: Fri Jun 20, 2008 8:35 pm
- Location: Checotah, Oklahoma USA
- Contact:
-
dubtrub
- Administrator
- Posts: 3795
- Joined: Sun May 04, 2008 10:12 am
- Contact:
Re: Ed Elliott, Step-by-Step Building of 4 Mosrite Custom Clones
Looking forward to it Eddy.
Danny Ellison
-
MWaldorf

- Site Admin
- Posts: 3264
- Joined: Sat May 24, 2008 1:21 pm
- Location: Alameda, California
- Contact:
Re: Ed Elliott, Step-by-Step Building of 4 Mosrite Custom Clones
Congratulations on the orders, and looking forward to seeing the build progress!
Oy vey - it's MESHUGGA BEACH PARTY - The world's premier Jewish Surf Music Band!

What? Couldn't tell the logo is a link? So click here, what's the hold up? http://www.meshuggabeachparty.com
What? Couldn't tell the logo is a link? So click here, what's the hold up? http://www.meshuggabeachparty.com
-
Dennisthe Menace

- Moderator
- Posts: 4981
- Joined: Mon May 05, 2008 8:40 pm
- Location: Ft Lauderdale Florida
- Contact:
Re: Ed Elliott, Step-by-Step Building of 4 Mosrite Custom Clones
SOMEONE GET THE CAMERAS ROLLING!!  ............
make the Mos' of it, choose the 'rite stuff.
.........Owner of 9 Mosrites...
.....proud owner and documented:
1963 "the Ventures" Model s/n #0038
http://www.thevintagerockproject.com/
.........Owner of 9 Mosrites...
.....proud owner and documented:
1963 "the Ventures" Model s/n #0038
http://www.thevintagerockproject.com/
-
gplayer

- Top Producer
- Posts: 433
- Joined: Sat Dec 27, 2008 4:36 am
- Location: Fl
- Contact:
Re: Ed Elliott, Step-by-Step Building of 4 Mosrite Custom Clones
Well, that'll give me something else to drool over. From what I've seen so far, your clones are extraordinary. Looking forward to this series.
-
EFElliott
- Top Producer
- Posts: 502
- Joined: Fri Jun 20, 2008 8:35 pm
- Location: Checotah, Oklahoma USA
- Contact:
Re: Ed Elliott, Step-by-Step Building of 4 Mosrite Custom Clones
First of all, thanks for the kind words, second you'll have to excuse
my messy shop, I've also been working on a major honey-do project
for the wife, I've been building a real big set of custom cabinets for
our kitchen remodel. The first photo is my shop building, I had it build
here at my home about a year ago, it's a 30X40 witch is plenty big
enough for me, directly behind my shop 1/4 a mile through the woods is
Lake Eufaula, at one time it was the worlds largest man-made lake.

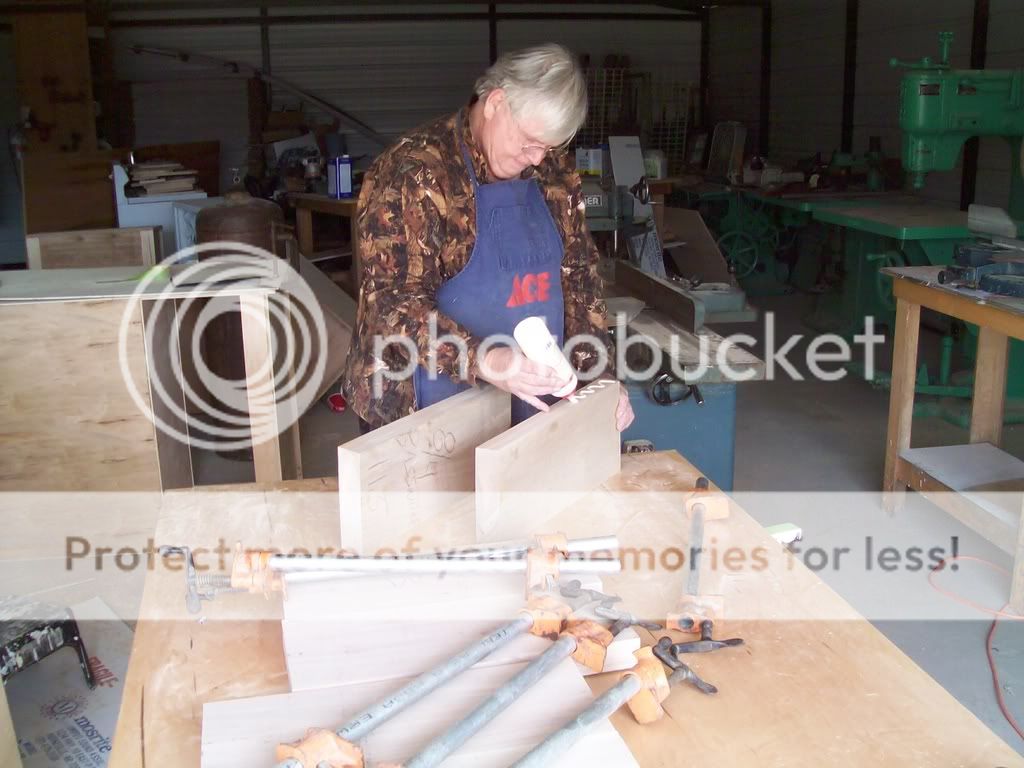
This is the Basswood and Maple for the 4 guitars, one of the '63s is going
to have a flame maple neck, but the flame maple hasn't came in yet,

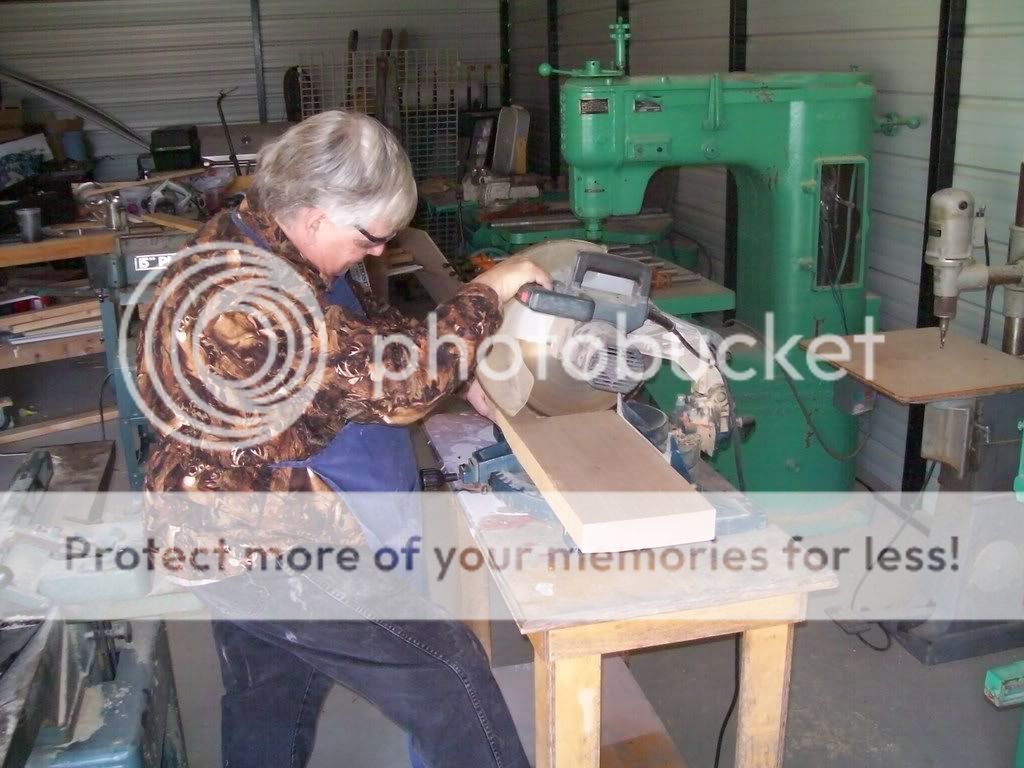
Well, here we go, the first of many constuction photos, I'm cutting the larger
Basswood boards into 20" billets.
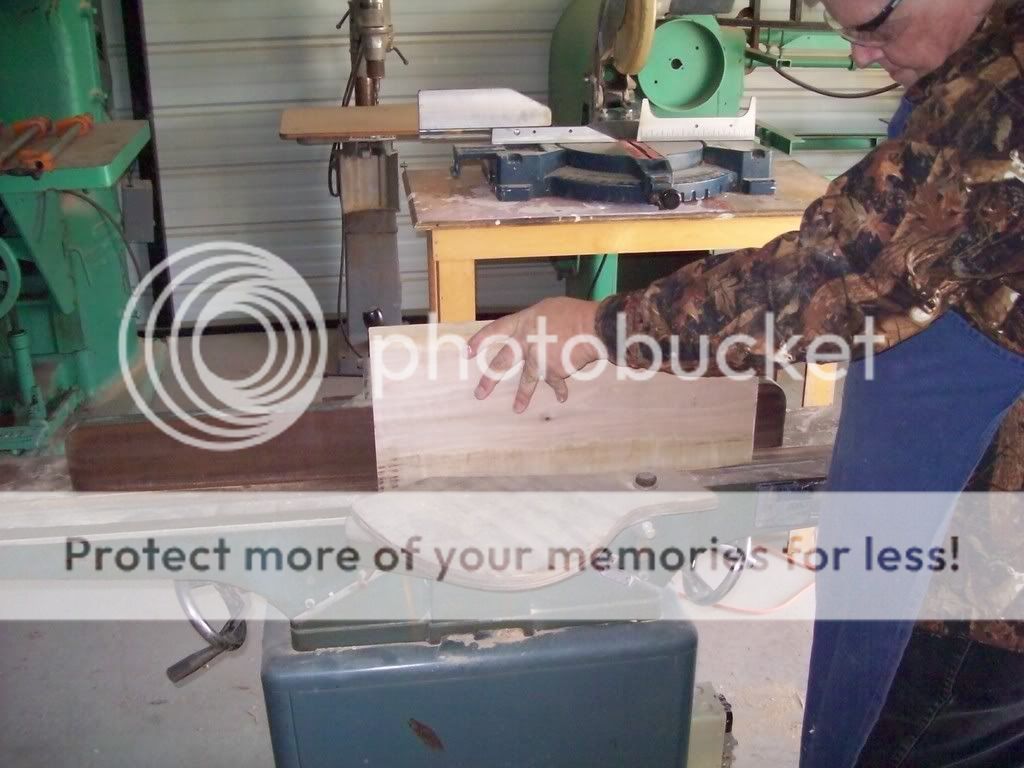
Next after I get the 8, 20" billets cut, I run the edges on the jointer, getting them ready
for glue-up.
Then I search a round the shop to find my clamps and get them lined up.

There's a lot of good glues on the market, I still use my old stand-by Original Titebond.


Well, that's the first one glued-up, 3 more to go tonight, tomorrow I'll pull the clamps off
and mark the profiles.


Well, findly got a round to sawing them out.
 ]
]


Doing some thickness planing


Attaching the profile Jig.

Routing the profile on the pin router.

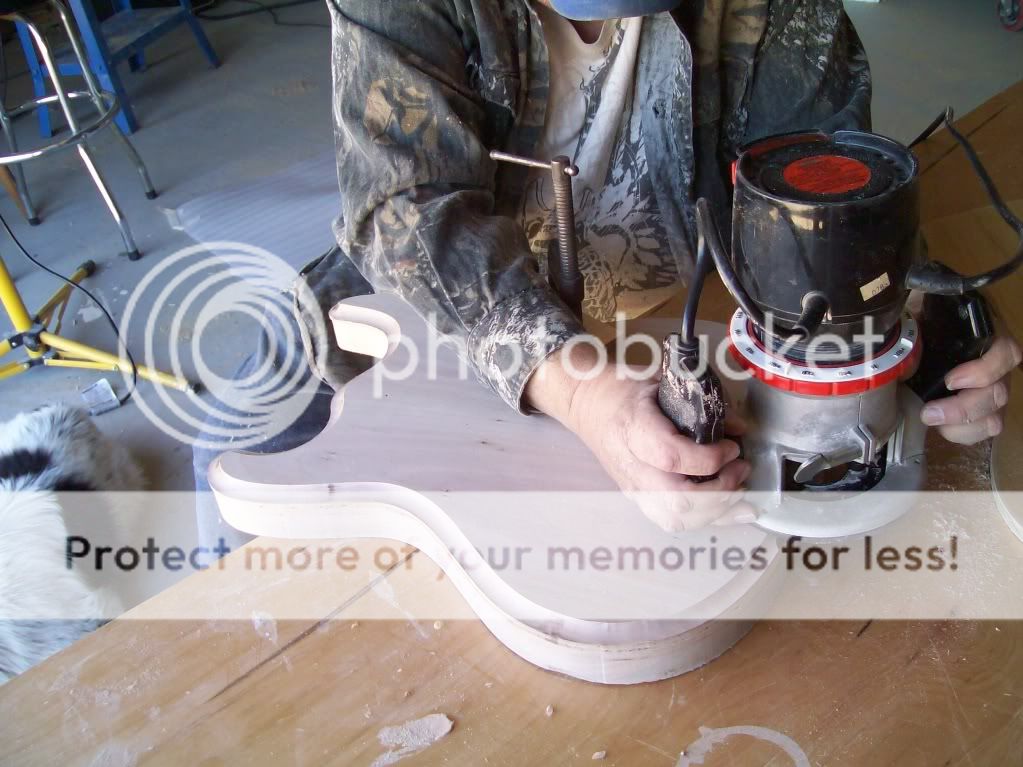
Well, all four bodies are profiled to shape. Next I'm going to take my trusty Sears and Roebuck
hand router and route a cove cut, and then the binding slot around the tops of the bodies.

Now back to the pin router to rout the neck pocket and control cavity.


Next I'm going to start "German Carving" the tops, I do this by hand with a 16 gt grinding disc on my electric drill, and finish up with a palm sander and a bunch of different sanding blocks.


Here I'm installing the 3 ply white/black/white binding, I've always used regular ol' Duco cement to glue binding in place, it works great. I use straping tape to hold the binding in place while the glue is drying, I like it because you can pull it really tight without it breaking.
 .
.


Well, I let the glue dry overnight, this morning I peeled all the tape off, then I took my little scraping tool and scraped the top and sides of the binding flush.

Drilling the hole for the Side-Jack.

Routing the radius in the back edge.

Belt and drum sanding the back contour shape.

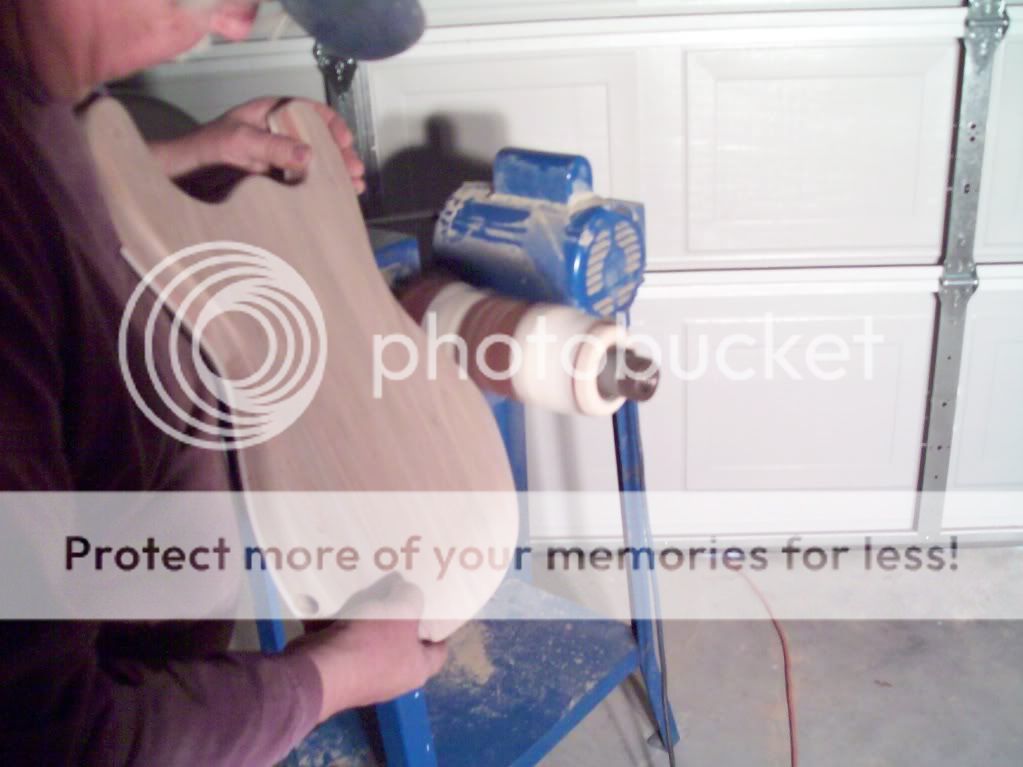
And hours and hours of hand sanding.

"Wha-La" From boards to bodies

Well, I'm putting the bodies in the rack for now and starting the necks, after I set the necks I'll do the routs for the pickups, the 2 bodies that have the concave bottom carve are the "59"
AKA 61-62 Joe Maphis style guitars, they don't need much of a pickup rout, the're going to have the flat mounted "Dog Eared" pickups, also they will be routed for the recessed vibratos units. Going to have the mistake plates too.
Allright, we're starting the necks, I'm making 2 out of Hard Rock Maple and 2 out of Flame Maple, all 4 will have Brazilian Rosewood fingerboards. So far I've planed the maple blocks and Rosewood down to a workable thickness, traced around my patterens with a Sharpe, now we're ready to saw'em out.

Sawing out a '63 Ventures style neck.

Sawing out one of the '62 Maphis style necks.

I've attached a shaping template to back of the neck blank and began pin routing the neck profile.

Free-hand routing the truss rod channel.


Here I'm profiling the fingerboards, first sawing them to shape, then finishing up with the beltsander, gettin' them ready to glue on the necks.


I've let the glue dry overnight with the clamps on. I've drawn out the side profile and heading back to the bandsaw.


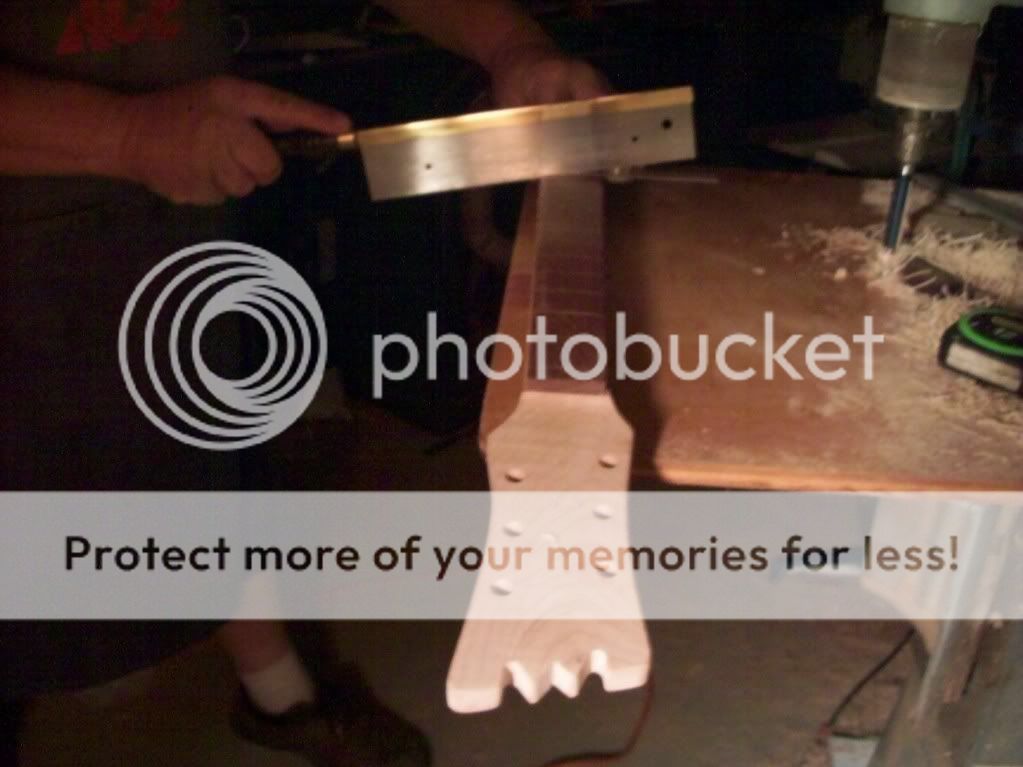
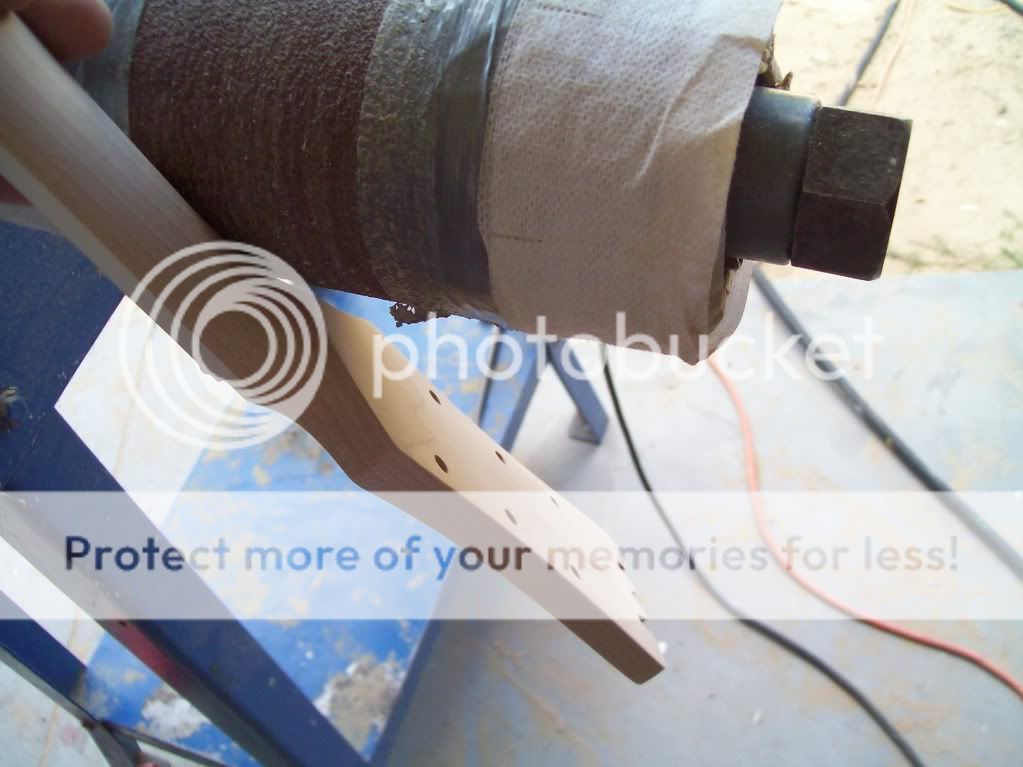
Shaping the head stock on the beltsander.

Now we're ready to carve the "M" on the top of thr head stock and drill for the tuning machines.


Shaping the fingerboard with a 10" radius-sanding block.

Laying out the fret slots with my official Mosrite fret scale template.

Sawing the fret slots with a dovetail saw.

Well I've got all the fret slots cut, I've took a 12" steel rule and a pencil and did the lay-out for the position markers, so we're going to drill 1/16" holes, install and level the position markers, then comes the frets.


I use my little brass hamer to set the frets, clip the ends of the frets with a pair of end-cutting pliers, file the fret ends flush with a 12"file, and then I give the frets a good pressing with my fret press, I like to make sure the frets are seated firm and evenly, then the binding


Well, got the frets in good and tite, time to do the binding, I use my heat gun to soften the binding to make that sharp turn at the end of the fingerboards of the "63s, I've took a hacksaw blade and ground an edge on it, makes a good binding scraping tool.


Well, got the binding all cleaned-up, time for the side position marker dots.


On the 2 '63 style necks I'm cutting the notch for the 1/2 round string guide.


On most of Semie's early Bakersfield guitars he used notched fret for the string guide '60-'63. All the pre-Ventures Maphis' and about a dozen or so of the '63 Ventures models, works real well, and I think it looks cool.


Here I'm drilling the pocket for the truss rod adjustment nut.

I'm going to fit all the necks to the bodies, a little belt-sanding and block-sanding an they fit like a glove, then I'll come back and finish shaping the backs of the necks, make and install the truss rods and glue 3 necks in, ones going to be a bolt-on.


Well it's time to shape the backs of the necks, I use my little belt-sanding machine and my drum sander to remove most of the wood, but all the final shaping I do by hand with sanding blocks, I spend hours hand-sanding to get that "Just Right" vintage Mosrite feel.


Well it's time to make the truss rods, I like to have them installed in the necks before I glue them in the bodies. We're going to cut 3/16" round rod into 18" lenths, Thread one end with a 10-32 die, bend a 45 on the end of the 1/8th X 1/4th flat stock, and drill a hole in it so the round rod can pass through, weld one end, I make the truss rod nuts out of 1/4" hex, drill, tap and saw into 1/2" lenths "Wa La" Adjustable truss rods.


Well the truss rods are installed. Now it's time to glue the necks into the bodies.


Well, the glue is dry, I've pulled all of my clamps off, took my Sears and Roebuck router and a couple of routing Jig I've made, routed all the pickup cavitys, the two '59 Maphis' are also routed for a recessed vibrato units "Just like the originals", I've drilled all the holes for the pickup wires and the ground wires that go under the vibratos. I like to get all this done before I start painting.


I've done a bit of touch-up sanding, masked the fingerboards and blowen all the dust off,
Now we're ready to start painting.

I'm Spraying the first sealer coat on one of the "59 Maphis customs" after 6 coats of sealer and a few days drying time I'll sand the sealer smooth then start the color coats for the sunbursts.

Here I'm flat sanding the sealer-base coat, on the second photo you'll notice the back contour is a lot deeper that the one on your Mosrite, or Mosrite clone, unless you have one of 25 '62 Maphis' or the first few '63 Ventures model. There's so many cool features on the '62 Maphis,
And that's the guitar that sold Nokie and the rest of The Ventures on Mosrite, it's a shame as time went on a lot of the cool features disapeared.


I've got the sealer sanded nice and smooth. Now it's time for the Color!
First translucent yellow, red and then a special mix of black.


Here's a couple of shots of the finished Sunbursts, there's no clear lacquer on the guitars yet, just color, before I spray the clear I've got to scrape the top edge of the binding and clean up any black that's snuck under my tape on the side of the binding. Then it's time to silkscreen the Simi-World Famous "E.F.Elliott Logo" then we fill the ol' paint gun up clear nitrocellulose lacquer and spray 8 coats.


The side of the binding I tape of with 3M fine line tape, the top I scrape with a razor blade inbedded in a little guide tool, it gives you a good sharp line.

After the binding is cleaned up, I like to silkscreen my logo on the necks, silkscreening is a lot like using a stencil and spreading the paint with sweege.


I've just finished shooting 8 coats of clear nitrocellulose lacquer on the guitars, so we're going to let'em hang here a while and dry.
While the finishes are drying, that's when I make my hardware, the tremelos, bridges, mutes, pickups, pickguards and all the other little goodys.
We're going to start with all the aluminum parts first,"The Vibra-Rite tremelo units "I've just shook these castings out of the sand and trimmed away the gateing, they come out of the sand pretty darn rought, but with
a little grinding,sandining,drilling and polishing we'll have some cool looking vintage style parts soon.

Stay Tuned! More to come.
Eddy
my messy shop, I've also been working on a major honey-do project
for the wife, I've been building a real big set of custom cabinets for
our kitchen remodel. The first photo is my shop building, I had it build
here at my home about a year ago, it's a 30X40 witch is plenty big
enough for me, directly behind my shop 1/4 a mile through the woods is
Lake Eufaula, at one time it was the worlds largest man-made lake.
This is the Basswood and Maple for the 4 guitars, one of the '63s is going
to have a flame maple neck, but the flame maple hasn't came in yet,
Well, here we go, the first of many constuction photos, I'm cutting the larger
Basswood boards into 20" billets.
Next after I get the 8, 20" billets cut, I run the edges on the jointer, getting them ready
for glue-up.
Then I search a round the shop to find my clamps and get them lined up.
There's a lot of good glues on the market, I still use my old stand-by Original Titebond.
Well, that's the first one glued-up, 3 more to go tonight, tomorrow I'll pull the clamps off
and mark the profiles.
Well, findly got a round to sawing them out.
]Doing some thickness planing
Attaching the profile Jig.
Routing the profile on the pin router.
Well, all four bodies are profiled to shape. Next I'm going to take my trusty Sears and Roebuck
hand router and route a cove cut, and then the binding slot around the tops of the bodies.
Now back to the pin router to rout the neck pocket and control cavity.
Next I'm going to start "German Carving" the tops, I do this by hand with a 16 gt grinding disc on my electric drill, and finish up with a palm sander and a bunch of different sanding blocks.
Here I'm installing the 3 ply white/black/white binding, I've always used regular ol' Duco cement to glue binding in place, it works great. I use straping tape to hold the binding in place while the glue is drying, I like it because you can pull it really tight without it breaking.
.Well, I let the glue dry overnight, this morning I peeled all the tape off, then I took my little scraping tool and scraped the top and sides of the binding flush.
Drilling the hole for the Side-Jack.
Routing the radius in the back edge.
Belt and drum sanding the back contour shape.
And hours and hours of hand sanding.
"Wha-La" From boards to bodies
Well, I'm putting the bodies in the rack for now and starting the necks, after I set the necks I'll do the routs for the pickups, the 2 bodies that have the concave bottom carve are the "59"
AKA 61-62 Joe Maphis style guitars, they don't need much of a pickup rout, the're going to have the flat mounted "Dog Eared" pickups, also they will be routed for the recessed vibratos units. Going to have the mistake plates too.
Allright, we're starting the necks, I'm making 2 out of Hard Rock Maple and 2 out of Flame Maple, all 4 will have Brazilian Rosewood fingerboards. So far I've planed the maple blocks and Rosewood down to a workable thickness, traced around my patterens with a Sharpe, now we're ready to saw'em out.
Sawing out a '63 Ventures style neck.
Sawing out one of the '62 Maphis style necks.
I've attached a shaping template to back of the neck blank and began pin routing the neck profile.
Free-hand routing the truss rod channel.
Here I'm profiling the fingerboards, first sawing them to shape, then finishing up with the beltsander, gettin' them ready to glue on the necks.
I've let the glue dry overnight with the clamps on. I've drawn out the side profile and heading back to the bandsaw.
Shaping the head stock on the beltsander.
Now we're ready to carve the "M" on the top of thr head stock and drill for the tuning machines.
Shaping the fingerboard with a 10" radius-sanding block.
Laying out the fret slots with my official Mosrite fret scale template.
Sawing the fret slots with a dovetail saw.
Well I've got all the fret slots cut, I've took a 12" steel rule and a pencil and did the lay-out for the position markers, so we're going to drill 1/16" holes, install and level the position markers, then comes the frets.
I use my little brass hamer to set the frets, clip the ends of the frets with a pair of end-cutting pliers, file the fret ends flush with a 12"file, and then I give the frets a good pressing with my fret press, I like to make sure the frets are seated firm and evenly, then the binding
Well, got the frets in good and tite, time to do the binding, I use my heat gun to soften the binding to make that sharp turn at the end of the fingerboards of the "63s, I've took a hacksaw blade and ground an edge on it, makes a good binding scraping tool.
Well, got the binding all cleaned-up, time for the side position marker dots.
On the 2 '63 style necks I'm cutting the notch for the 1/2 round string guide.
On most of Semie's early Bakersfield guitars he used notched fret for the string guide '60-'63. All the pre-Ventures Maphis' and about a dozen or so of the '63 Ventures models, works real well, and I think it looks cool.
Here I'm drilling the pocket for the truss rod adjustment nut.
I'm going to fit all the necks to the bodies, a little belt-sanding and block-sanding an they fit like a glove, then I'll come back and finish shaping the backs of the necks, make and install the truss rods and glue 3 necks in, ones going to be a bolt-on.
Well it's time to shape the backs of the necks, I use my little belt-sanding machine and my drum sander to remove most of the wood, but all the final shaping I do by hand with sanding blocks, I spend hours hand-sanding to get that "Just Right" vintage Mosrite feel.
Well it's time to make the truss rods, I like to have them installed in the necks before I glue them in the bodies. We're going to cut 3/16" round rod into 18" lenths, Thread one end with a 10-32 die, bend a 45 on the end of the 1/8th X 1/4th flat stock, and drill a hole in it so the round rod can pass through, weld one end, I make the truss rod nuts out of 1/4" hex, drill, tap and saw into 1/2" lenths "Wa La" Adjustable truss rods.
Well the truss rods are installed. Now it's time to glue the necks into the bodies.
Well, the glue is dry, I've pulled all of my clamps off, took my Sears and Roebuck router and a couple of routing Jig I've made, routed all the pickup cavitys, the two '59 Maphis' are also routed for a recessed vibrato units "Just like the originals", I've drilled all the holes for the pickup wires and the ground wires that go under the vibratos. I like to get all this done before I start painting.
I've done a bit of touch-up sanding, masked the fingerboards and blowen all the dust off,
Now we're ready to start painting.
I'm Spraying the first sealer coat on one of the "59 Maphis customs" after 6 coats of sealer and a few days drying time I'll sand the sealer smooth then start the color coats for the sunbursts.
Here I'm flat sanding the sealer-base coat, on the second photo you'll notice the back contour is a lot deeper that the one on your Mosrite, or Mosrite clone, unless you have one of 25 '62 Maphis' or the first few '63 Ventures model. There's so many cool features on the '62 Maphis,
And that's the guitar that sold Nokie and the rest of The Ventures on Mosrite, it's a shame as time went on a lot of the cool features disapeared.
I've got the sealer sanded nice and smooth. Now it's time for the Color!
First translucent yellow, red and then a special mix of black.
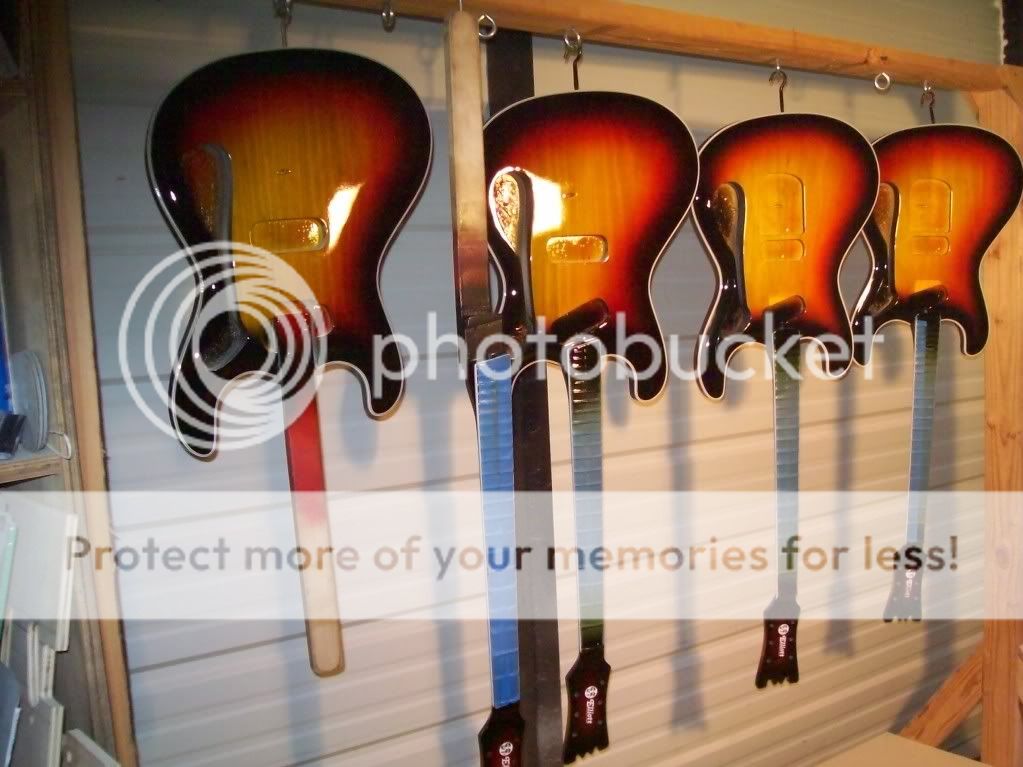
Here's a couple of shots of the finished Sunbursts, there's no clear lacquer on the guitars yet, just color, before I spray the clear I've got to scrape the top edge of the binding and clean up any black that's snuck under my tape on the side of the binding. Then it's time to silkscreen the Simi-World Famous "E.F.Elliott Logo" then we fill the ol' paint gun up clear nitrocellulose lacquer and spray 8 coats.
The side of the binding I tape of with 3M fine line tape, the top I scrape with a razor blade inbedded in a little guide tool, it gives you a good sharp line.
After the binding is cleaned up, I like to silkscreen my logo on the necks, silkscreening is a lot like using a stencil and spreading the paint with sweege.
I've just finished shooting 8 coats of clear nitrocellulose lacquer on the guitars, so we're going to let'em hang here a while and dry.
While the finishes are drying, that's when I make my hardware, the tremelos, bridges, mutes, pickups, pickguards and all the other little goodys.
We're going to start with all the aluminum parts first,"The Vibra-Rite tremelo units "I've just shook these castings out of the sand and trimmed away the gateing, they come out of the sand pretty darn rought, but with
a little grinding,sandining,drilling and polishing we'll have some cool looking vintage style parts soon.
Stay Tuned! More to come.
Eddy
-
MWaldorf
- Site Admin
- Posts: 3264
- Joined: Sat May 24, 2008 1:21 pm
- Location: Alameda, California
- Contact:
Re: Ed Elliott, Step-by-Step Building of 4 Mosrite Custom Clones
Wow Eddy, these shots are great! So, am I dreaming or is there a sunburst VIII body on the rack behind you in that last photo? 
Oy vey - it's MESHUGGA BEACH PARTY - The world's premier Jewish Surf Music Band!
What? Couldn't tell the logo is a link? So click here, what's the hold up? http://www.meshuggabeachparty.com
What? Couldn't tell the logo is a link? So click here, what's the hold up? http://www.meshuggabeachparty.com
-
EFElliott
- Top Producer
- Posts: 502
- Joined: Fri Jun 20, 2008 8:35 pm
- Location: Checotah, Oklahoma USA
- Contact:
Re: Ed Elliott, Step-by-Step Building of 4 Mosrite Custom Clones
Yep Mel,
That's a VIII just like yours in the back ground, I refinished the body and neck
for Mosrite Guitar Collector, Dr. Michael Marks out of Nashville, got to
get it shipped off soon.
Eddy
That's a VIII just like yours in the back ground, I refinished the body and neck
for Mosrite Guitar Collector, Dr. Michael Marks out of Nashville, got to
get it shipped off soon.
Eddy
-
MWaldorf
- Site Admin
- Posts: 3264
- Joined: Sat May 24, 2008 1:21 pm
- Location: Alameda, California
- Contact:
Re: Ed Elliott, Step-by-Step Building of 4 Mosrite Custom Clones
EFElliott wrote:Yep Mel,
That's a VIII just like yours in the back ground, I refinished the body and neck
for Mosrite Guitar Collector, Dr. Michael Marks out of Nashville, got to
get it shipped off soon.
Eddy
Cool! The picture of that guitar on his website was the first place I saw a three pickup Mosrite and realized "This is possible!" So when you next talk to him, please let him know I say thanks!
Oy vey - it's MESHUGGA BEACH PARTY - The world's premier Jewish Surf Music Band!
What? Couldn't tell the logo is a link? So click here, what's the hold up? http://www.meshuggabeachparty.com
What? Couldn't tell the logo is a link? So click here, what's the hold up? http://www.meshuggabeachparty.com
-
ElTwang

- Top Producer
- Posts: 616
- Joined: Mon Jun 16, 2008 11:51 am
- Location: Copenhagen, Denmark
- Contact:
Re: Ed Elliott, Step-by-Step Building of 4 Mosrite Custom Clones
Cool thread starting here! Do you have a favorite part of the guitar building process, Ed?
Return to “Mosrite & Clone, Projects, Parts & Accessories Q&A”
Who is online
Users browsing this forum: No registered users and 69 guests