Had a practice run with the coping saw today.
Really hard work. The blade gets all jammed up in the shavings.
It got t he job done though.
More practice needed before the big run.
DIY Pickguard
-
MissionBrown
- Senior Member
- Posts: 124
- Joined: Tue Sep 28, 2010 4:04 pm
- Location: Australia
- Contact:
-
MissionBrown
- Senior Member
- Posts: 124
- Joined: Tue Sep 28, 2010 4:04 pm
- Location: Australia
- Contact:
Re: DIY Pickguard
Got some more practice in the other day.
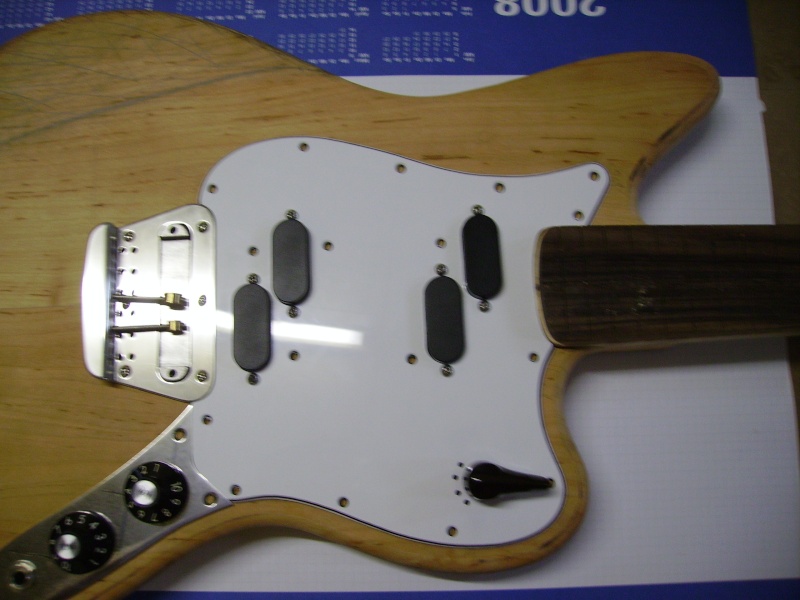
This time with the router. I put half of a Fender Bullet/Mustang Bass pickup in my cheap flying V.
In person it's not perfect, pretty close considering that I wasn't working with a decent template and still aren't that great with the router.
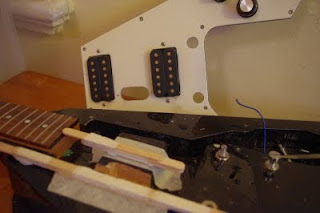
I still want to do more practice before the big one.
There's at least one more scratch plate to be done before I hit the Hummingbird.
This time with the router. I put half of a Fender Bullet/Mustang Bass pickup in my cheap flying V.
In person it's not perfect, pretty close considering that I wasn't working with a decent template and still aren't that great with the router.
I still want to do more practice before the big one.
There's at least one more scratch plate to be done before I hit the Hummingbird.

-
Veenture

- Master Contributor
- Posts: 4127
- Joined: Sat Jan 03, 2009 12:07 pm
- Location: The Netherlands
- Contact:
Re: DIY Pickguard
Daz rite, practice makes poifectMissionBrown wrote:Got some more practice in the other day.
I still want to do more practice before the big one.
-
MWaldorf

- Site Admin
- Posts: 3264
- Joined: Sat May 24, 2008 1:21 pm
- Location: Alameda, California
- Contact:
Re: DIY Pickguard
MissionBrown wrote:
OK, I have to ask, how did you wire in the extra pickup?
Oy vey - it's MESHUGGA BEACH PARTY - The world's premier Jewish Surf Music Band!

What? Couldn't tell the logo is a link? So click here, what's the hold up? http://www.meshuggabeachparty.com
What? Couldn't tell the logo is a link? So click here, what's the hold up? http://www.meshuggabeachparty.com
-
MissionBrown
- Senior Member
- Posts: 124
- Joined: Tue Sep 28, 2010 4:04 pm
- Location: Australia
- Contact:
Re: DIY Pickguard
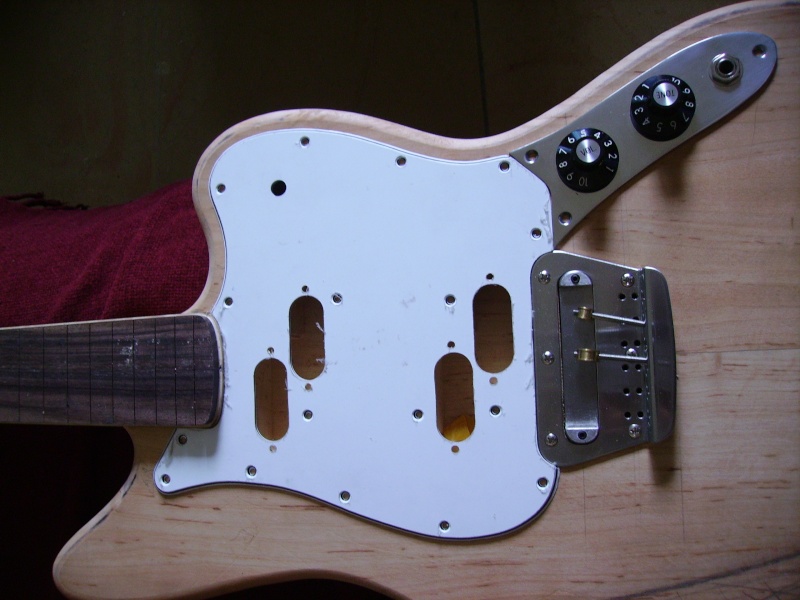
MWaldorf wrote:MissionBrown wrote:http://1.bp.blogspot.com/-uGzwtNrFDag/TeCf2TMQzaI/AAAAAAAAAbo/7ws3VIapeHM/s320/IMGP4292+copy.jpg
OK, I have to ask, how did you wire in the extra pickup?
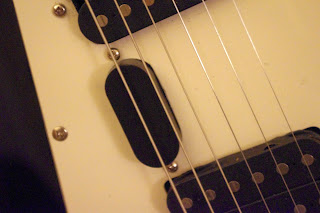
It's wired to a separate output.
Being half a pickup, the output is a little low, but seems to be beneficial in this application
-
MissionBrown
- Senior Member
- Posts: 124
- Joined: Tue Sep 28, 2010 4:04 pm
- Location: Australia
- Contact:
Re: DIY Pickguard
This is a tricky game.
Because the Dremel router only comes with two guide collars, I have had to do some tricksy things to get the shapes I need. I have had to make my template 9mm larger in all directions than the object I'm making/cloning.
It's a bit confusing, but I've had to make an extra oversized template, to make an oversized template in order to make what i want to make.
Talk about a slow process!
Currently working on adding a mini humbucker pulled from a Gretsch Pro Jet.
But it's not standard mini humbucker sized. So I can't just get an off the shelf bucker to mini adaptor!
As I said in an earlier post. Practice practice practice.
-
MissionBrown
- Senior Member
- Posts: 124
- Joined: Tue Sep 28, 2010 4:04 pm
- Location: Australia
- Contact:
Re: DIY Pickguard
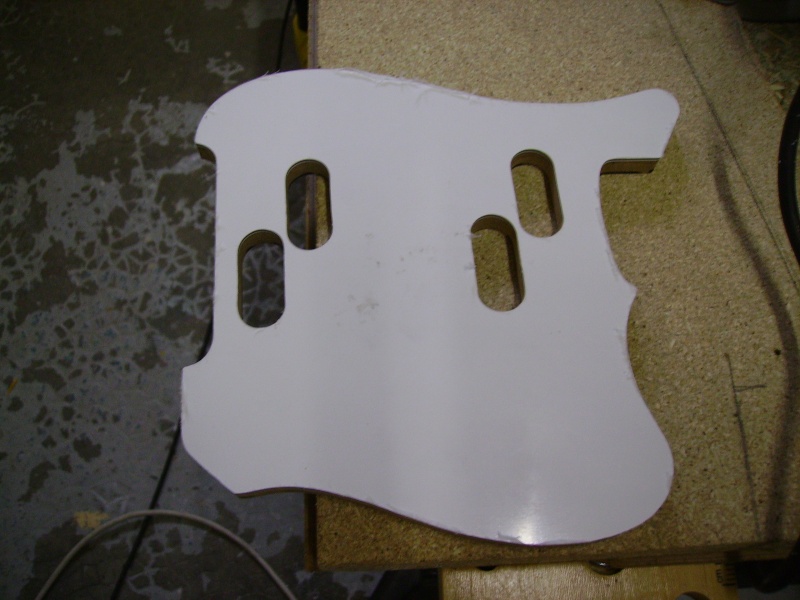
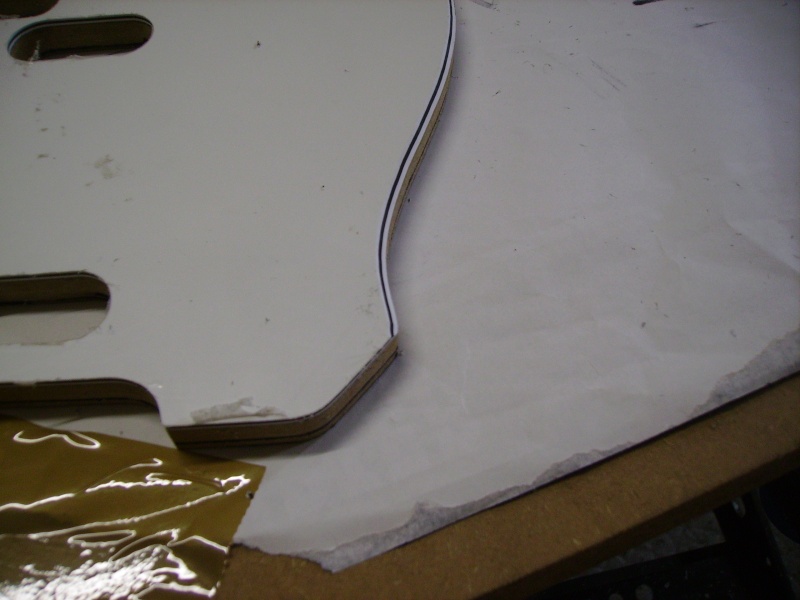
Finally started making templates
I knocked three out in short order, pretty easy on 3.6mm plywood.
Plastic seems much more difficult to work with.
Here's the story and some pics.
http://theawesomepowerofrockets.blogspot.com/2011/11/diy-scratch-plates.html
I knocked three out in short order, pretty easy on 3.6mm plywood.
Plastic seems much more difficult to work with.
Here's the story and some pics.
http://theawesomepowerofrockets.blogspot.com/2011/11/diy-scratch-plates.html
-
slapshot
- Active Member
- Posts: 93
- Joined: Mon Apr 12, 2010 7:28 am
- Location: Australia
- Contact:
Re: DIY Pickguard
JimPage wrote:MissionBrown, you have a great blog; I somehow discovered it before you became active here. I must have been looking up something on Google that led me to your blog.
me too.one of those sites that seems to turn up in my google image searching often.
thanks to that i stole a guyatone lg-125 at auction the other night
-
MissionBrown
- Senior Member
- Posts: 124
- Joined: Tue Sep 28, 2010 4:04 pm
- Location: Australia
- Contact:
Re: DIY Pickguard
slapshot wrote:JimPage wrote:MissionBrown, you have a great blog; I somehow discovered it before you became active here. I must have been looking up something on Google that led me to your blog.
me too.one of those sites that seems to turn up in my google image searching often.
thanks to that i stole a guyatone lg-125 at auction the other night
aww thanks folks.
I don't get to update it half as much as I'd like.
I started it mainly because I couldn't find reliable information on so many bits of gear and how to do certain things.
Glad to be of service.
-
ludobag
- Top Producer
- Posts: 291
- Joined: Sun Nov 20, 2011 9:32 am
- Location: France
- Contact:
Re: DIY Pickguard
this is how i do 
for better result need to have less material to rout at the end ,then cut your blanck 2 or 3 mm max bigger
a scroll saw ,a router is needed (and if you can a table router for the 45 °)and a good template (the harder in fact )

the black marks are where you have to made the angle (it avoid to chanfer all the guard )
)

with the 45° router bit think where is the upper side if not you will have a nice lefty guard

test on scraps for hight


careful of your hand for sure
drill the all
lot of work for a thing at 30 dollars but if it didn't exist you have no choice
it is the first and the more you made better they are ,for my telemaster it become really more easy i just have to find now a stagered drill cause my chanfer bit is silly ,she like to make the chanfer side to the hole
for better result need to have less material to rout at the end ,then cut your blanck 2 or 3 mm max bigger
a scroll saw ,a router is needed (and if you can a table router for the 45 °)and a good template (the harder in fact )
the black marks are where you have to made the angle (it avoid to chanfer all the guard
with the 45° router bit think where is the upper side if not you will have a nice lefty guard
test on scraps for hight
careful of your hand for sure
drill the all
lot of work for a thing at 30 dollars but if it didn't exist you have no choice
it is the first and the more you made better they are ,for my telemaster it become really more easy i just have to find now a stagered drill cause my chanfer bit is silly ,she like to make the chanfer side to the hole
Return to “Mosrite & Clone, Projects, Parts & Accessories Q&A”
Who is online
Users browsing this forum: No registered users and 369 guests