Mosrite Bass Clone: Project # 4

User avatar
dubtrub
Administrator
Posts: 3795
Joined: Sun May 04, 2008 10:12 am
Contact:

Mosrite Bass Clone: Project # 4

Postby dubtrub » Sat Aug 09, 2008 6:18 pm

After Dennis suggested and others joined in with the idea for a step by step description of a Mosrite Bass clone project, I decided that if I was going to chronicle this project I had better dig out the camera and start before it got too far along. As I stated else where I am not going to be using templates for shaping the neck, body or fret board. I have paper tracings of a Mosrite bass and these will be transferred directly onto the wood surface. All shaping will be done by hand tools. So here goes.

The body is made of two pieces of alder which I purchased last summer from a wood supplier in Washington state. At that time the wood was freshly cut, so it has been curing for a year and is now ready for building. After gluing the two parts together I took it to a cabinet shop and had them plane both sides to a thickness of 1 5/8". Actually there are three pieces glued together as I needed another 1 1/4" for the upper rear bout.

Here you see that the shape has been drawn onto the wood and band sawed to rough shape. After this it will go to the drill press where I'll mount a 2" drum sander to final shape it. If I was using a template, this is where I would use a router to trim to final shape. You can see the pickguard drawn on the body. I will be using a 1/2" router bit to create the German carve, so using that measurement and a pattern, I draw the pickguard in place in order to determine the neck pickup location. It also provides a good reference for locating everything else. The main thing needed is a center line drawn from the center of the neck pocket to the strap button on the bottom end of the body. Without a center line it is virtually impossible to do a proper layout for all the parts to fit or line up. Otherwise you will be drilling holes and filling them in.

https://imageshack.com/i/8bdscn0070no4j

http://imageshack.com/a/img58/4931/dscn0074wy0.jpg

https://imageshack.com/i/41dscn0082rx5j


For the neck I'm using (3) 1"X2" hard rock maple boards laminated together. Due to barely having enough material for the length of a bass neck, it was necessary to stagger the boards when gluing them together in order to have sufficient wood for the offset angle of the headstock and body end of the neck. Next I will rout the truss rod channel.

https://imageshack.com/i/1mdscn0075ol3j

In the following photo you can see the paper pattern for the headstock and it along with center lines for referrence has been drawn on the neck board. Also you can see the blank rosewood fretboard.

https://imageshack.com/i/8bdscn0072ud7j

I have now cut the fret slots. This is a simple jig which is basically a miter box, however it is made so that the modified rib back saw will only cut so deep before stopping. I modified the saw by grinding down the edges of the saw teeth to the necessary width for the fret slot.

https://imageshack.com/i/8bdscn0076ae8j

Next I will be routing the truss rod channel and modifying an existing trussrod to fit the requirement for this particular scale length which is 30 1/4". I use a dial micrometer and the fret scale calculator on the Stewart McDonald website to determine the exact measurements for each fret slot.

Questions or comments are welcomed throughout this project.

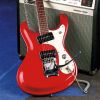
EDITED: Since this project has now been completed I'll post a photo of the finished product, but please continue through the other photo's of the building process.

Image
Danny Ellison

User avatar
Dennisthe Menace
Moderator
Posts: 4981
Joined: Mon May 05, 2008 8:40 pm
Location: Ft Lauderdale Florida
Contact:

Re: Mosrite Bass Clone Project

Postby Dennisthe Menace » Sat Aug 09, 2008 7:33 pm

2 Song Titles come to mind for Background Theme Music for Danny's Project......
1) Journey-"Don't Stop Believing"----Make it a reality. :mrgreen:
2) Boston--"Don't Look Back"--------Always look ahead, move Forward. ;)
make the Mos' of it, choose the 'rite stuff.
.........Owner of 9 Mosrites...
.....proud owner and documented:
1963 "the Ventures" Model s/n #0038
http://www.thevintagerockproject.com/

User avatar
MWaldorf
Site Admin
Posts: 3264
Joined: Sat May 24, 2008 1:21 pm
Location: Alameda, California
Contact:

Re: Mosrite Bass Clone Project

Postby MWaldorf » Sat Aug 09, 2008 11:11 pm

Danny,

Looks great - thanks for sharing! For tricks of the trade, I particularly like the wood block offset for the headstock!

So, is this going to be a one pickup or two pickup model? A sidejack? What color?

Mel
Oy vey - it's MESHUGGA BEACH PARTY - The world's premier Jewish Surf Music Band!

Image

What? Couldn't tell the logo is a link? So click here, what's the hold up? http://www.meshuggabeachparty.com

User avatar
dubtrub
Administrator
Posts: 3795
Joined: Sun May 04, 2008 10:12 am
Contact:

Re: Mosrite Bass Clone Project

Postby dubtrub » Tue Aug 12, 2008 3:37 pm

MWaldorf wrote:So, is this going to be a one pickup or two pickup model? A sidejack? What color?

This will be a two pickup bass, no sidejack, and as for color I haven't decided yet, but leaning toward candy apple red or blue.

Today I got a little bit done. I'd like to say I'm getting beyond the hard part but actually there is no easy part to scratch building a guitar.

I started off by shortening a truss rod. I purchased several of these trussrod from a luthier in Taiwan, that sells on eBay. He has the best two way trussrod I've seen and for the right price. Here's the link on eBay. He sells various lengths, but didn't have one the right size for a Mosrite, so I bought a longer one then brazed it together where needed then cut it to length.

Image

After getting the trussrod finished, I moved on to routing the trussrod channel. I do this while the wood is still square and use the guide on the router to complete the process.

Image

Here you see that I have cut the neck to rough shape. After this I will clue on extra pieces of wood to make the 'ears' on the head stock. I have order a set of Elephant ears tuners and will wait until I received the to fit them to the paper pattern before cutting out the headstock to final shape.

Image

This is just an over view picture ot the project to date.

Image
Danny Ellison

User avatar
dubtrub
Administrator
Posts: 3795
Joined: Sun May 04, 2008 10:12 am
Contact:

Re: Mosrite Bass Clone: Project # 4

Postby dubtrub » Sat Aug 16, 2008 3:49 pm

The building process has grown to a snails pace with the shop running around 100 degrees and three hurricane fans running. At any rate I've been able to endure a few hours each day. However, not without difficulties.

I started sanding both the body and the neck to a workable surface. The body had to 'trued up' to prepare for the routing to start the German carve. But since the body is the easy part, I will next direct all my attention to the neck.

Image

All I am doing in this photo is getting the neck into a semi squared shape in order to start the other stages. Everything must be squared and trued and again the center line reference is critical. Actually everything has a center line including the raw fret board.

Image

Now I have shaped the headstock and located the tuning peg holes and drilled them with a pilot drill. I used the largest size drill bit I had to get the holes close to final dimension but it was still necessary to use the Dremel tool with a router carving bit to enlarge the holes for the peg heads to fit. I got over zealous and tried a large drill bit to quickly, only to damage the wood. darn! I glued the fractional size small pieces back in but now, 'there goes the chance for a clear finish'. As you can clearly see the repaired damaged area in the photo, it basically looks like crap. I hate not having proper tools to work with, but since I don't normally build basses, I have no need for bits so large.

Image
Image
Danny Ellison

User avatar
Dennisthe Menace
Moderator
Posts: 4981
Joined: Mon May 05, 2008 8:40 pm
Location: Ft Lauderdale Florida
Contact:

Re: Mosrite Bass Clone: Project # 4

Postby Dennisthe Menace » Sat Aug 16, 2008 9:46 pm

...................did U decide on the color yet???Image
make the Mos' of it, choose the 'rite stuff.
.........Owner of 9 Mosrites...
.....proud owner and documented:
1963 "the Ventures" Model s/n #0038
http://www.thevintagerockproject.com/

User avatar
dubtrub
Administrator
Posts: 3795
Joined: Sun May 04, 2008 10:12 am
Contact:

Re: Mosrite Bass Clone: Project # 4

Postby dubtrub » Sat Aug 16, 2008 10:04 pm

Dennisthe Menace wrote:...................did U decide on the color yet???Image

Not yet. I wait until it finished then decide. Lots of options but I'm leaning towards candy apple blue.

BTW, I've been applying water to the damage area around the peg head hole. It raises the wood by swelling the grain, then I sand it smooth and repeat. It's just about disappeared, so it's not as bad of a screw up as I first thought. Whew!
Danny Ellison

User avatar
dubtrub
Administrator
Posts: 3795
Joined: Sun May 04, 2008 10:12 am
Contact:

Re: Mosrite Bass Clone: Project # 4

Postby dubtrub » Mon Aug 18, 2008 1:44 pm

I have now installed the fret board, trimmed the step down end of the neck, and radius the fret board. I use a template shown in another photo for gauging the radius as I sand along the fret board using a straight edge. Also, you can see at the end there is a section of rosewood missing. I had to use a standard length piece of rosewood to make the fret board (as that is all I had) and match and fit the corner piece on after the board was set. Another thing I should mention. I use masking tape over the trussrod in the channel so as to not allow glue to run into the channel rendering the truss rod adjustment useless. The board is glued on using Elmer's Carpenter's glue.

Image

In this photo, I am gluing on the binding. I use medium CA glue which allows the glue to stay put and not run all over the place while moving along the length of the binding. Once the binding has set, I then use medium grit sandpaper to dress down the plastic binding to match the height of the rosewood board.

Image

Although I didn't photograph it, I use masking tape on the fret board to draw the position for the position markers, rather than draw directly onto the wood. I use a micrometer to get a precise measurement for the location of the dots both on the top and sides of the neck. Once the markers are located, I use the drill press to drill the holes about 3/16" deep. The markers come in little plastic rods. I simply apply a little CA glue on the end and press it into the hole. After a few second I use the nippers to trim of the rod and move on to the next hole.

Image

I should have turned the neck around so as to show the black side dots. Oh well! Nothing special here, this photo just depicts the fret wire and the radius gauge. The neck is now ready for fretting.

Image
Danny Ellison

User avatar
Bushers
Valued Member
Posts: 192
Joined: Wed Jul 16, 2008 7:34 pm
Location: Tulsa, OK (UK (Southampton) Expat)
Contact:

Re: Mosrite Bass Clone: Project # 4

Postby Bushers » Mon Aug 18, 2008 3:06 pm

dubtrub wrote:I use a micrometer to get a precise measurement for the location of the dots both on the top and sides of the neck.

That'll be a VERNIER! :D

Cant get something like that passed an engineer......looking good!!!
Jason (Bushers)
1965 Ventures II Model ~ #B233

User avatar
dubtrub
Administrator
Posts: 3795
Joined: Sun May 04, 2008 10:12 am
Contact:

Re: Mosrite Bass Clone: Project # 4

Postby dubtrub » Mon Aug 18, 2008 3:59 pm

Bushers wrote:
dubtrub wrote:I use a micrometer to get a precise measurement for the location of the dots both on the top and sides of the neck.

That'll be a VERNIER! :D

Cant get something like that passed an engineer......looking good!!!

:oops:

Here's a couple more shots as I have now had a chance to install all the frets. Next I will be dressing the frets but I won't be photographing that part as my close up shots don't show up very well. Basically I've got a concave fret file and a large whet stone. I will level the frets with the stone similar as one would use a large file. After the frets are level, I will re-crown them with the fret file. I have small stainless steel fretboard protectors from StewMac that I lay over each fret throughout the dressing process. For someone without the protectors, blue painters masking tape will work.

I use a Dremel tool with a cutoff wheel to cut the fret wire. After cutting it to the proper length of each fret slot, I cut a little notch in the end of the tang to allow the fret to hang over the edge of the binding. Mosrites were not done this way, they had the frets installed and the ends dressed prior to applying the binding. Before setting the fret into the slot, I use the nippers to hold it and use a plastic mallet to tap the fret wire into a curve as depicted in the photo. This curve is accented a little more than the radius of the fretboard. It allows for easy fret installation and the fret lays into place quite nicely. With this process it requires very little if any leveling as long as the fretboard is perfectly straight.

ImageImage
Danny Ellison


Return to “Mosrite & Clone, Projects, Parts & Accessories Q&A”

Who is online

Users browsing this forum: No registered users and 63 guests