Star Swirl *** 1st build
-
cmiller0034
- Top Producer
- Posts: 221
- Joined: Tue Oct 15, 2013 1:44 pm
- Location: Louisville, Ky
Re: Star Swirl *** 1st build
I Hope John H doesn't think I was being a smart alek in my last post. I was attempting to make a funny Router Pun, and just realized that when you read his last post and then read mine it looks like I was trying to correct his spelling. And I look like a jerk. I was'nt hope, he did not take it that way. I so, I'm sorry!
"If the women don't find you handsome, they should at least find you handy."- a wise man
-
cmiller0034
- Top Producer
- Posts: 221
- Joined: Tue Oct 15, 2013 1:44 pm
- Location: Louisville, Ky
Re: Star Swirl *** 1st build
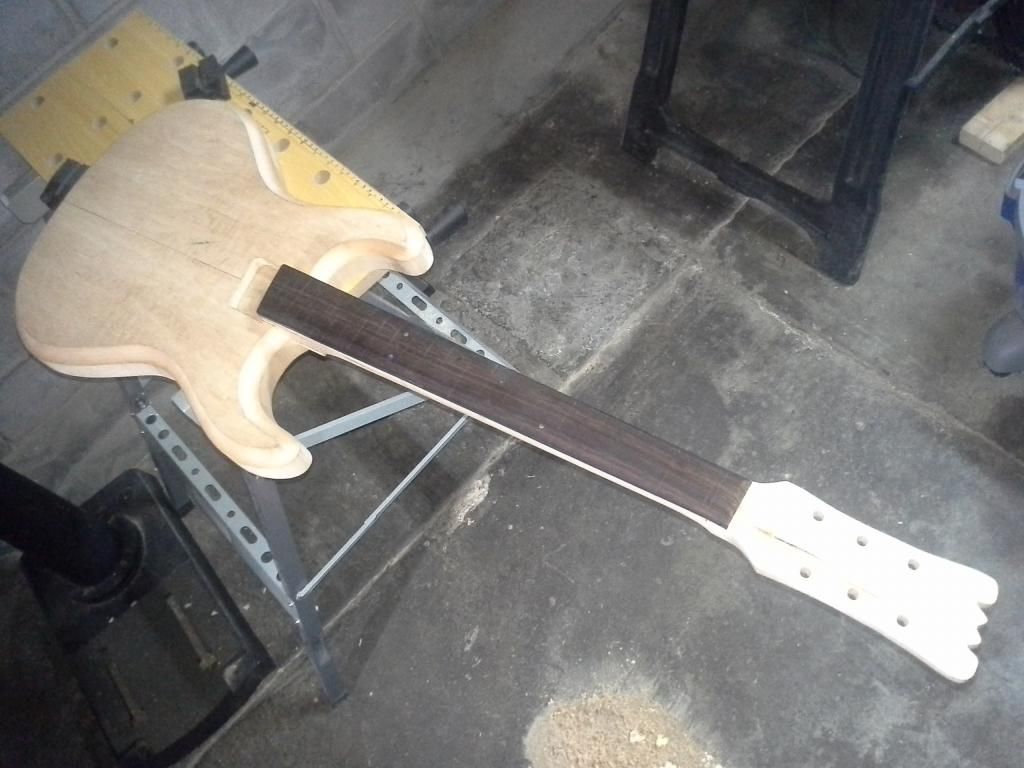
In the Pocket

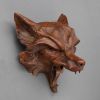
Neck Pocket made and tested
A bit too high. I had to take about 1/8" from the heel
I decided to use John H's suggestion for a Jig. Turned out well.
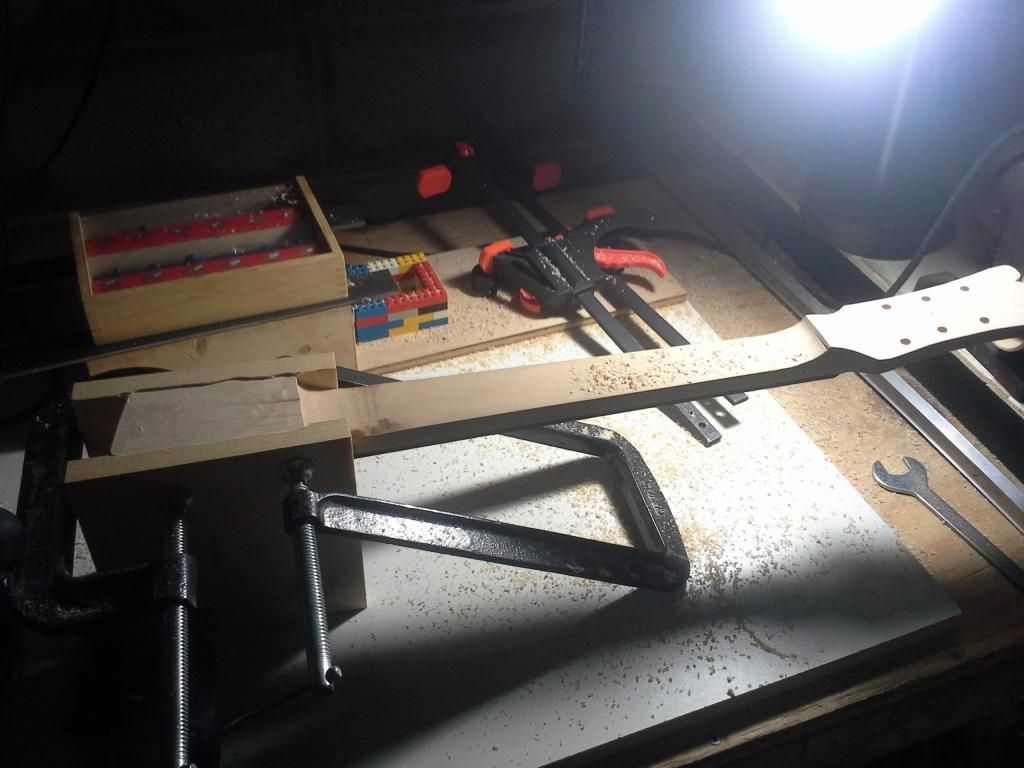
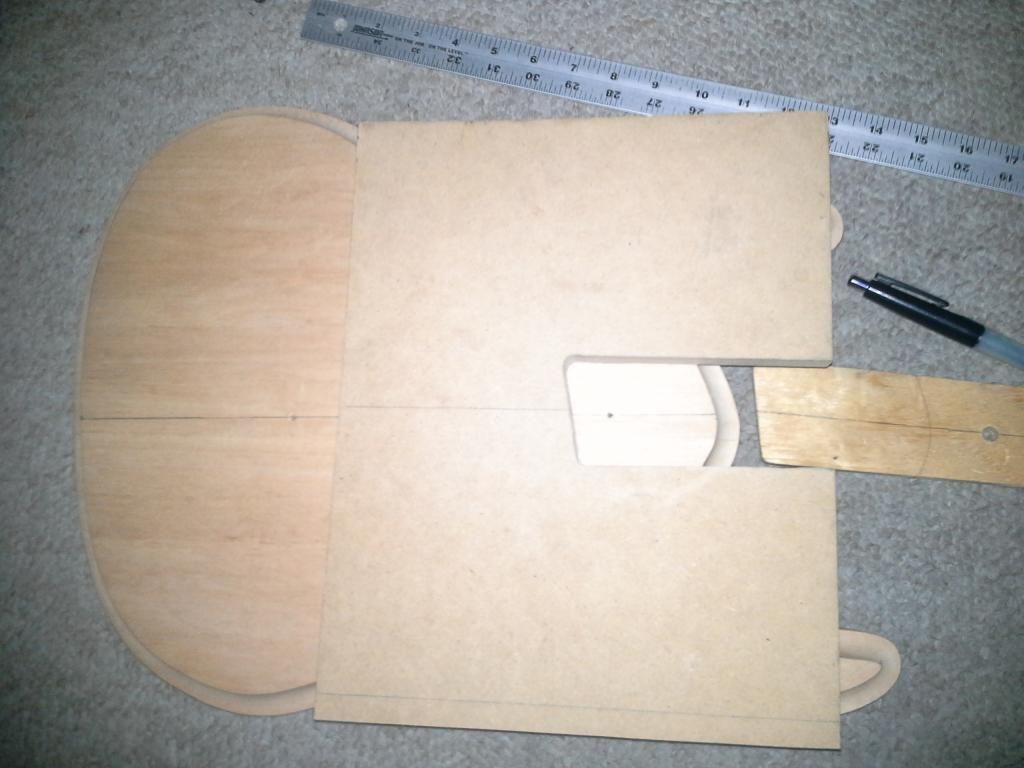
Money ball!

Next time, hustlers.

Neck Pocket made and tested


A bit too high. I had to take about 1/8" from the heel

I decided to use John H's suggestion for a Jig. Turned out well.


Money ball!

Next time, hustlers.
"If the women don't find you handsome, they should at least find you handy."- a wise man
-
John H
- Regular Member
- Posts: 19
- Joined: Thu Jun 12, 2014 8:23 am
Re: Star Swirl *** 1st build
You're doing very well on your first one. The confidence, and experience that you gain here will be obvious on all of your future projects. Too many people set out to build "the best guitar ever" on their first try, and don't realize how many different skills are involved. Many projects fall short of expectations, and some fail all together by builder's being overwhelmed by all of the details.
Don't let the little setbacks get you down. You're doing good work.
Don't let the little setbacks get you down. You're doing good work.
-
panther

- Top Producer
- Posts: 817
- Joined: Tue May 03, 2011 8:31 pm
- Location: Anza, California
Re: Star Swirl *** 1st build
Fabulous work indeed for a first build.
Dan
Dan
"The More People I Meet, The More I Miss My Dog"
-
cmiller0034
- Top Producer
- Posts: 221
- Joined: Tue Oct 15, 2013 1:44 pm
- Location: Louisville, Ky
Re: Star Swirl *** 1st build
Lots of Hiccups last couple of days
but first:
Thanks fellas. I only made it this far with the help and encouragement of fine folks like you in the forums. This is kinda like a build diary I guess, helps me to remember my mistakes as well as good ideas that I will want to use on future builds
I don't like Basswood.
Been a while since I last worked on the body. I forgot how prone to chipping and tearout this near-softwood tends to be.
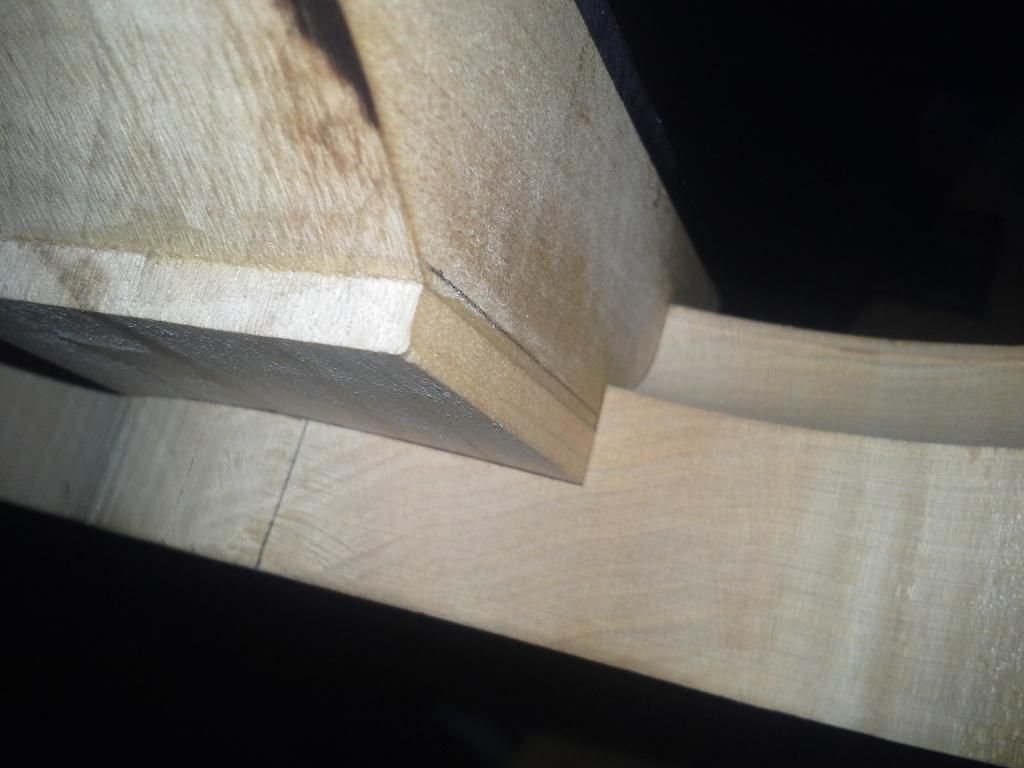
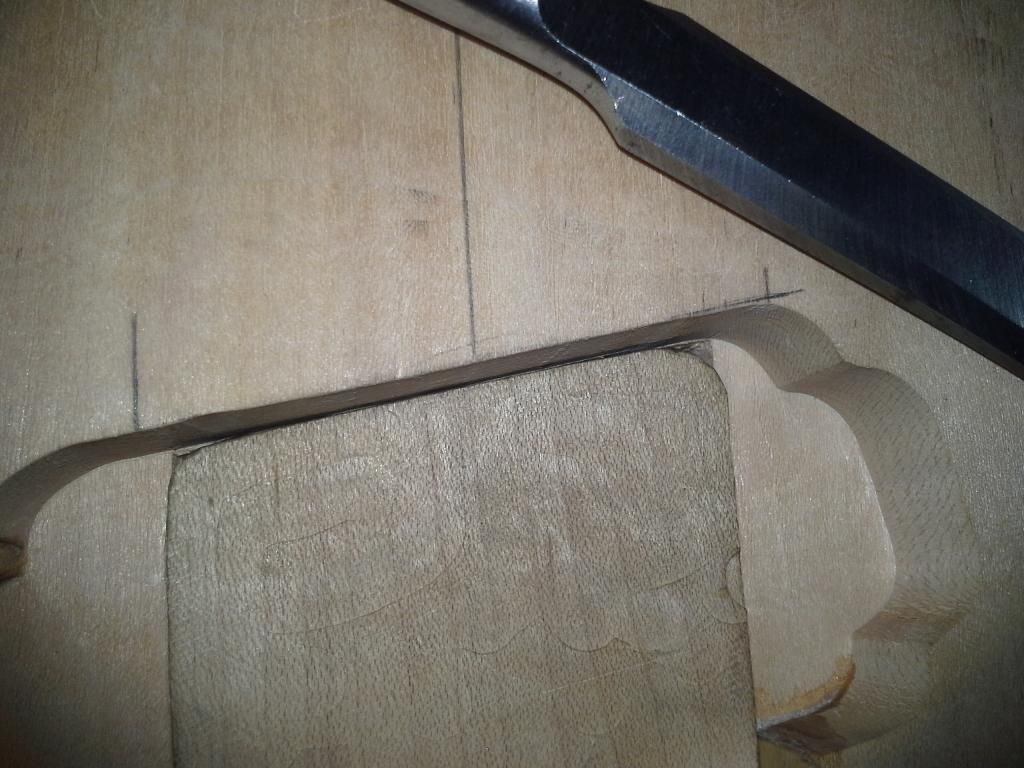
Routing the neck pocket seemed to go fairly smoothly at first...
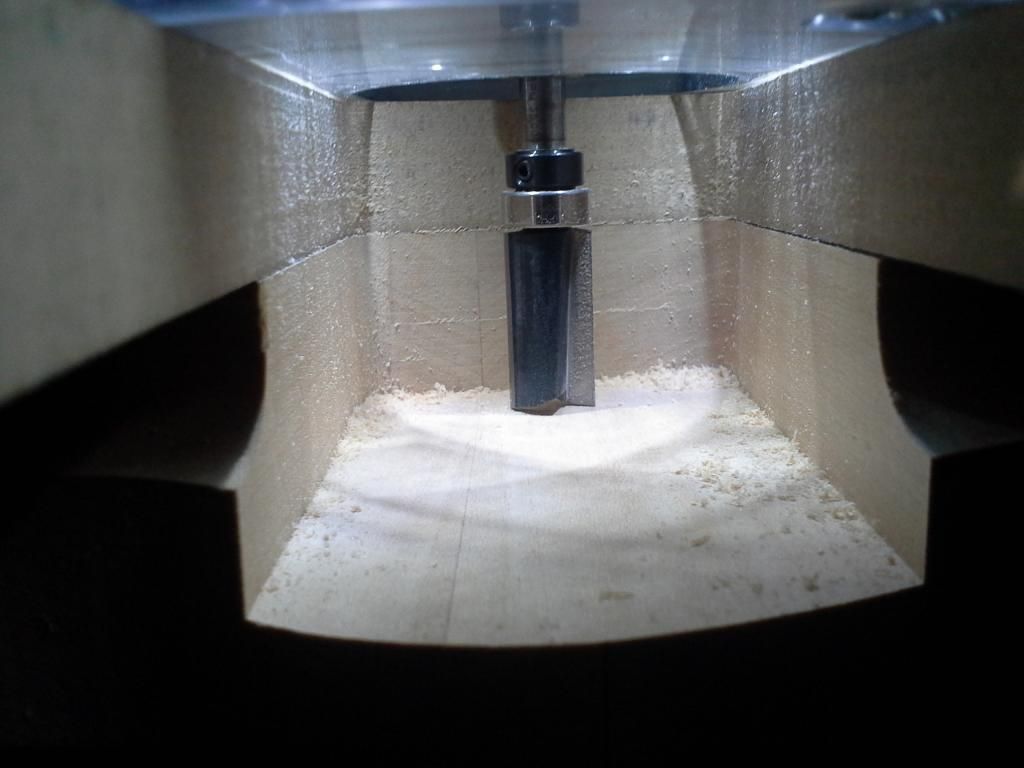
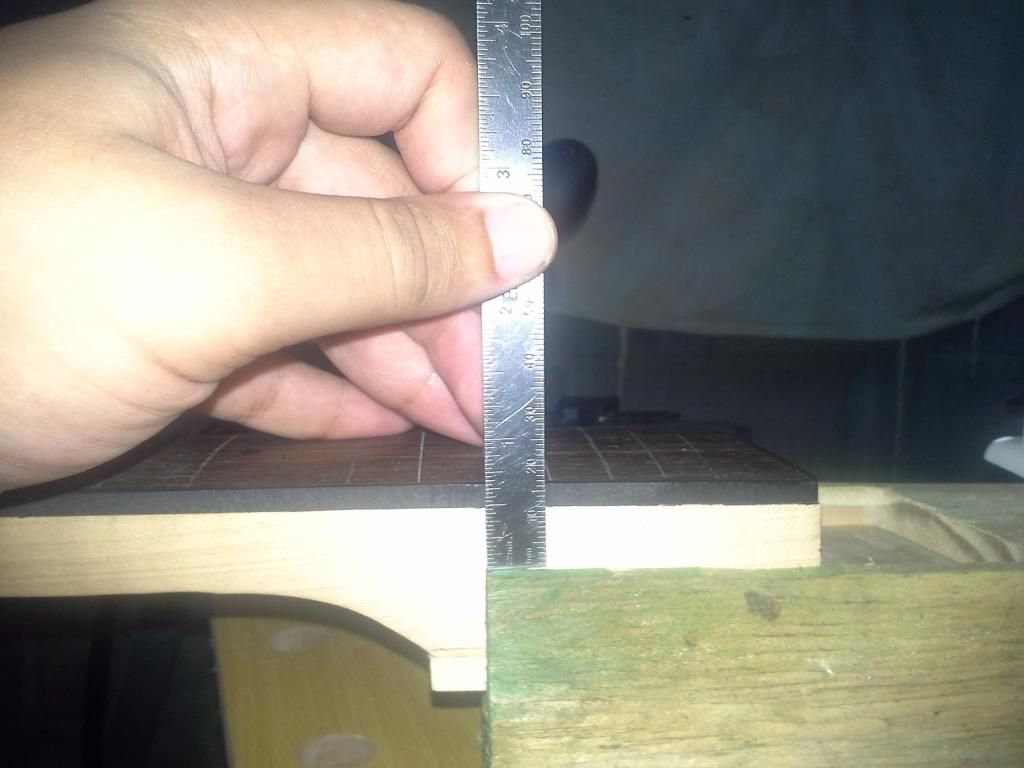
My template was not perfect it seems, the back end of the heel would not sit flush against the hole it made for it.
What's wrong neck, why wont you go in your home! Are you too good for your home!
sides were tight though
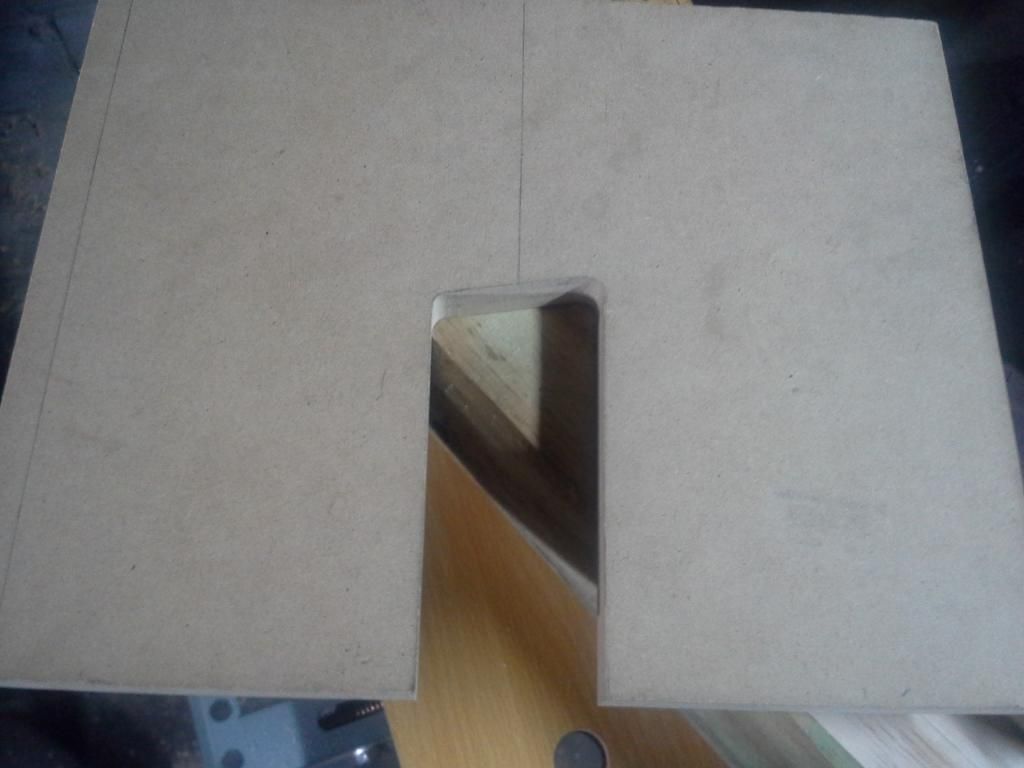
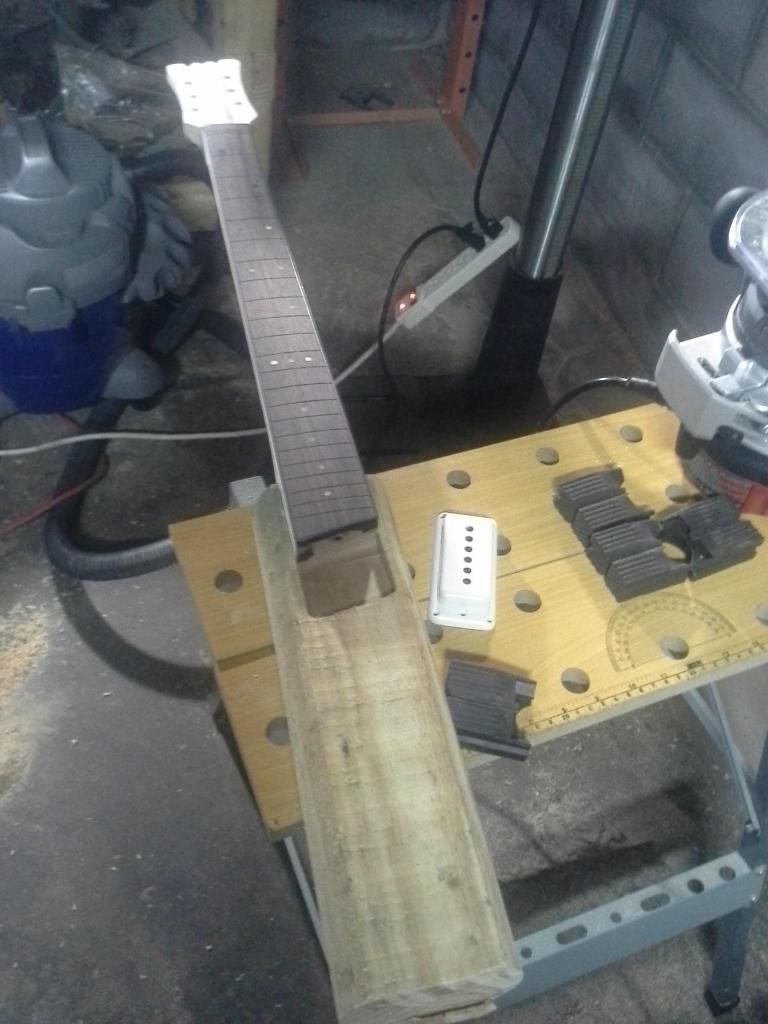
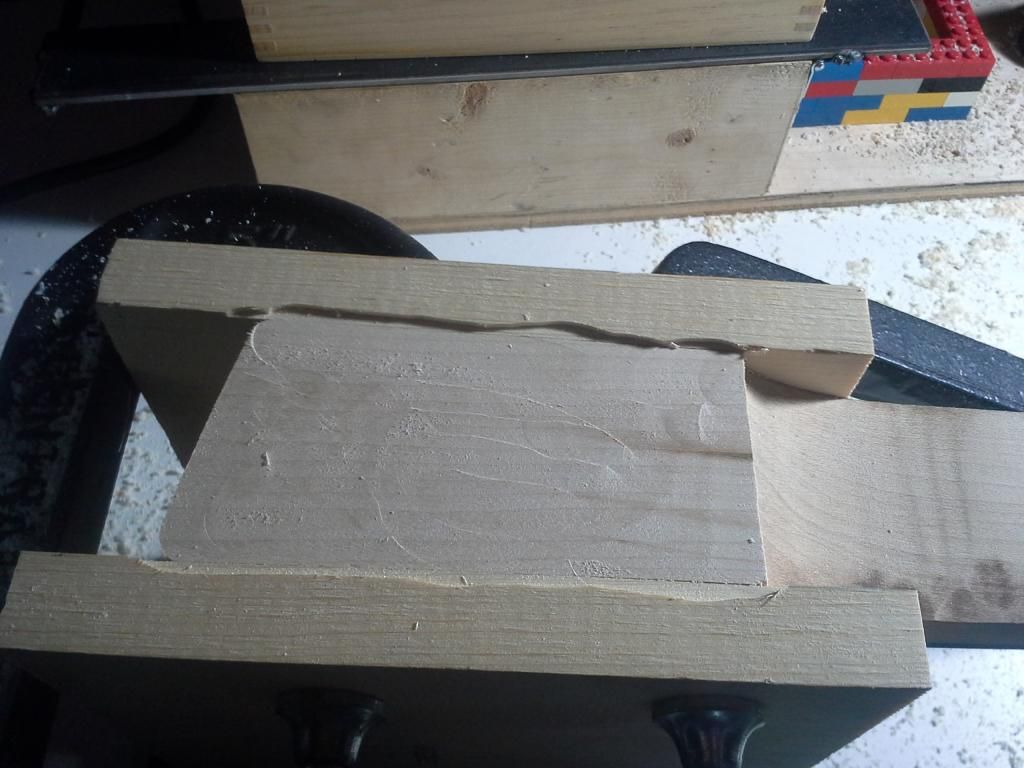
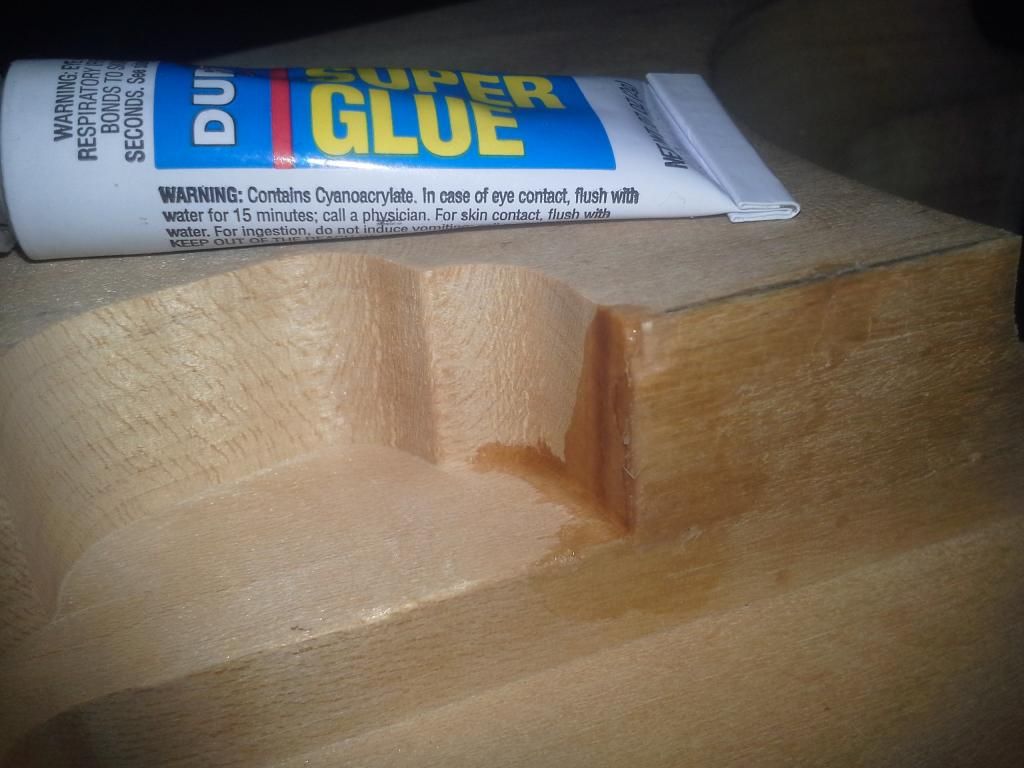
Then I started routing the pickup cavity. Thats when the trouble began. I was taking shallow passes. Nibbling at the wood when I heard a sickening CRACK
Tearout! I was too angry to take a photo of it. I just tried to minimize further damage and pushed the torn wood fibers back into place, supporting the broken wood with hardboard to complete the route.
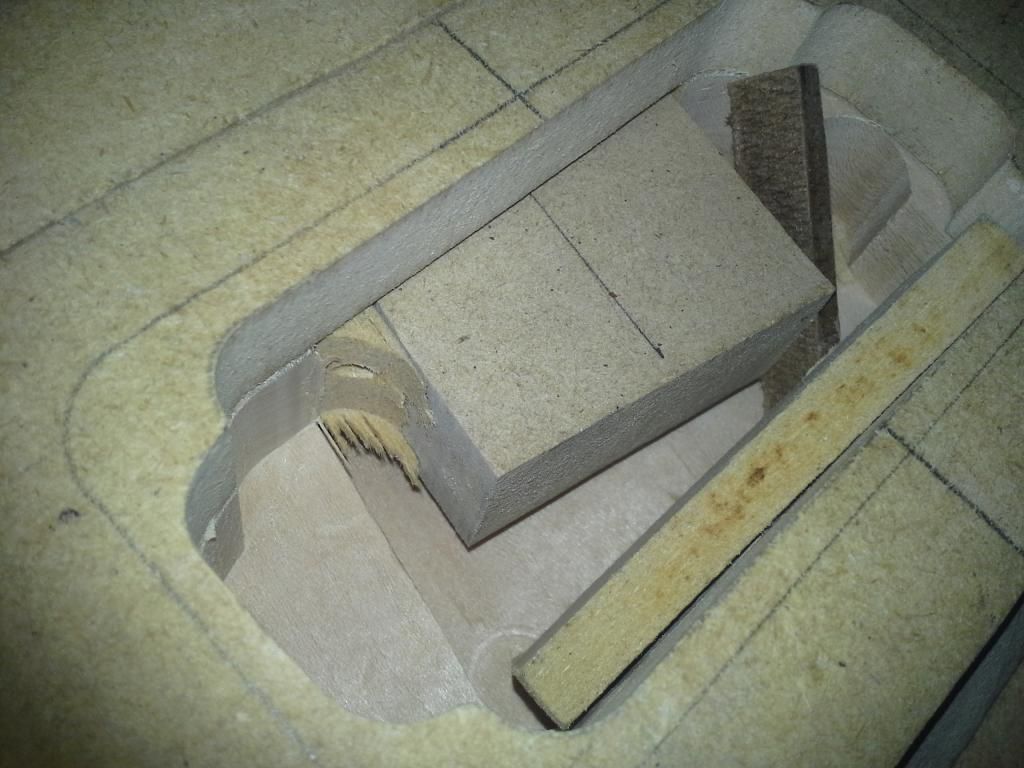
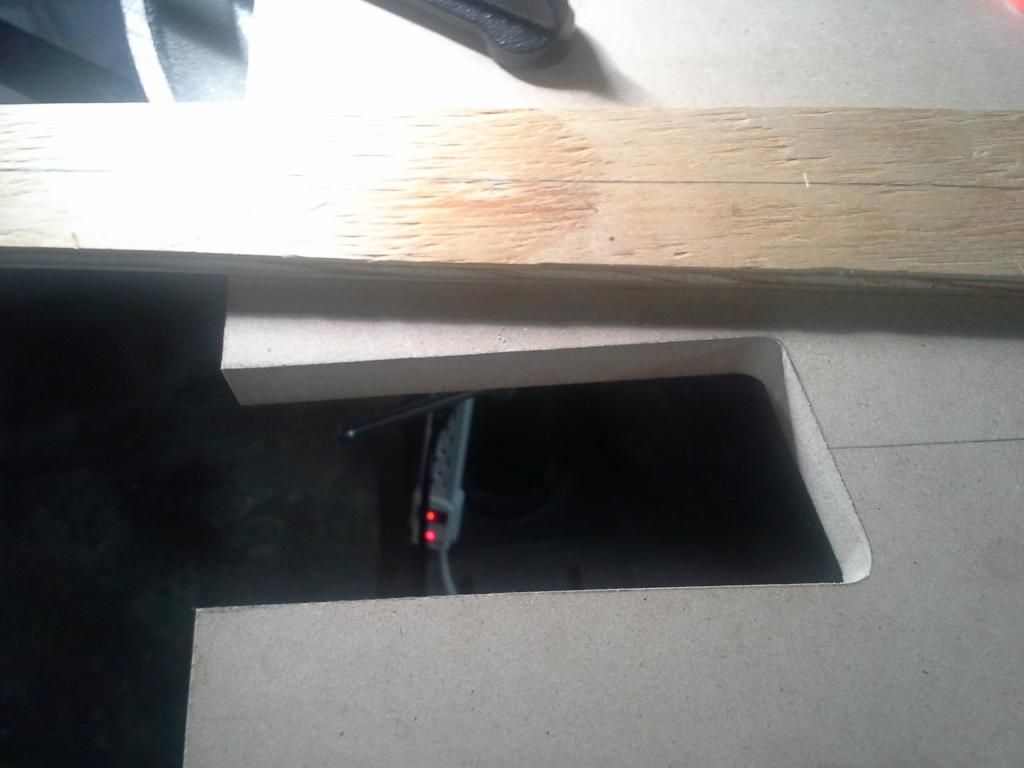
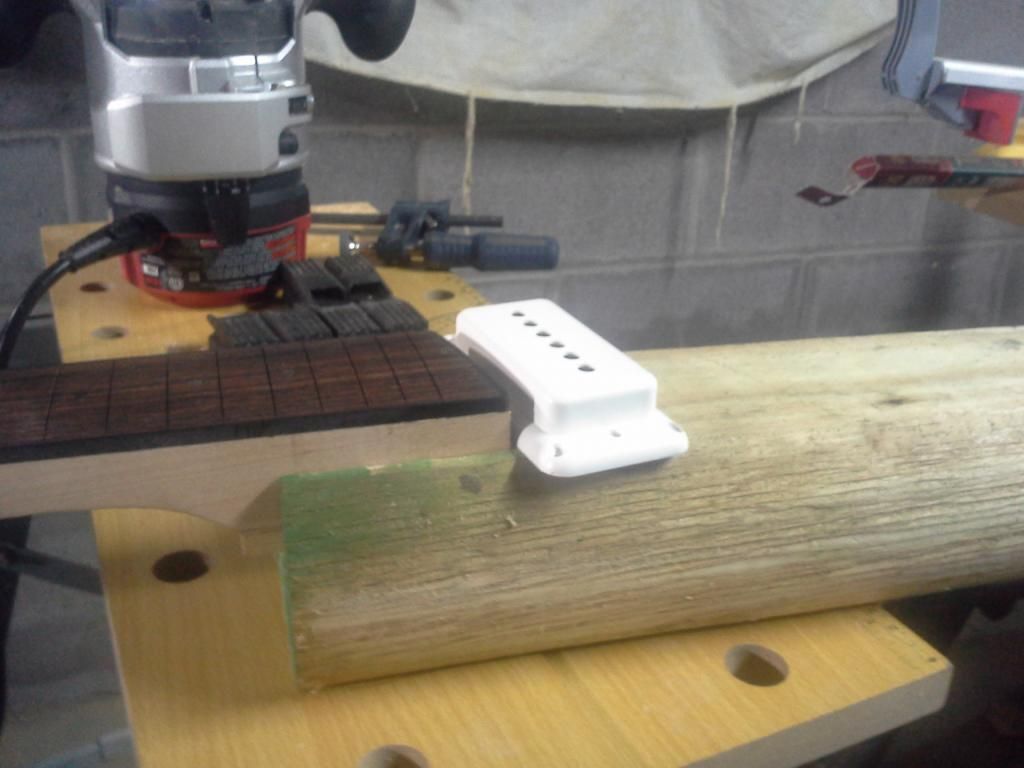
I repaired the torn side and replaced the chips with superglue.
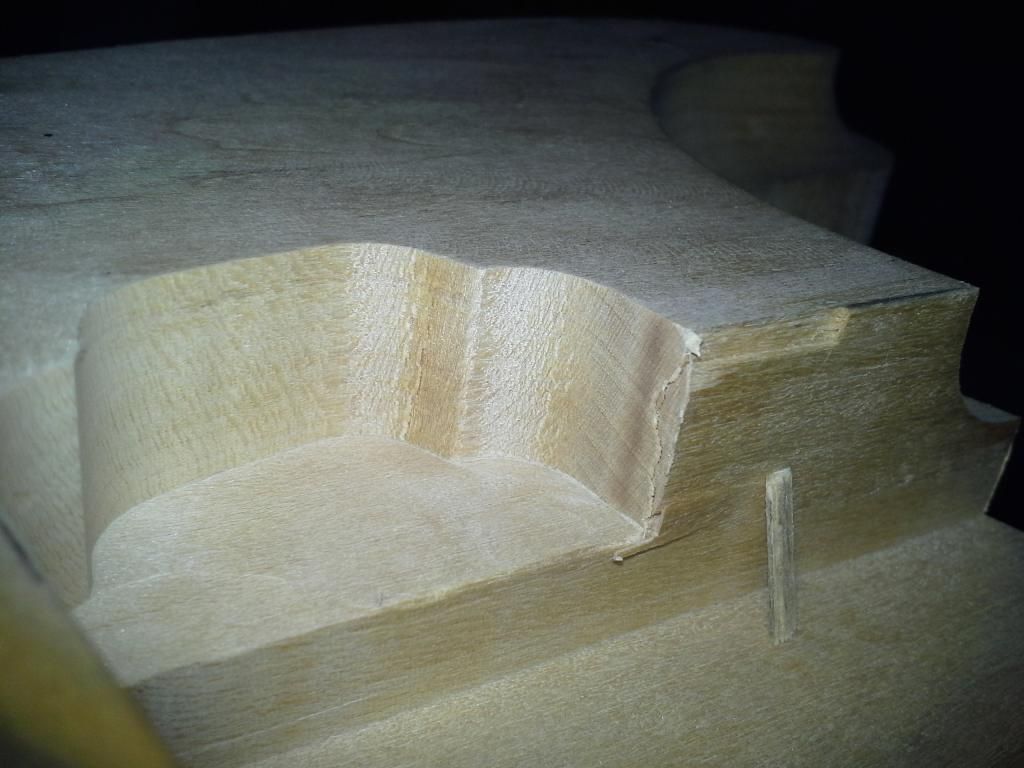
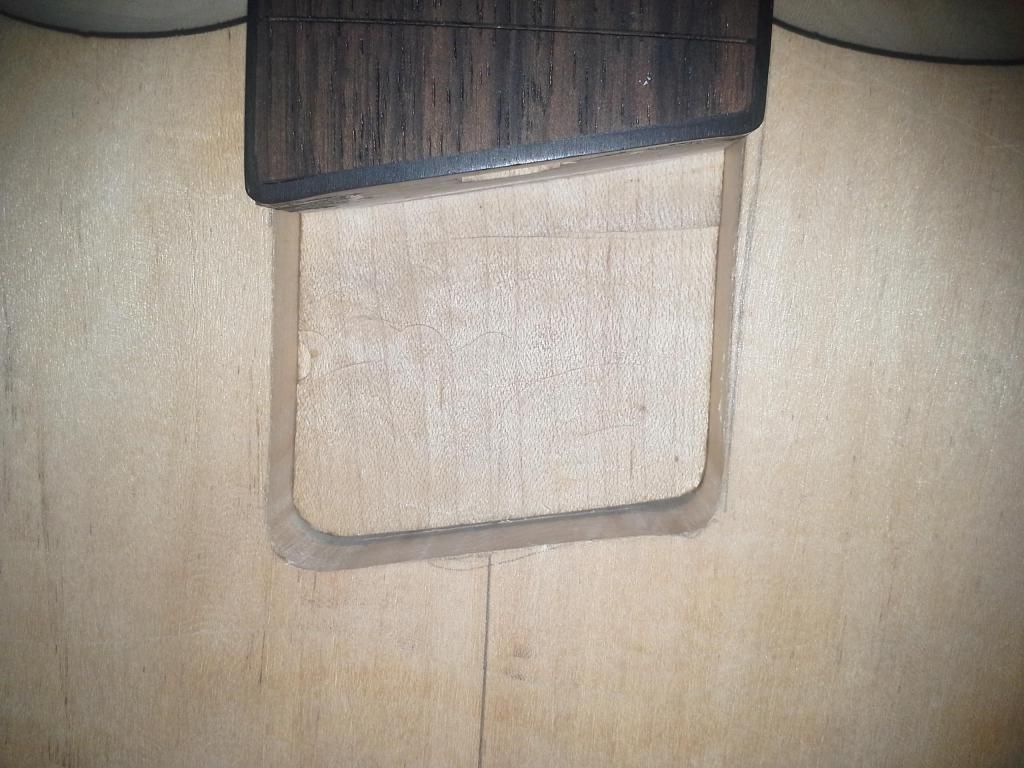
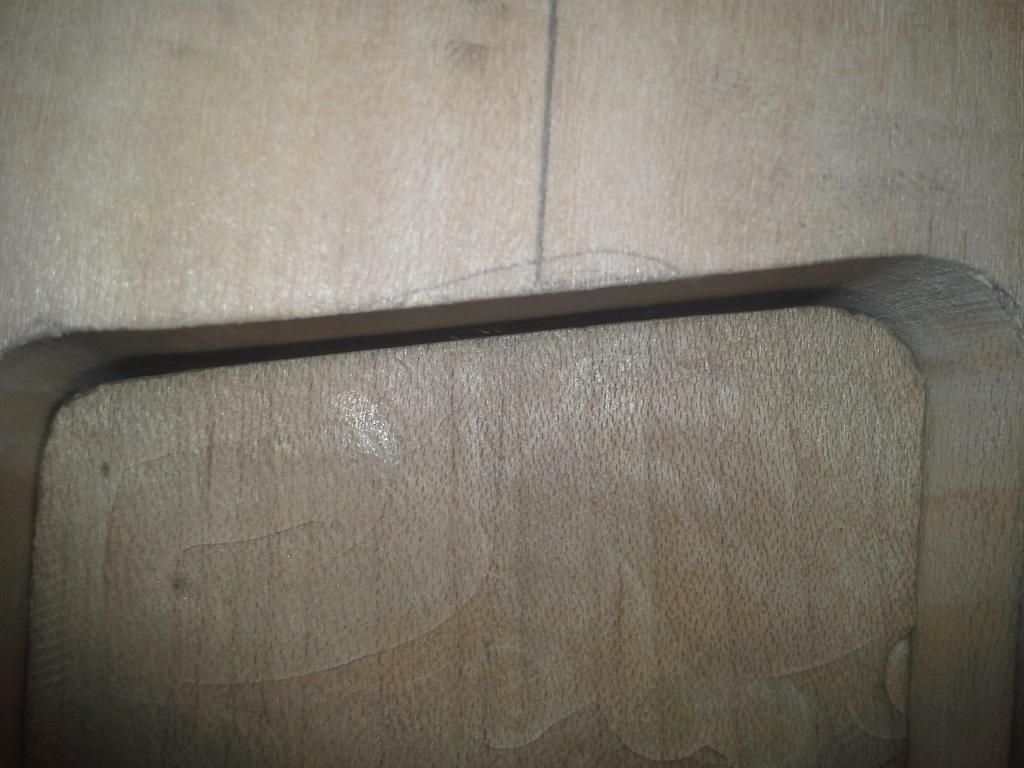
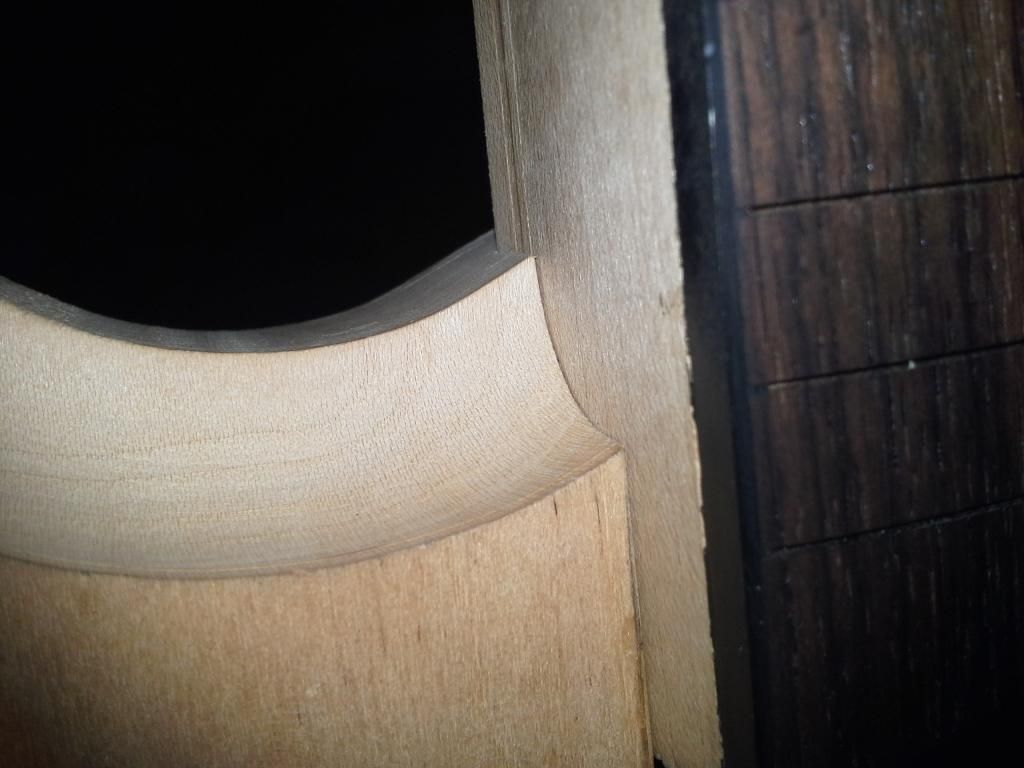
Once the glued dried, I decided to square off the corners of my neck poket. I would rather have it flush with the back corner than have it look pretty. Besides me, who's going to look in there anyway?
And then I really Screwed up!
I wanted to have Machine screws to attach my neck the way Warmoth does. Seems stronger to me.
So I dashed to the store 10 minutes before it closed for the night, guitar in hand and got some brass threaded inserts with appropriately long machine screws to match. I got several complements and questions about my guitar from some curious shoppers.
I already had black Neck screws and ferrules that i was going to use, but the screws were too long to use anyway. That's when I decided to go they threaded insert rout.
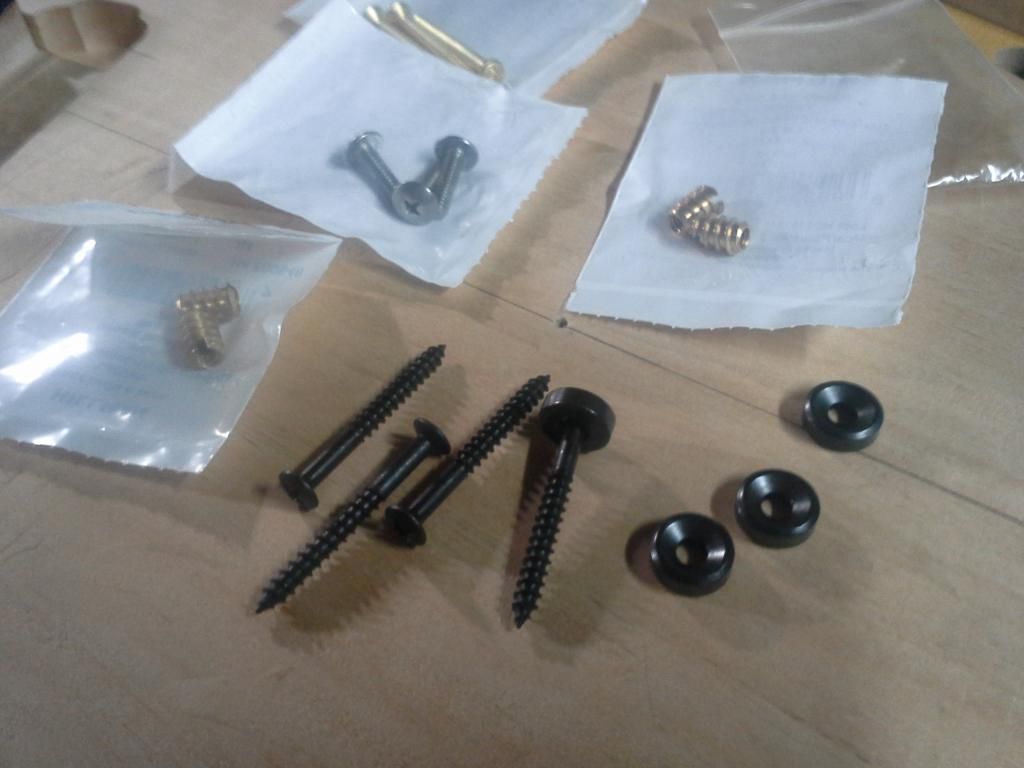
I have ALOT of drill bits, but I could not find one that fit these brass inserts perfectly. They were too tight (which split the wood) or too wide. I decided to go with the slightly tight bit. But alas, Maple is no joke. I could not get that insert to turn into that wood. Besides I only got one good hand, with two broken bones in my left hand
a terrible sketch by my physician of my broken bones

Also getting these things to go in straight seemed impossible. I got a bright Idea and decided to put my screw bit inside of drill press. Keep in mind I KNEW this was probably a bad Idea, but figured I could just try a larger bit if it did not work.
the following photos are the result.
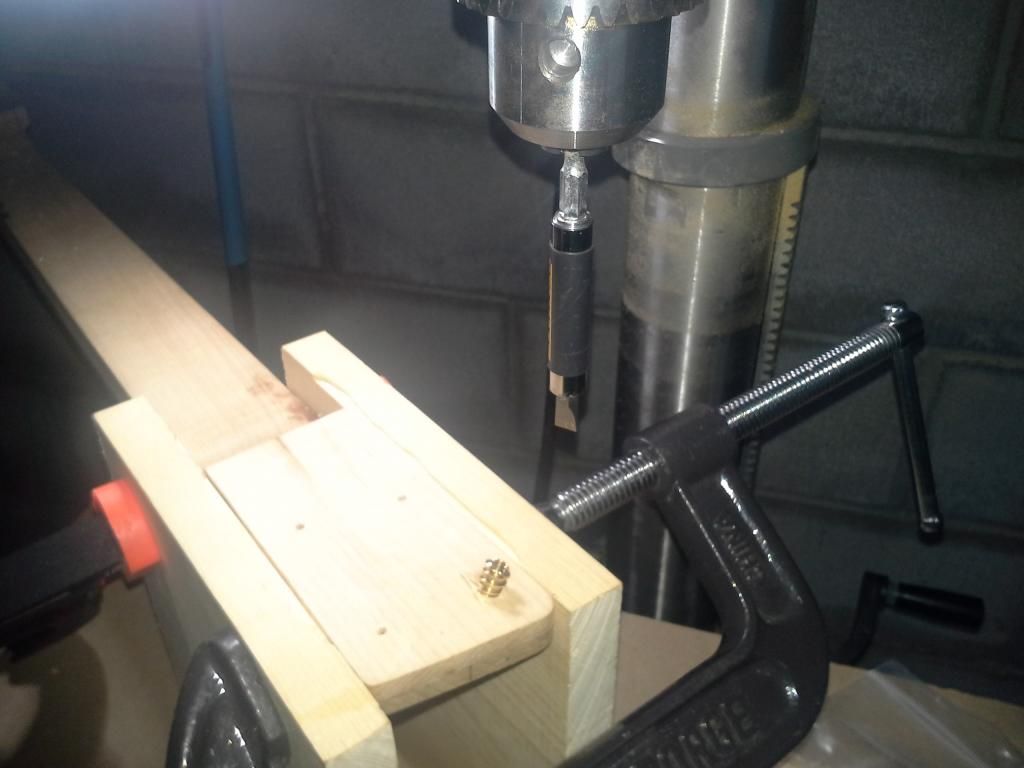
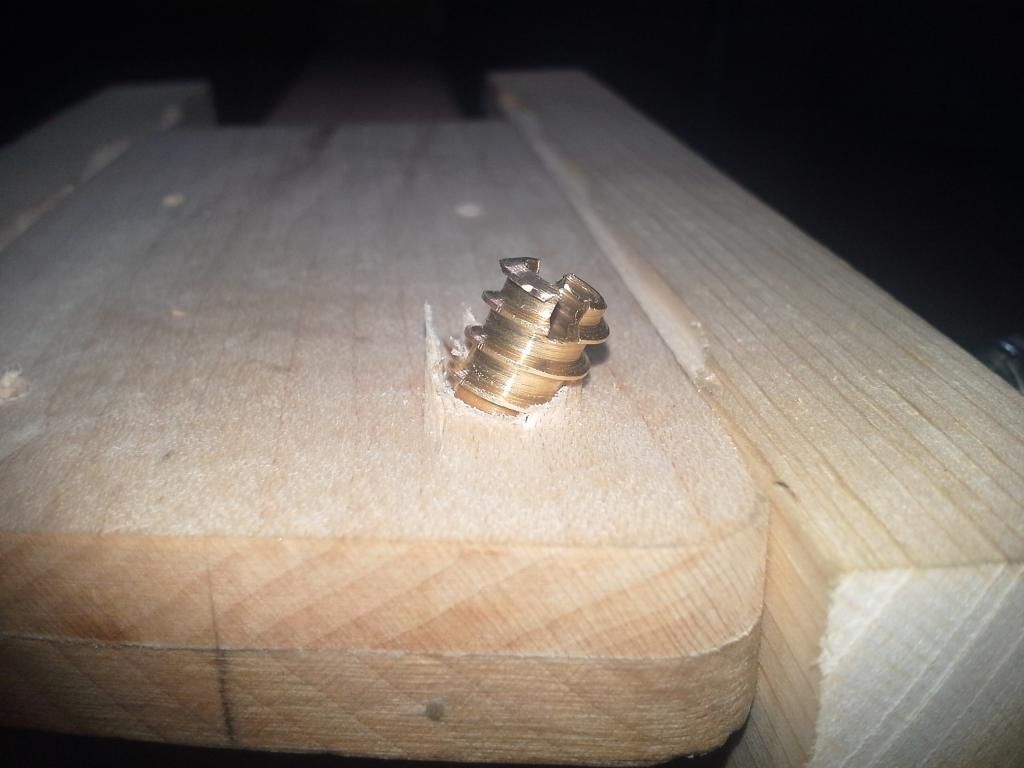
..... Le sigh.
I gave up on the threaded insert. At least with THESE inserts. I thing threads need to be a little higher so that the insert can slip down in the hole first and THEN start biting into the wood. That way the thing will drive in straight as you turn it.
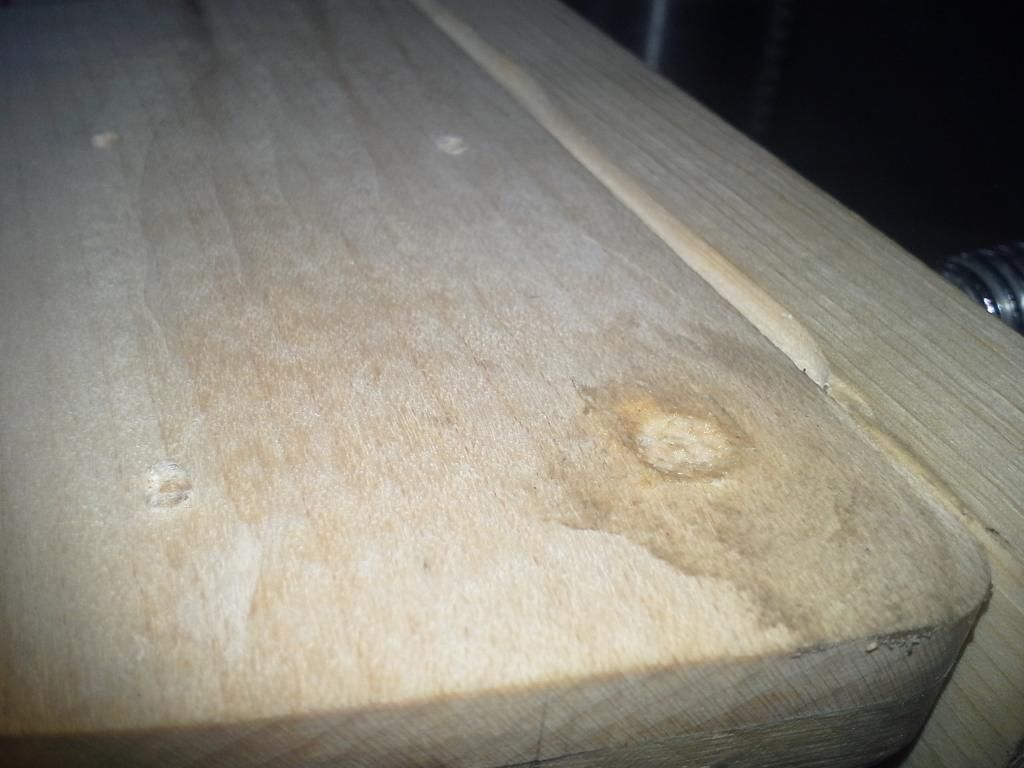
I was going to use the plug cutter I purchased to glue a solid maple plug into the mess that I made. I saw it the other day SOMEWHERE, couldn't find it now though.
I filled the hole with saw dust and wood glue. Gotta go back to the store today and get some screws and return the machine ones that I did not use.
Live and learn.
but first:
John H wrote:You're doing very well on your first one. The confidence, and experience that you gain here will be obvious on all of your future projects. Too many people set out to build "the best guitar ever" on their first try, and don't realize how many different skills are involved. Many projects fall short of expectations, and some fail all together by builder's being overwhelmed by all of the details.
Don't let the little setbacks get you down. You're doing good work.
Fabulous work indeed for a first build.
Dan
Thanks fellas. I only made it this far with the help and encouragement of fine folks like you in the forums. This is kinda like a build diary I guess, helps me to remember my mistakes as well as good ideas that I will want to use on future builds
I don't like Basswood.
Been a while since I last worked on the body. I forgot how prone to chipping and tearout this near-softwood tends to be.
Routing the neck pocket seemed to go fairly smoothly at first...


My template was not perfect it seems, the back end of the heel would not sit flush against the hole it made for it.
What's wrong neck, why wont you go in your home! Are you too good for your home!


sides were tight though

Then I started routing the pickup cavity. Thats when the trouble began. I was taking shallow passes. Nibbling at the wood when I heard a sickening CRACK
Tearout!

I repaired the torn side and replaced the chips with superglue.


Once the glued dried, I decided to square off the corners of my neck poket. I would rather have it flush with the back corner than have it look pretty. Besides me, who's going to look in there anyway?


And then I really Screwed up!
I wanted to have Machine screws to attach my neck the way Warmoth does. Seems stronger to me.
So I dashed to the store 10 minutes before it closed for the night, guitar in hand and got some brass threaded inserts with appropriately long machine screws to match. I got several complements and questions about my guitar from some curious shoppers.
I already had black Neck screws and ferrules that i was going to use, but the screws were too long to use anyway. That's when I decided to go they threaded insert rout.

I have ALOT of drill bits, but I could not find one that fit these brass inserts perfectly. They were too tight (which split the wood) or too wide. I decided to go with the slightly tight bit. But alas, Maple is no joke. I could not get that insert to turn into that wood. Besides I only got one good hand, with two broken bones in my left hand
a terrible sketch by my physician of my broken bones

Also getting these things to go in straight seemed impossible. I got a bright Idea and decided to put my screw bit inside of drill press. Keep in mind I KNEW this was probably a bad Idea, but figured I could just try a larger bit if it did not work.
the following photos are the result.


..... Le sigh.
I gave up on the threaded insert. At least with THESE inserts. I thing threads need to be a little higher so that the insert can slip down in the hole first and THEN start biting into the wood. That way the thing will drive in straight as you turn it.
I was going to use the plug cutter I purchased to glue a solid maple plug into the mess that I made. I saw it the other day SOMEWHERE, couldn't find it now though.
I filled the hole with saw dust and wood glue. Gotta go back to the store today and get some screws and return the machine ones that I did not use.
Live and learn.

"If the women don't find you handsome, they should at least find you handy."- a wise man
-
cmiller0034
- Top Producer
- Posts: 221
- Joined: Tue Oct 15, 2013 1:44 pm
- Location: Louisville, Ky
Re: Star Swirl *** 1st build
My hand and possible surgery has me REALLY depressed.
here is a band that I have been listening to beat this summer time blues.
Creature is my Favorite. Since I spend most of my nights working on this guitar.
Makes me feel better. hope it does the same for you.
here is a band that I have been listening to beat this summer time blues.
Creature is my Favorite. Since I spend most of my nights working on this guitar.
Makes me feel better. hope it does the same for you.
"If the women don't find you handsome, they should at least find you handy."- a wise man
-
rcblair

- Senior Member
- Posts: 102
- Joined: Mon Aug 16, 2010 5:06 pm
- Location: Massachusetts
Re: Star Swirl *** 1st build
I can sympathize on the hand problems. I severed a tendon in my left index finger at the end of Jan. and had surgery in mid-Feb. I'm still rehabbing the finger and it could take a year for "full" recovery.
More on topic - my late-60's or early 70's bass has the standard 4 screws coming in from the back of the body but there are also 2 screws in the front of the neck heel into the body making for a 6-bolt neck. This joint is very rigid and I don't think you will need to bother with inserts. How many times are you going to remove the neck? I only use inserts for small screws like pickguards covering a battery that I need to replace periodically.
Rick B.
1965 Ventures Model Bass. Original owner. Early 70's bass.
-
cmiller0034
- Top Producer
- Posts: 221
- Joined: Tue Oct 15, 2013 1:44 pm
- Location: Louisville, Ky
Re: Star Swirl *** 1st build
rcblair wrote:I can sympathize on the hand problems. I severed a tendon in my left index finger at the end of Jan. and had surgery in mid-Feb. I'm still rehabbing the finger and it could take a year for "full" recovery.
How many times are you going to remove the neck? I only use inserts for small screws like pickguards covering a battery that I need to replace periodically.
Rick B.
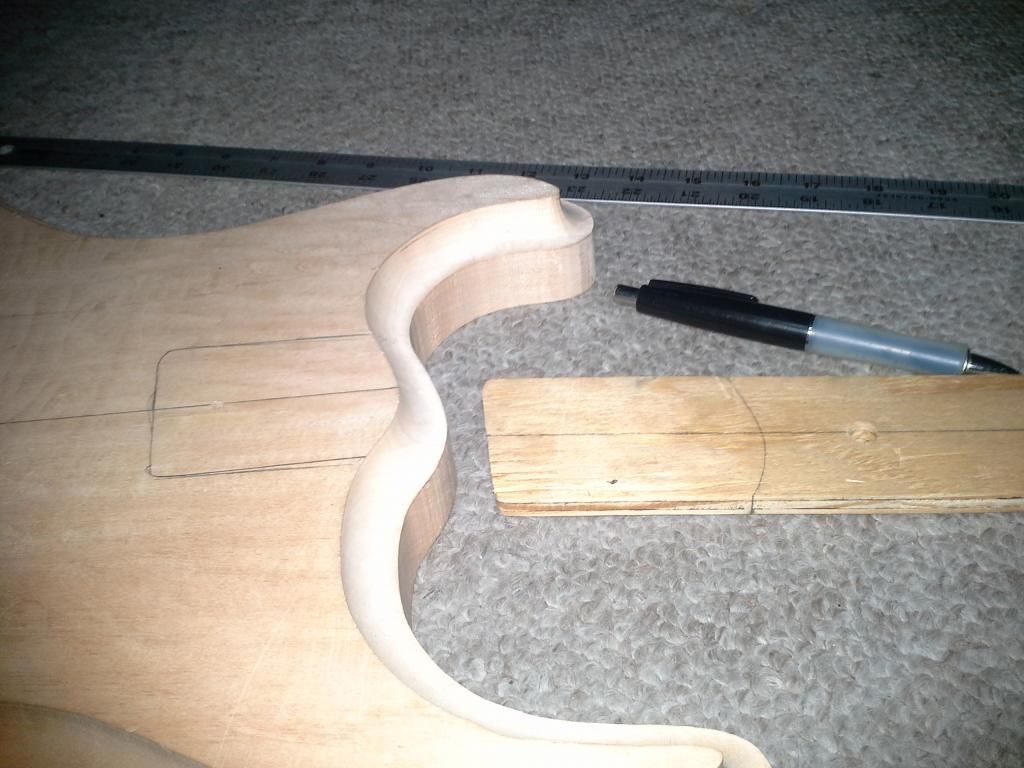
Thanks for the empathy Rick, You got a point about the neck inserts. I went ahead and got regular Stainless steel Screws to use with my ferrules. I was about time that the neck and body be joined in matrimony. Plus I needed them together to transition the curve of the neck with the body..


I cant seem to put this thing down. Its not even finished yet.

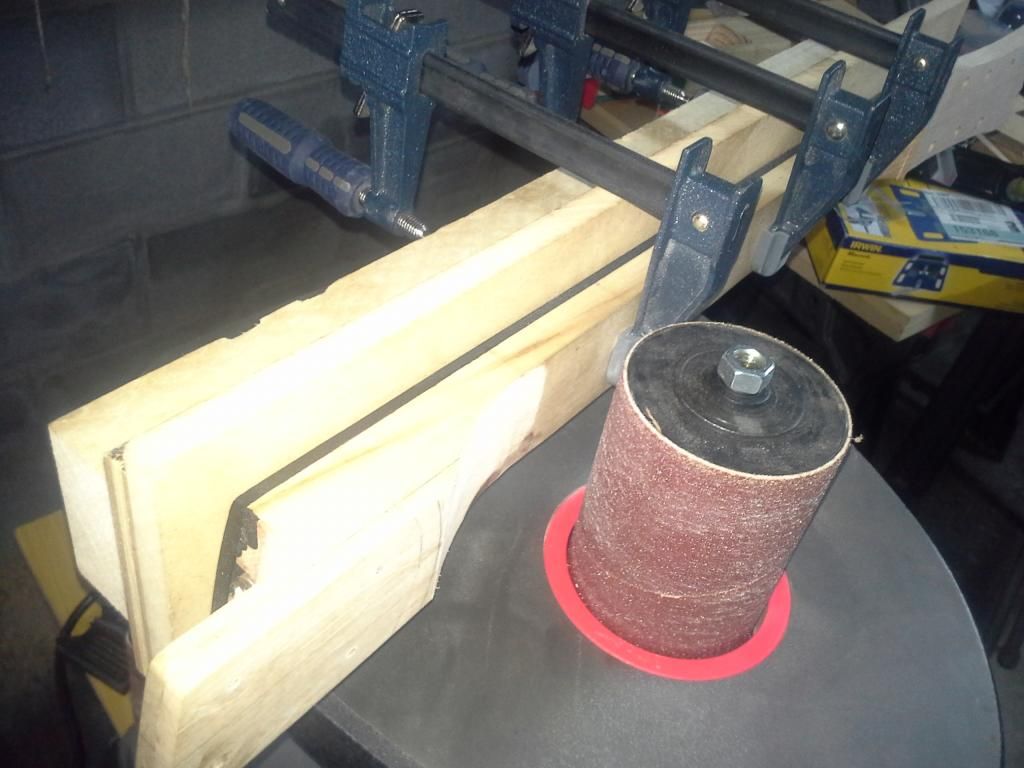
I also discovered that the 1/2" Cove router bit that I used was a bit too bit for the edges of this guitar. I would have been better served by a 5/16" cove bit. It just took off too much "meat" off the body. I will have to trim down the pickguard, its hanging off the edge. That will change the look of the guitar and I am not at all happy with that.

Also Since, the headstock is slightly tilted I don't want to use my nice vintage Kluson deluxe tuners on it. I have some Chinese knock off locking tuners I got for cheap. Not too hot on the quality of the paint job or general fit and finish of the product, but they will serve. They are black and would match the planned color scheme nicely though. I might use those and save the Klusons for the next guitar. (which hopefully will have less rookie mistakes in it).
I leave you with soul
"If the women don't find you handsome, they should at least find you handy."- a wise man
-
cmiller0034
- Top Producer
- Posts: 221
- Joined: Tue Oct 15, 2013 1:44 pm
- Location: Louisville, Ky
Re: Star Swirl *** 1st build
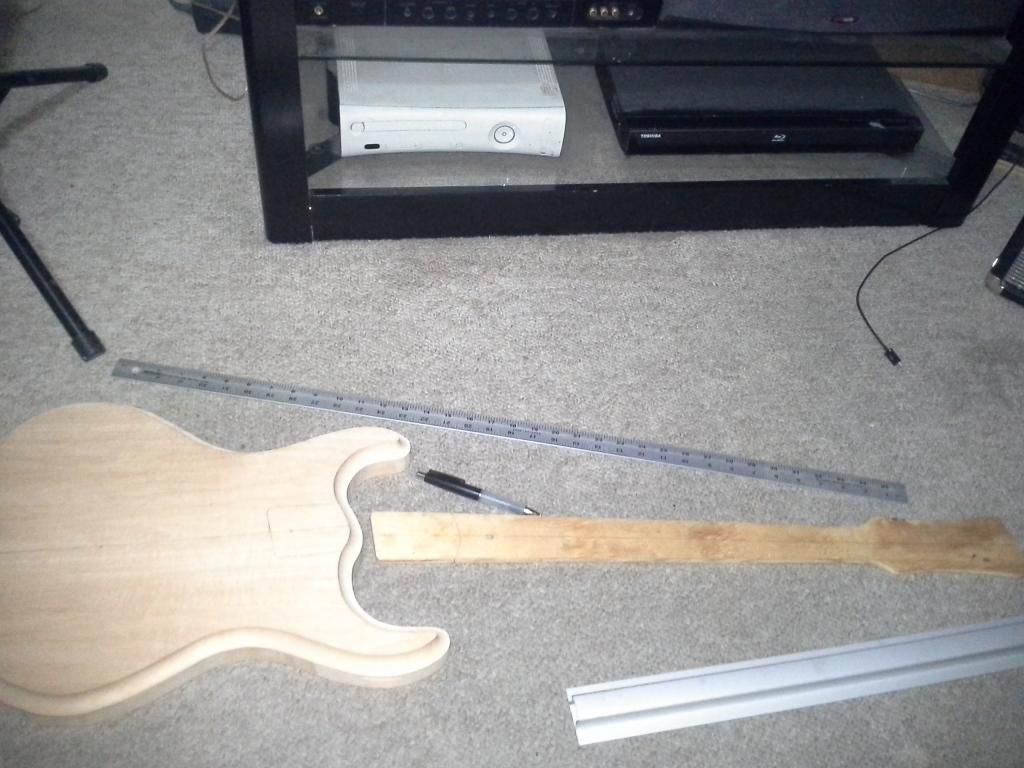
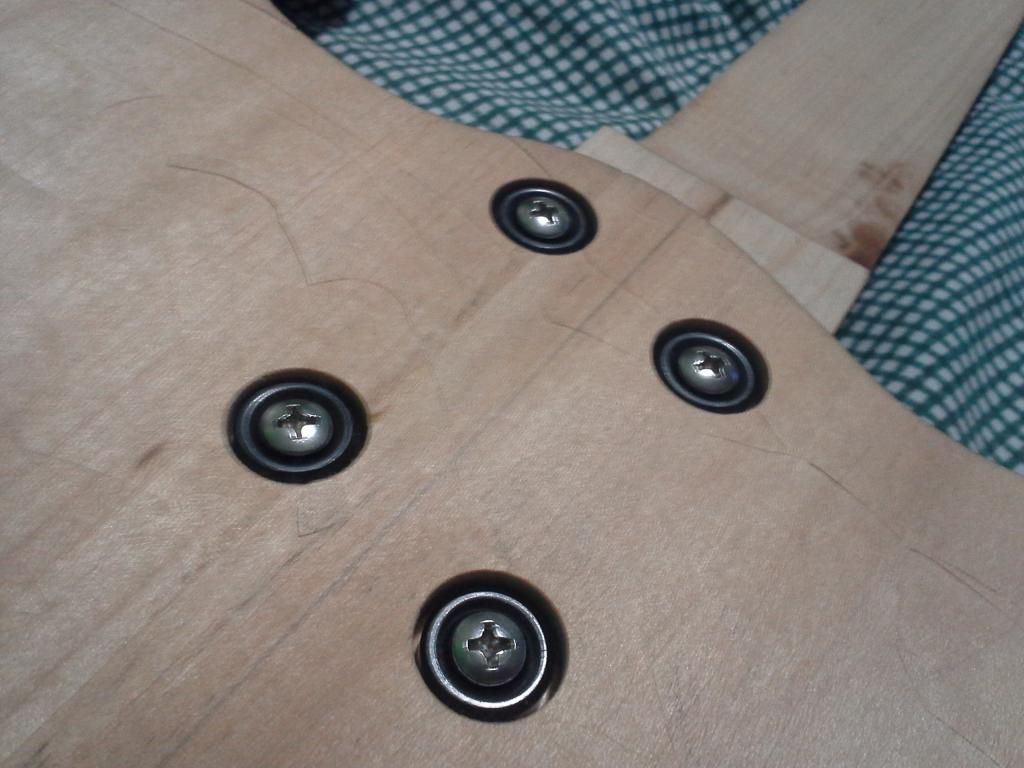
A Dry fit in Dry Dock
Recently installed Neck screws were removed
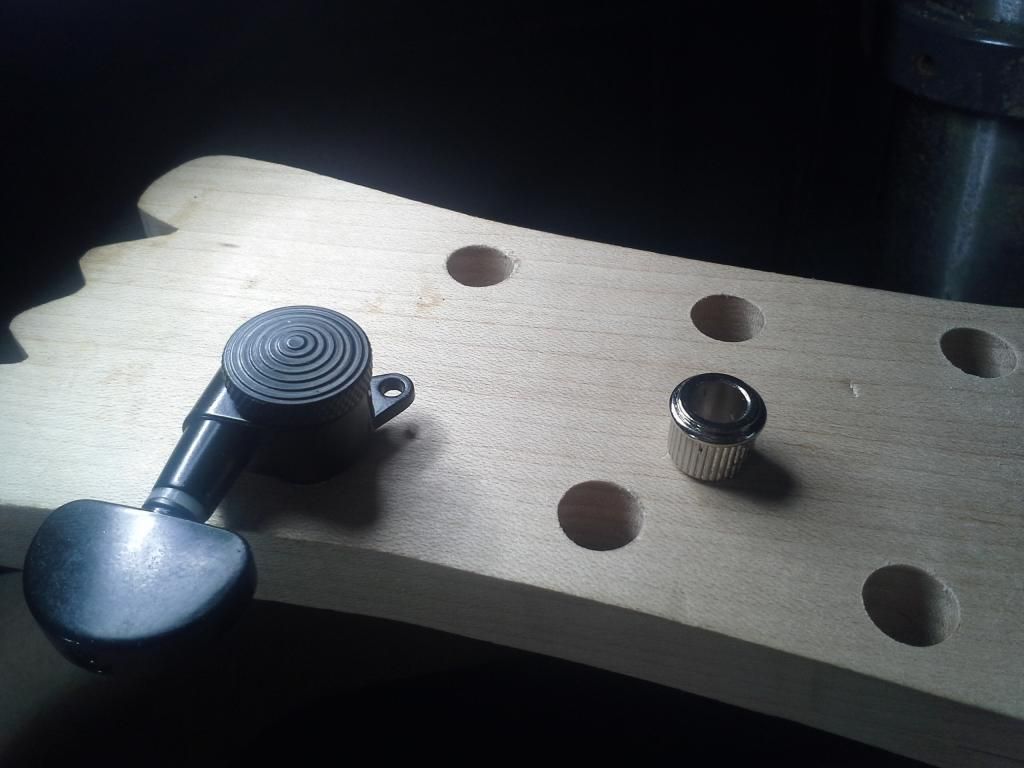
"Low Cost" locking tuning machines

1. Come non-lubricated, dry as desert sand an hard to turn. I'm waiting for my Tri Flow Dry Lube to arrive in the mail

2. threads on the locking mechanism were cut sloppily
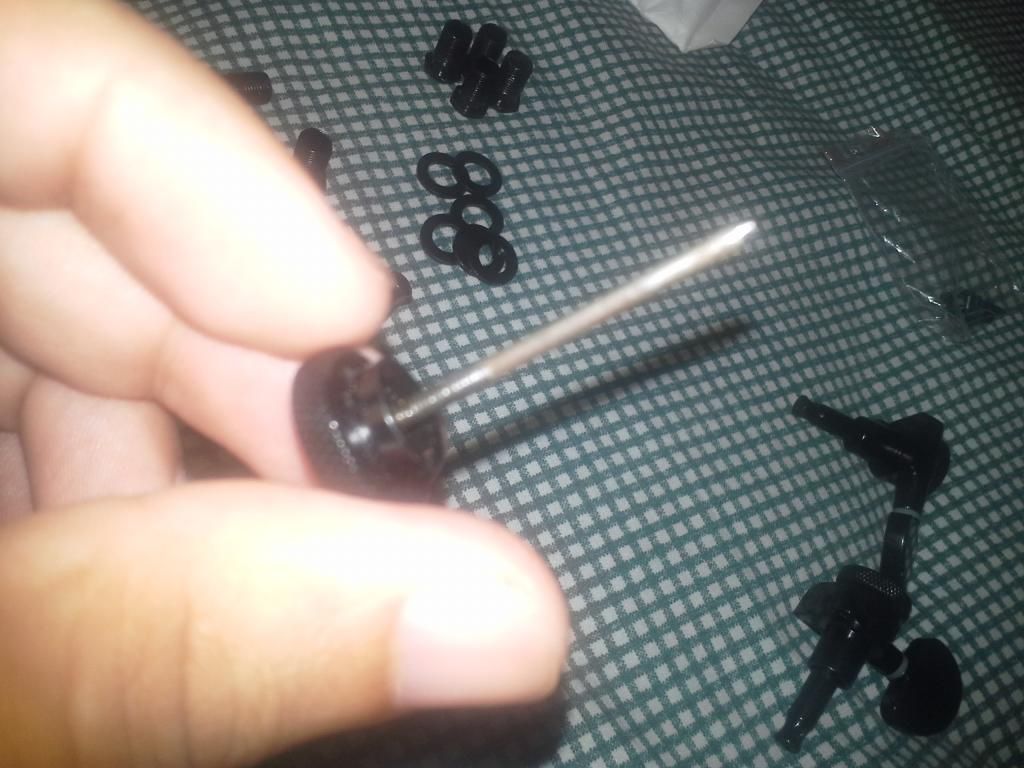
3. the paint...
4. the cost. less the $20. I cant complain about that. You get what you pay for. These should serve on this guitar however. If not I have Kluson adapter bushings which fit the same 10 mm holes as these cheapies. I have a backdoor if I need to use it. And they are black, I'm a fan of Black Chrome hardware but these will serve.
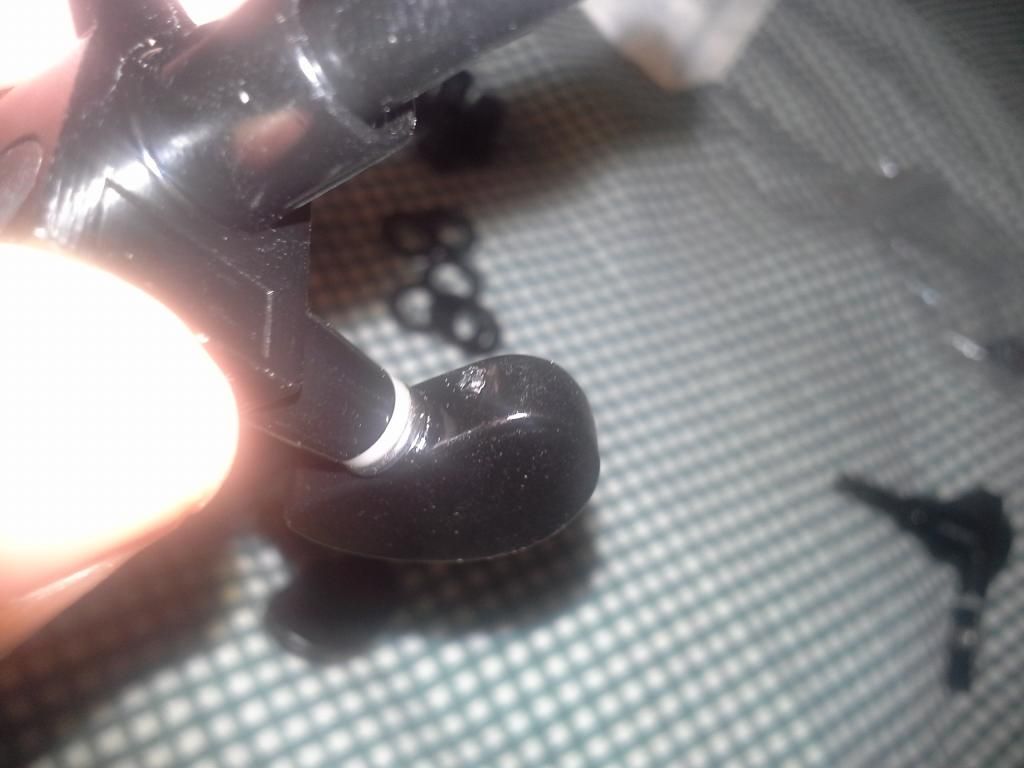
The heel was move closer to the body for better access to the upper frets and more erogonomic feel

The Kluson 10 mm Adapter bushing next to the 10 mm locking tuner the hole diameter is are actually 9.78 mm for a tight fit.
the dry fit
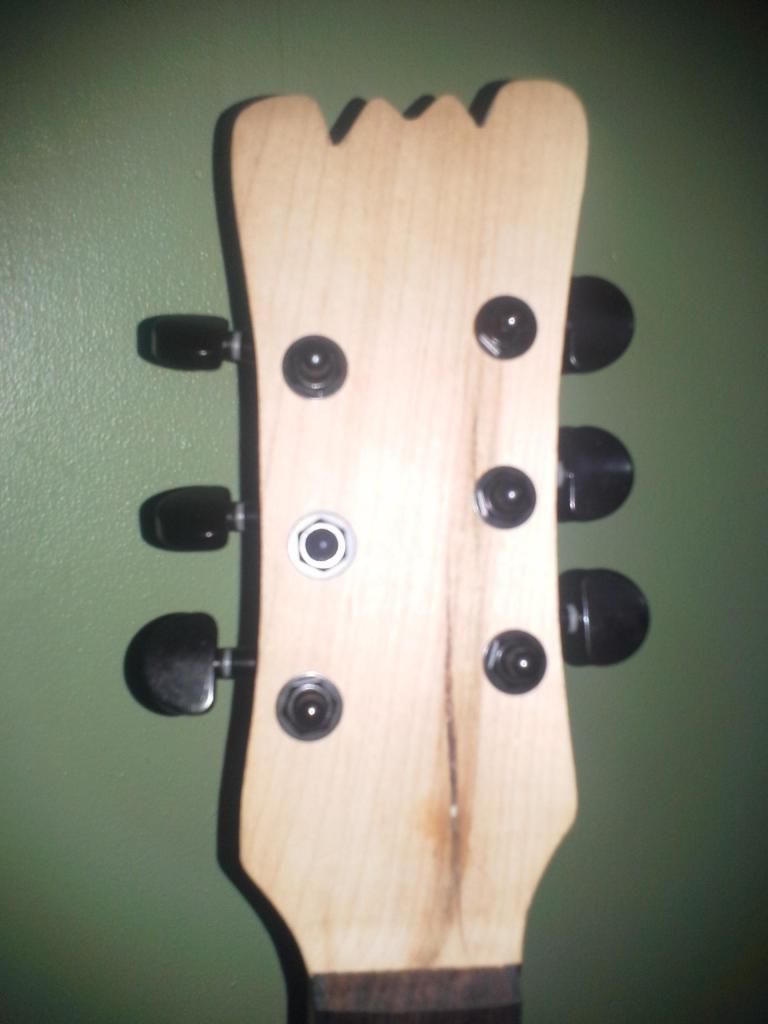
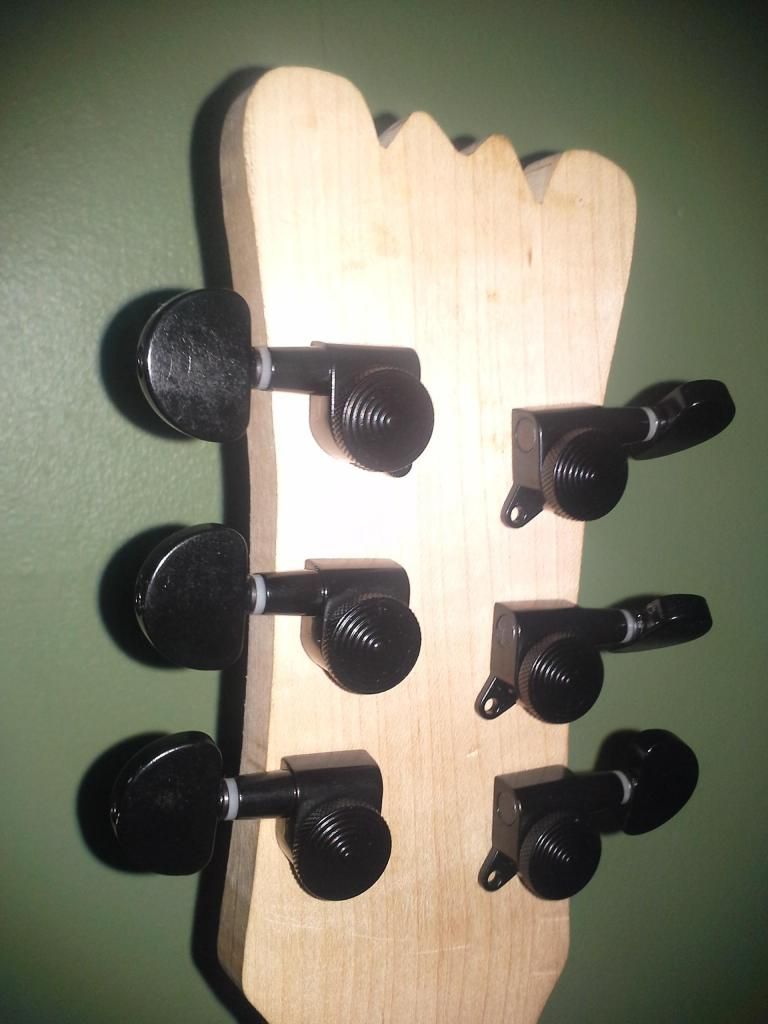
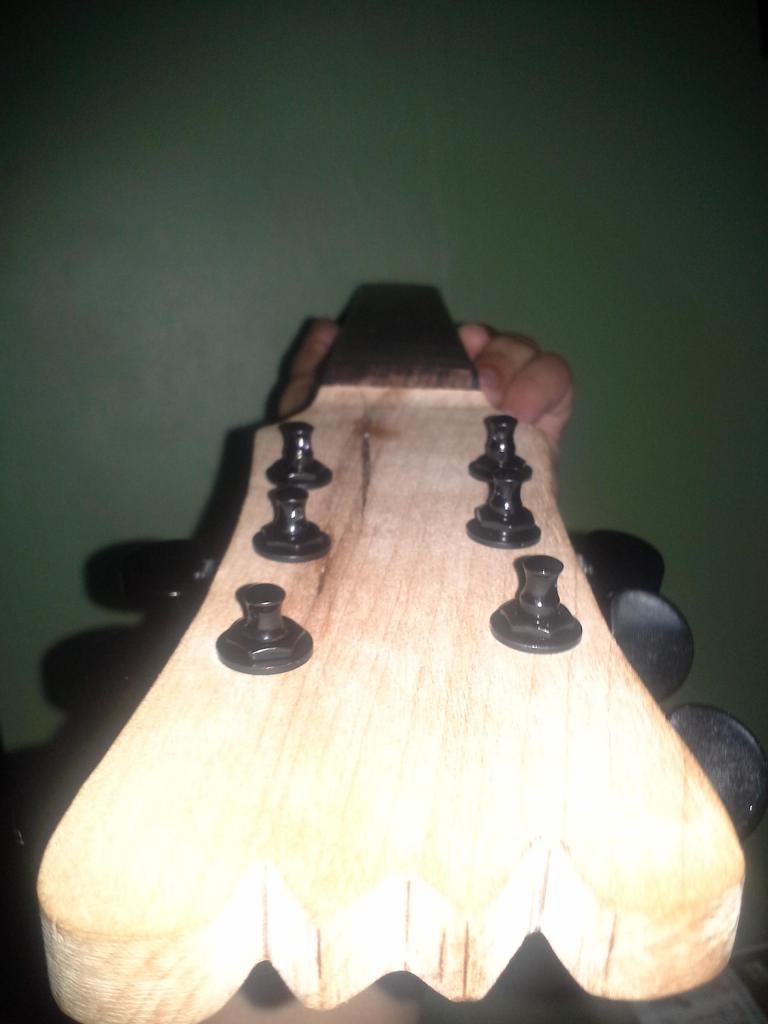
Tuners Look pretty good too me. Till next time
Riddle me this
At the sound of me, men may dream or stamp their feet.
At the sound of me, women may laugh or sometimes weep.
what am I?

Guess right and you receive the greatest gift of all!
Recently installed Neck screws were removed

"Low Cost" locking tuning machines

1. Come non-lubricated, dry as desert sand an hard to turn. I'm waiting for my Tri Flow Dry Lube to arrive in the mail
2. threads on the locking mechanism were cut sloppily

3. the paint...

4. the cost. less the $20. I cant complain about that. You get what you pay for. These should serve on this guitar however. If not I have Kluson adapter bushings which fit the same 10 mm holes as these cheapies. I have a backdoor if I need to use it. And they are black, I'm a fan of Black Chrome hardware but these will serve.
The heel was move closer to the body for better access to the upper frets and more erogonomic feel


The Kluson 10 mm Adapter bushing next to the 10 mm locking tuner the hole diameter is are actually 9.78 mm for a tight fit.

the dry fit


Tuners Look pretty good too me. Till next time
Riddle me this
At the sound of me, men may dream or stamp their feet.
At the sound of me, women may laugh or sometimes weep.
what am I?
Guess right and you receive the greatest gift of all!
"If the women don't find you handsome, they should at least find you handy."- a wise man
-
panther
- Top Producer
- Posts: 817
- Joined: Tue May 03, 2011 8:31 pm
- Location: Anza, California
Return to “Mosrite & Clone, Projects, Parts & Accessories Q&A”
Who is online
Users browsing this forum: No registered users and 91 guests